Pen Display Hand Sync
Introduction
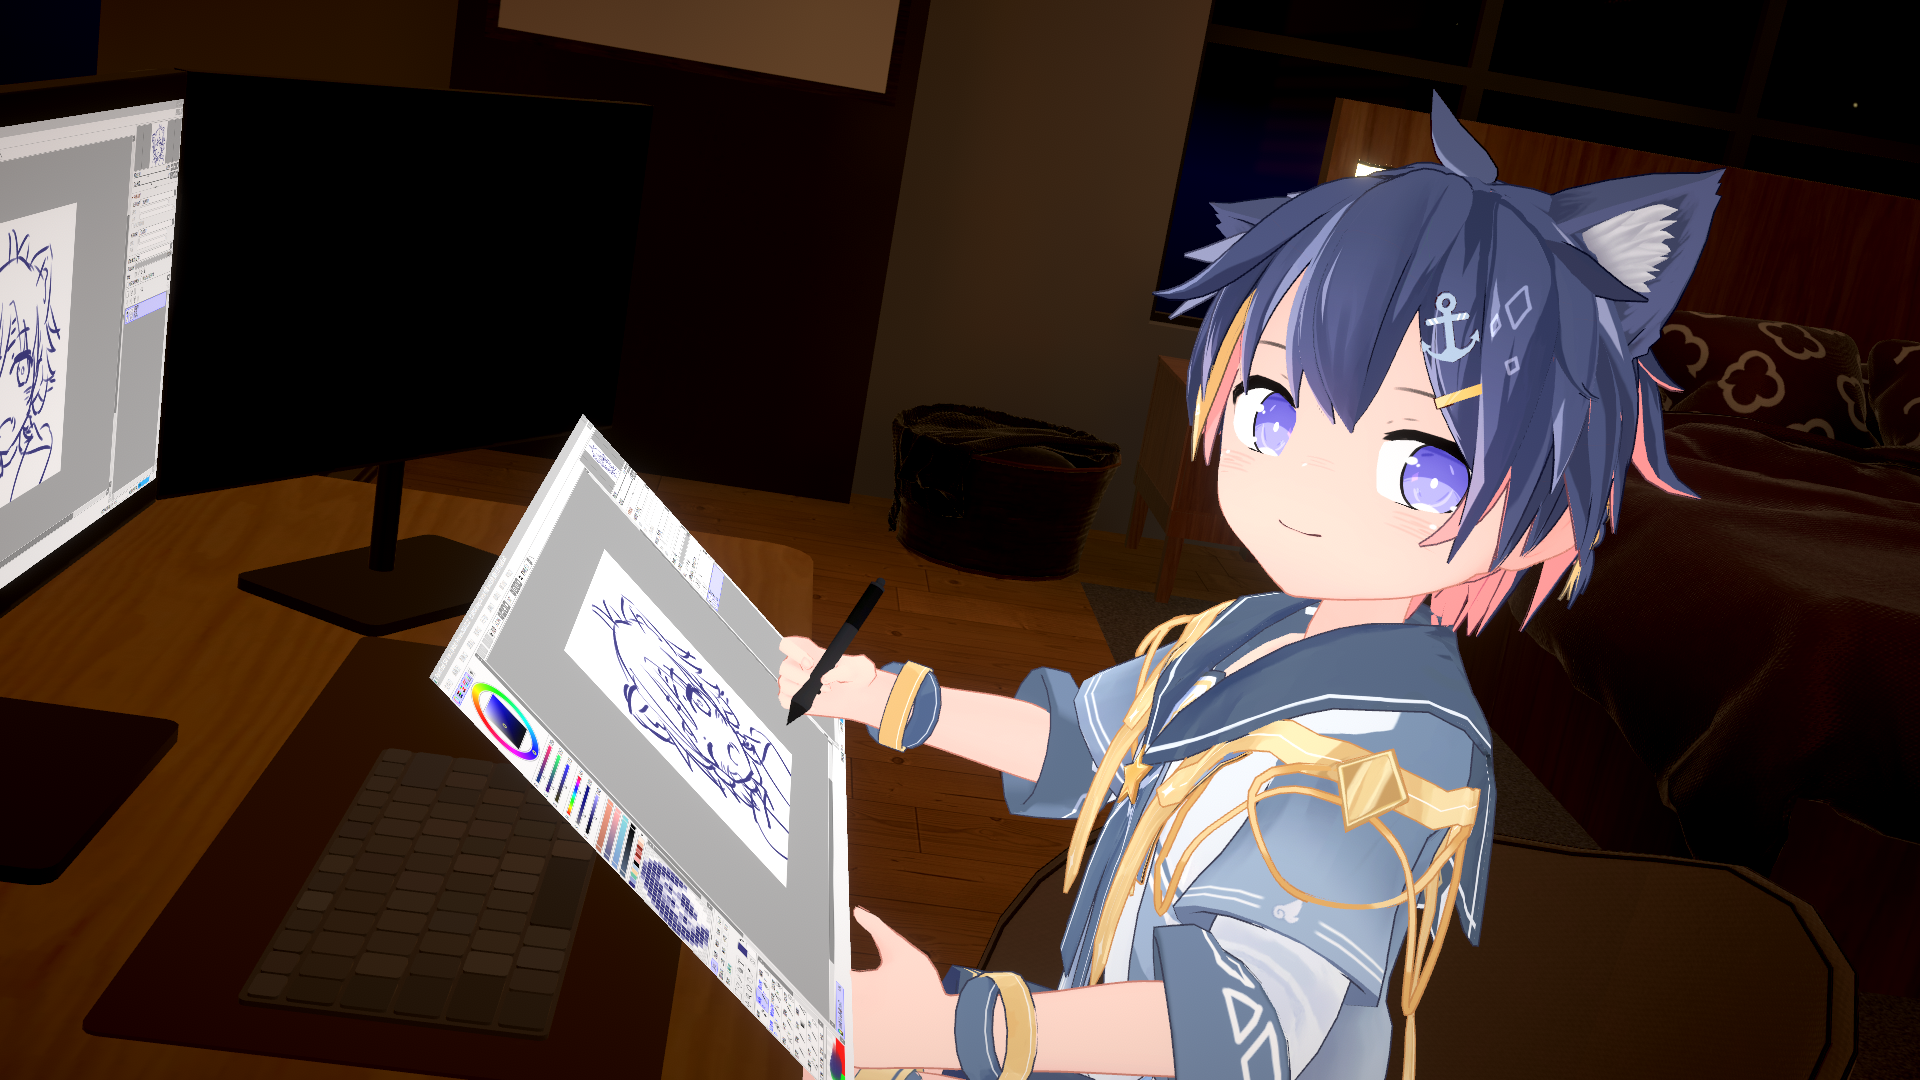
This page provides an example scene to help you build your own live for drawing or designing.
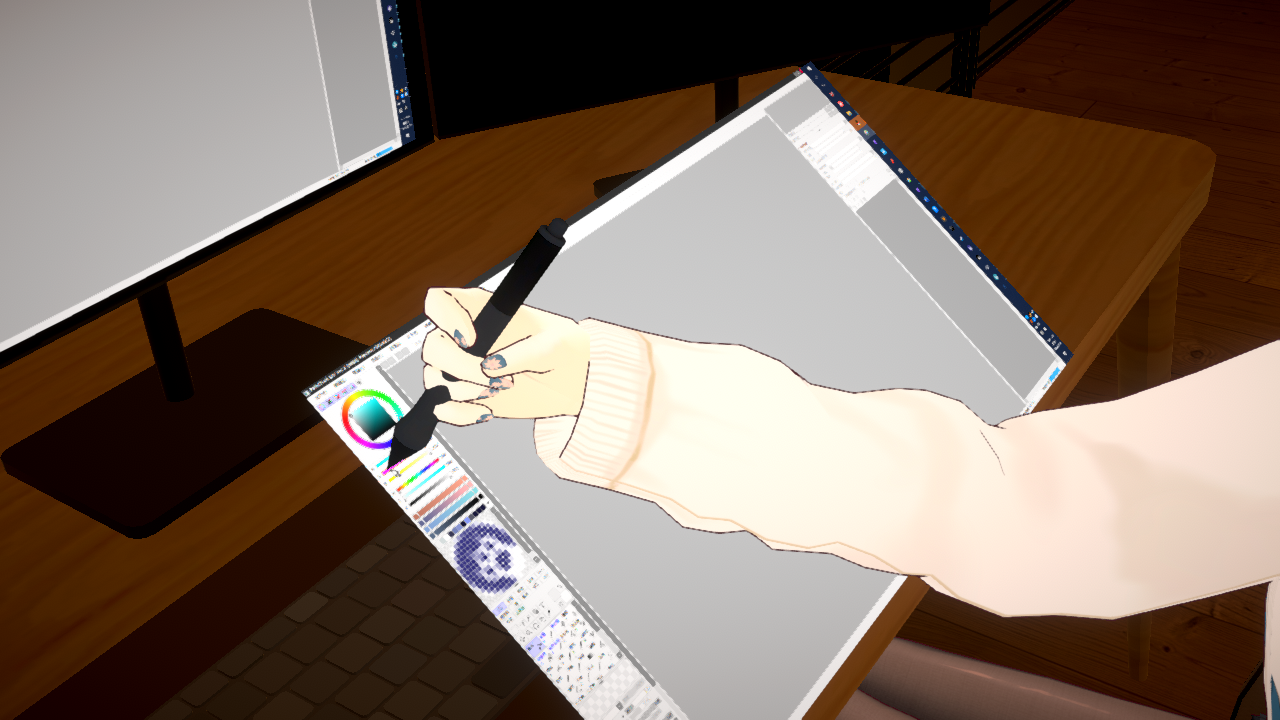
It will allow you to hold the pen and have it follow your cursor in the screen asset perfectly in the Warudo world!
Showcase!
Tutorials
Step 1 - Preparation
-
First, you need to subscribe the following items in Steam workshop to continue the following tutorials:
Item Steam workshop URL Environment 🔗 Loft Apartment Character 🔗 VRoid Avatar Sample A Prop 1 🔗 Square Grid Prop 2 🔗 Drawing Tablet Set Node 🔗 Mouse Position Nodes -
Next, you need to download the following file and put it into the
<WARUDO_DATA_FOLDER>\Scenesfolder:
- Then, you can open the scene you downloaded by the
Open sceneoption in Warudo.
You need to switch URP (Nilotoon) to BiRP to follow this tutorial.
You can switch it back after the configuration is complete, and replace the environment and character to URP version.
Step 2 - Assign Display (For Multi-Display Users)
- Determine the monitor you want the Warudo main window to locate.
(called Monitor A) - Determine the monitor you want to display in Warudo.
(called Monitor B)
If Monitor A = Monitor B, you can directly skip to step 3, otherwise:
-
✨ Change the
Output Offset X/Yvalues in theMouse Position Relative To Screennode to make sure theOutputis(0,0)when your mouse is locate at the the upper left corner of Monitor B.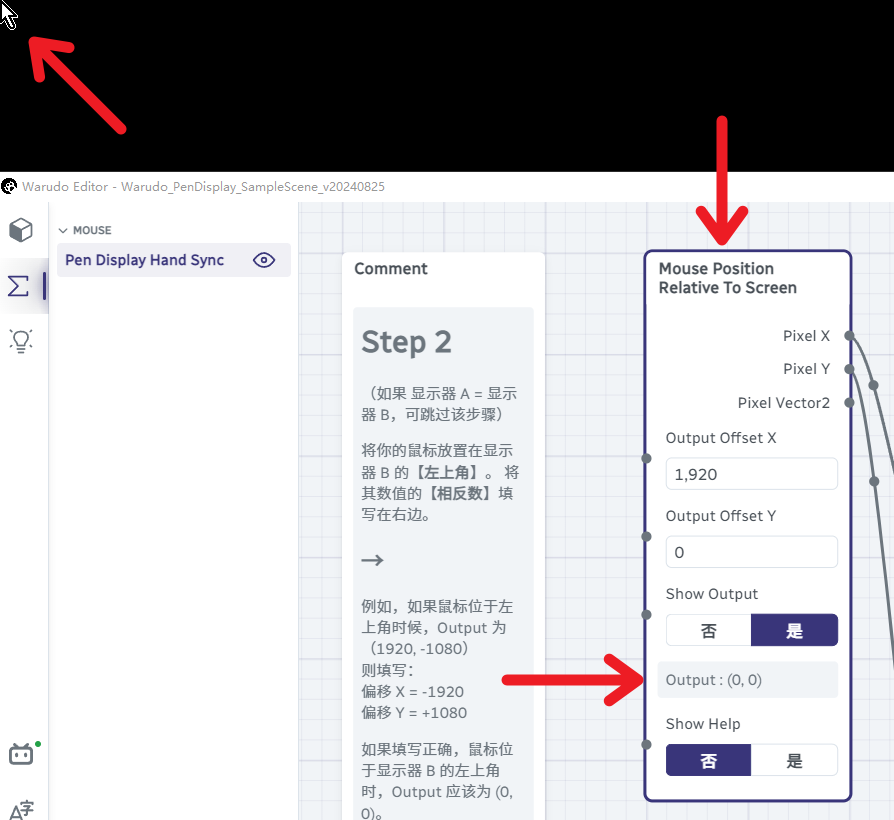
- Move your mouse to the upper left corner of Monitor B.
- Input the ❗ Opposite Value ❗ of
Outputnow intoOutput Offset X/Y.
e.g. If the Output is (1920, -1080) when the mouse is at the upper left corner, you need to fill:
Output Offset X=-1920
Output Offset Y=+1080 - Verify the ✨ step again.
Every time you change your selection of Monitor A or B, you need to re-adjust the offset values.
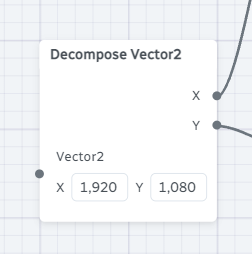
Step 3 - Enter Display Resolution
Input the resolution (in pixel) of Monitor B in the Decompose Vector2 node.
| Size | X | Y |
|---|---|---|
| 1080p | 1920 | 1080 |
| 2K | 2560 | 1440 |
| 4K | 3840 | 2160 |
| ⋯ | ⋯ | ⋯ |
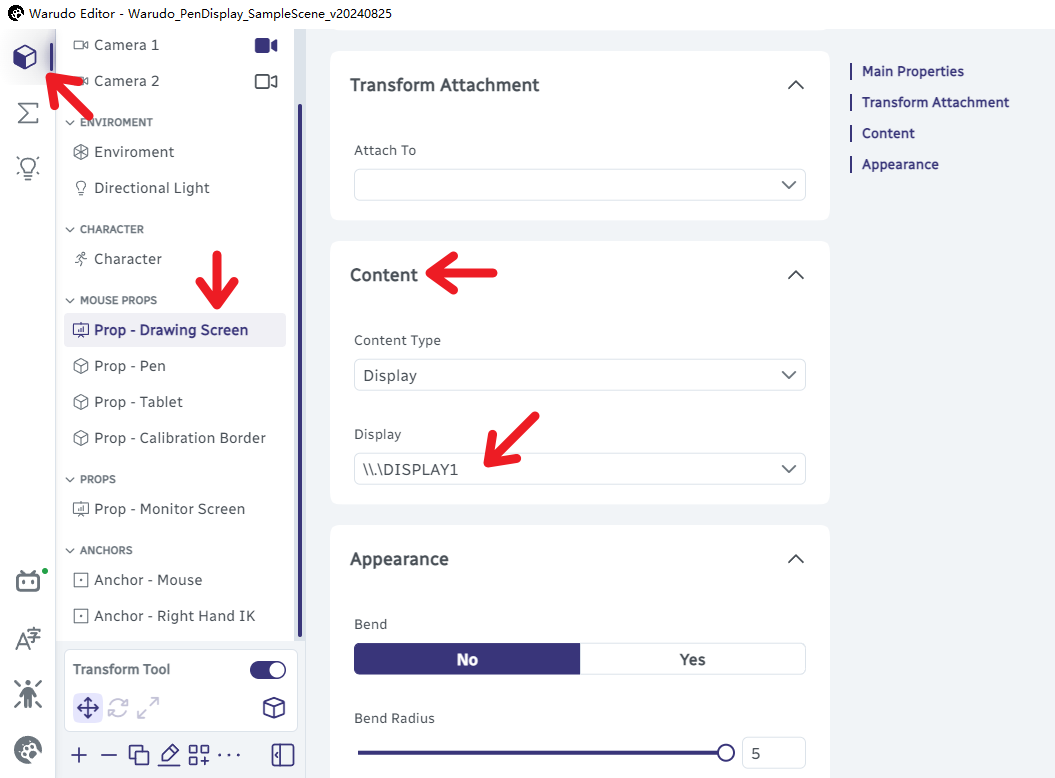
Step 4 - Select Display
Select the Display for Monitor B as the Content - Display in Prop - Drawing Screen.
Step 5 - (Optional) Customize Assets
We recommend skipping this step for the first try.
You can use the Onboarding Assistant to configure your own character, environment, and motion capture.
You can also customize the positions of the character and screen.
For different characters, you may need to adjust the values of Trnasform - Position in Anchor - Right Hand IK to make the character hold the pen better.
You need to disable the Finger Movements pendulum physics in your motion capture settings!
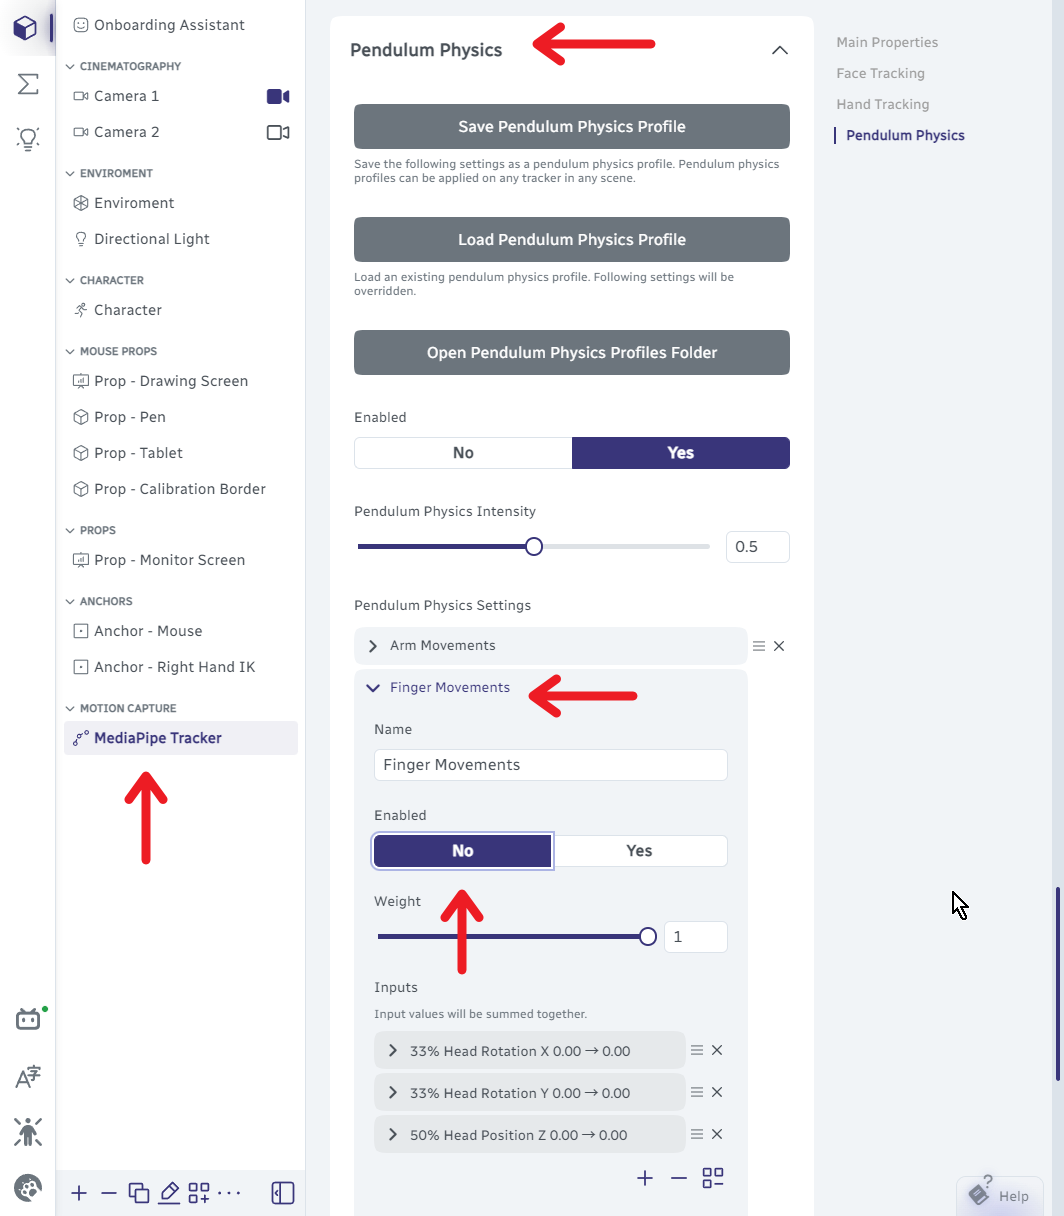
- We also recommend turning off other body-related pendulum physics ( like
Arm MovementsandBody Lean).
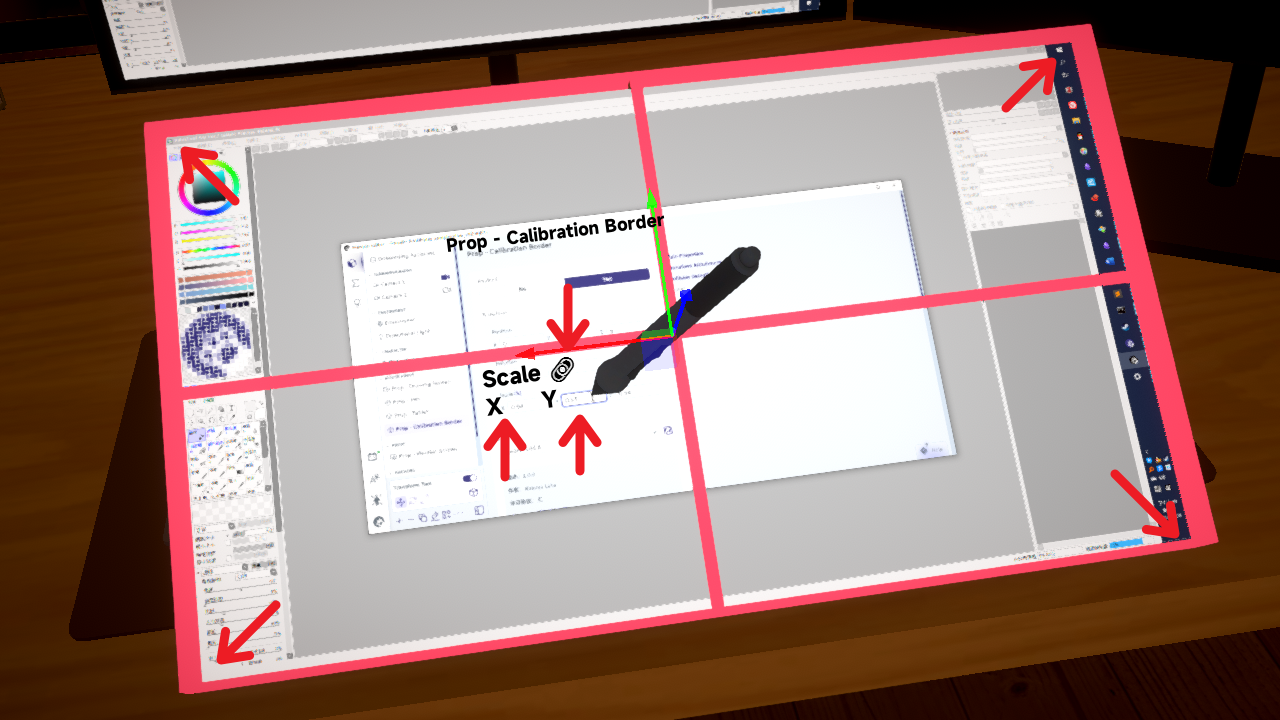
Step 6 - Calibrate Mapping
Adjust the X and Y values in the Scale of Prop - Calibration Border, respectively.
Make sure that the screen fits the Inner Edge of the red box as perfectly as possible.
You need to unlock the 🔗 Uniform Scaling before adjusting scale each time.
Step 7 - Hide Calibration Border
Finally, you can hide the Prop - Calibration Border asset by switch its Enabled option to No.

Do not delete Prop - Calibration Border, if so, you will not be able to calibrate next time.
Things to note
-
You may need to change
Mirrored TrackingorInvert Handsin the motion capture asset to choose the tracking method you prefer. -
If you want to change the selection of Monitor A or Monitor B, you need to repeat Step 2–6.
-
You can adjust the thickness of
Prop - Drawing Screenor enable and adjust the scale ofProp - Tabletto further increase the realism.
Known Issues
Hand-Pen Clipping
Since the first priority of this blueprint is to align the pen tip with the cursor, limited by the implementation principle of hand IK, when the hand is too far away from the screen center, the pen may not fit your hand perfectly.
So we recommend not to adjust the scale of screen too large.
Binding the pen to the finger bone can avoid this problem, but the pen will not be able to perfectly follow the cursor, which is more suitable for pen tablet rather than pen display.
(This scene currently does not support this mode)
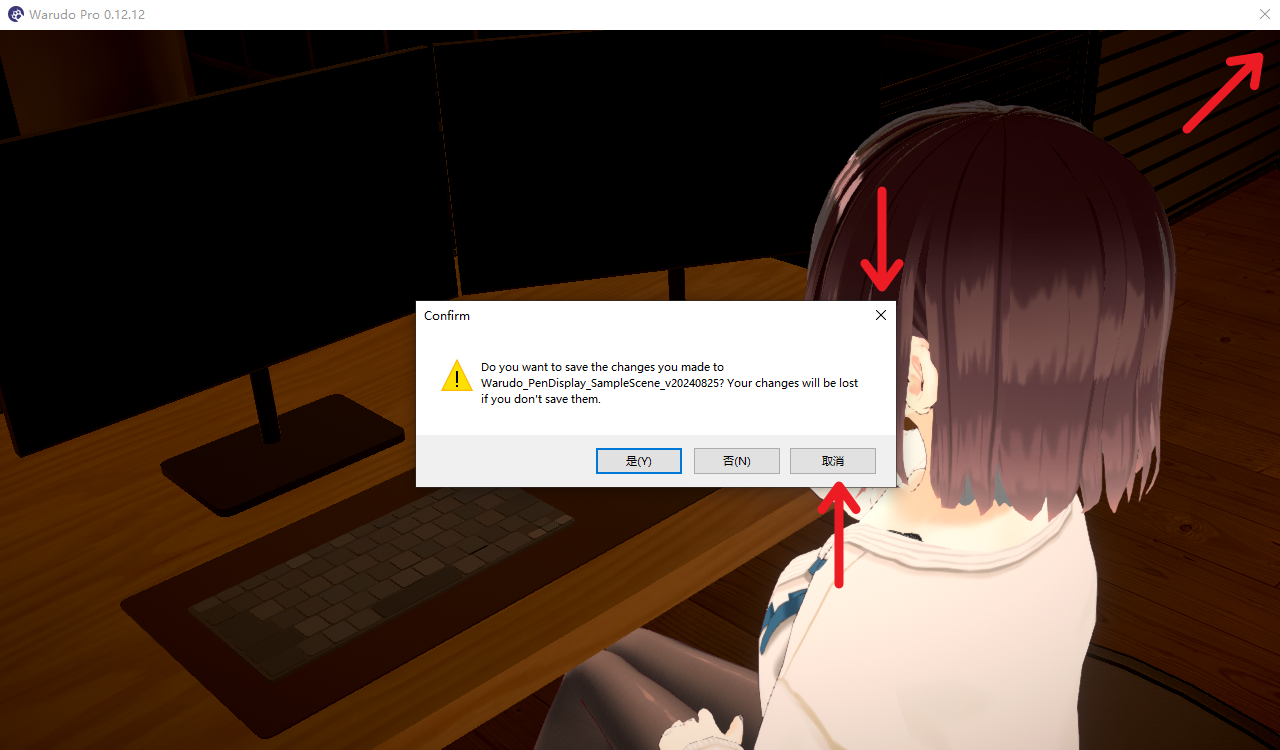
Display Disappear
If you click the close button in the upper right corner of the Warudo main window but without exiting, the screen will disappear (Because the option list of display becomes null).
This is a bug waiting to be fixed, and currently can only be solved by exiting warudo and reopening it. (You can still save your changes)