角色
角色是 Warudo 的核心。Warudo 支持标准的 VRM 模型格式。如果你的模型不是 VRM 格式(例如是 MMD 或者 VRChat 专用模型),可以使用 Mod SDK 导出为 .warudo 格式,即可加载到 Warudo 中。
角色文件应放在 Warudo 数据文件夹的 Characters 子文件夹内。
找不到数据文件夹?点击「菜单」->「打开数据文件夹」即可。
配置 Setup
默认情况下,你的场景应该已经有一个角色了。如果你需要增加一个角色,你可以使用 添加资源 按钮。
我们推荐使用 新手向导 → 基本配置 → 开始配置 来配置你的角色。这样 Warudo 可以自动导入你的角色文件、配置动作捕捉、导入 VRM 表情。
如果你更乐意手动操作的话,你也可以直接在角色资源里将源设置为你的模型文件,搭配下方的配置动作捕捉和导入 VRM 表情按钮,来完成角色的配置。
动作捕捉
请参考动作捕捉文档来为你的角色配置动作捕捉。配置完之后,你可以在角色资源中快速校准追踪,也可以在角色资源中快速跳转到追踪蓝图的某些特定部分。
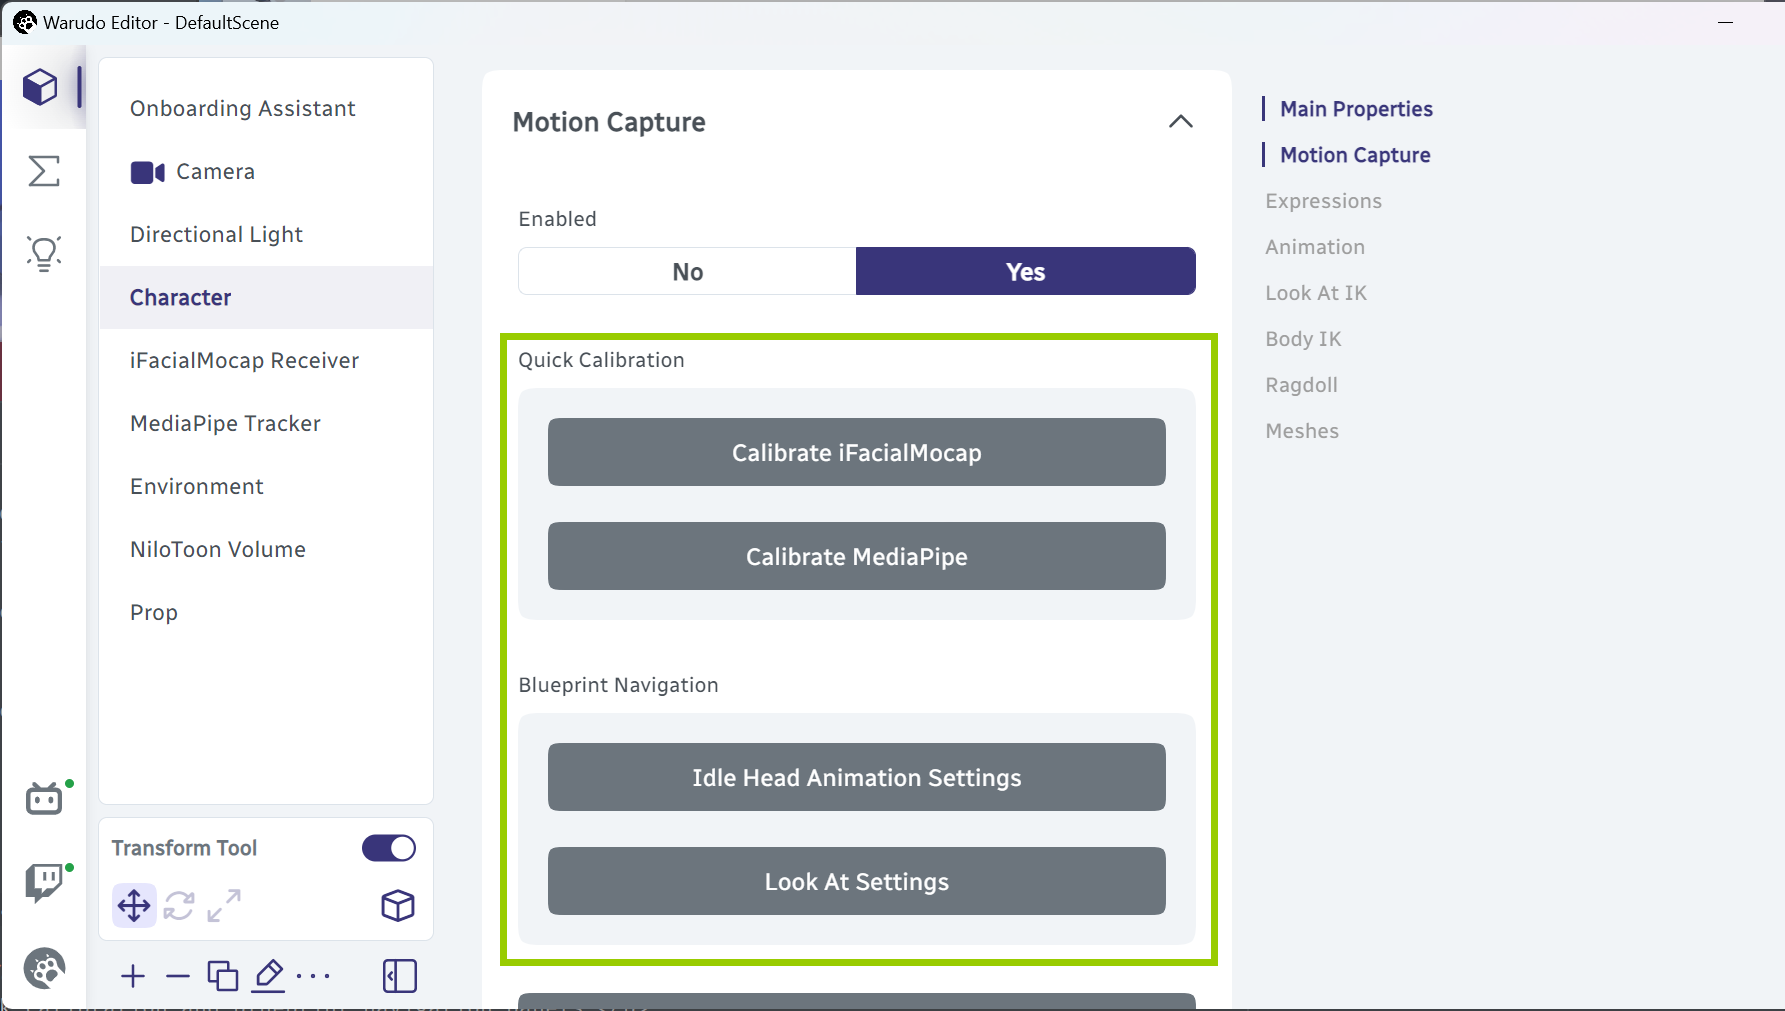
快速校准与蓝图跳转面板。
表情
「表情」可以在面部捕捉的基础上进一步控制角色的面部表情。角色资源支持 VRM 表情(又名 VRM BlendShapeClips)以及自定义表情。
在新手向导中,Warudo 会自动导入角色的所有 VRM 表情,并生成对应热键的蓝图。你也可以点击导入 VRM 表情和生成按键绑定蓝图这两个按钮来手动完成对应的操作。
如果你使用的是 .warudo 格式的模型,但是 GameObject 上存在一个 VRMBlendShapeProxy 组件的话,那么 Warudo 依然能够导入 VRM 表情。
表情列表中的每一个表情都可以展开;展开后你可以点击在角色上淡入表情按钮来预览表情,也可以自定义表情的一些设置。
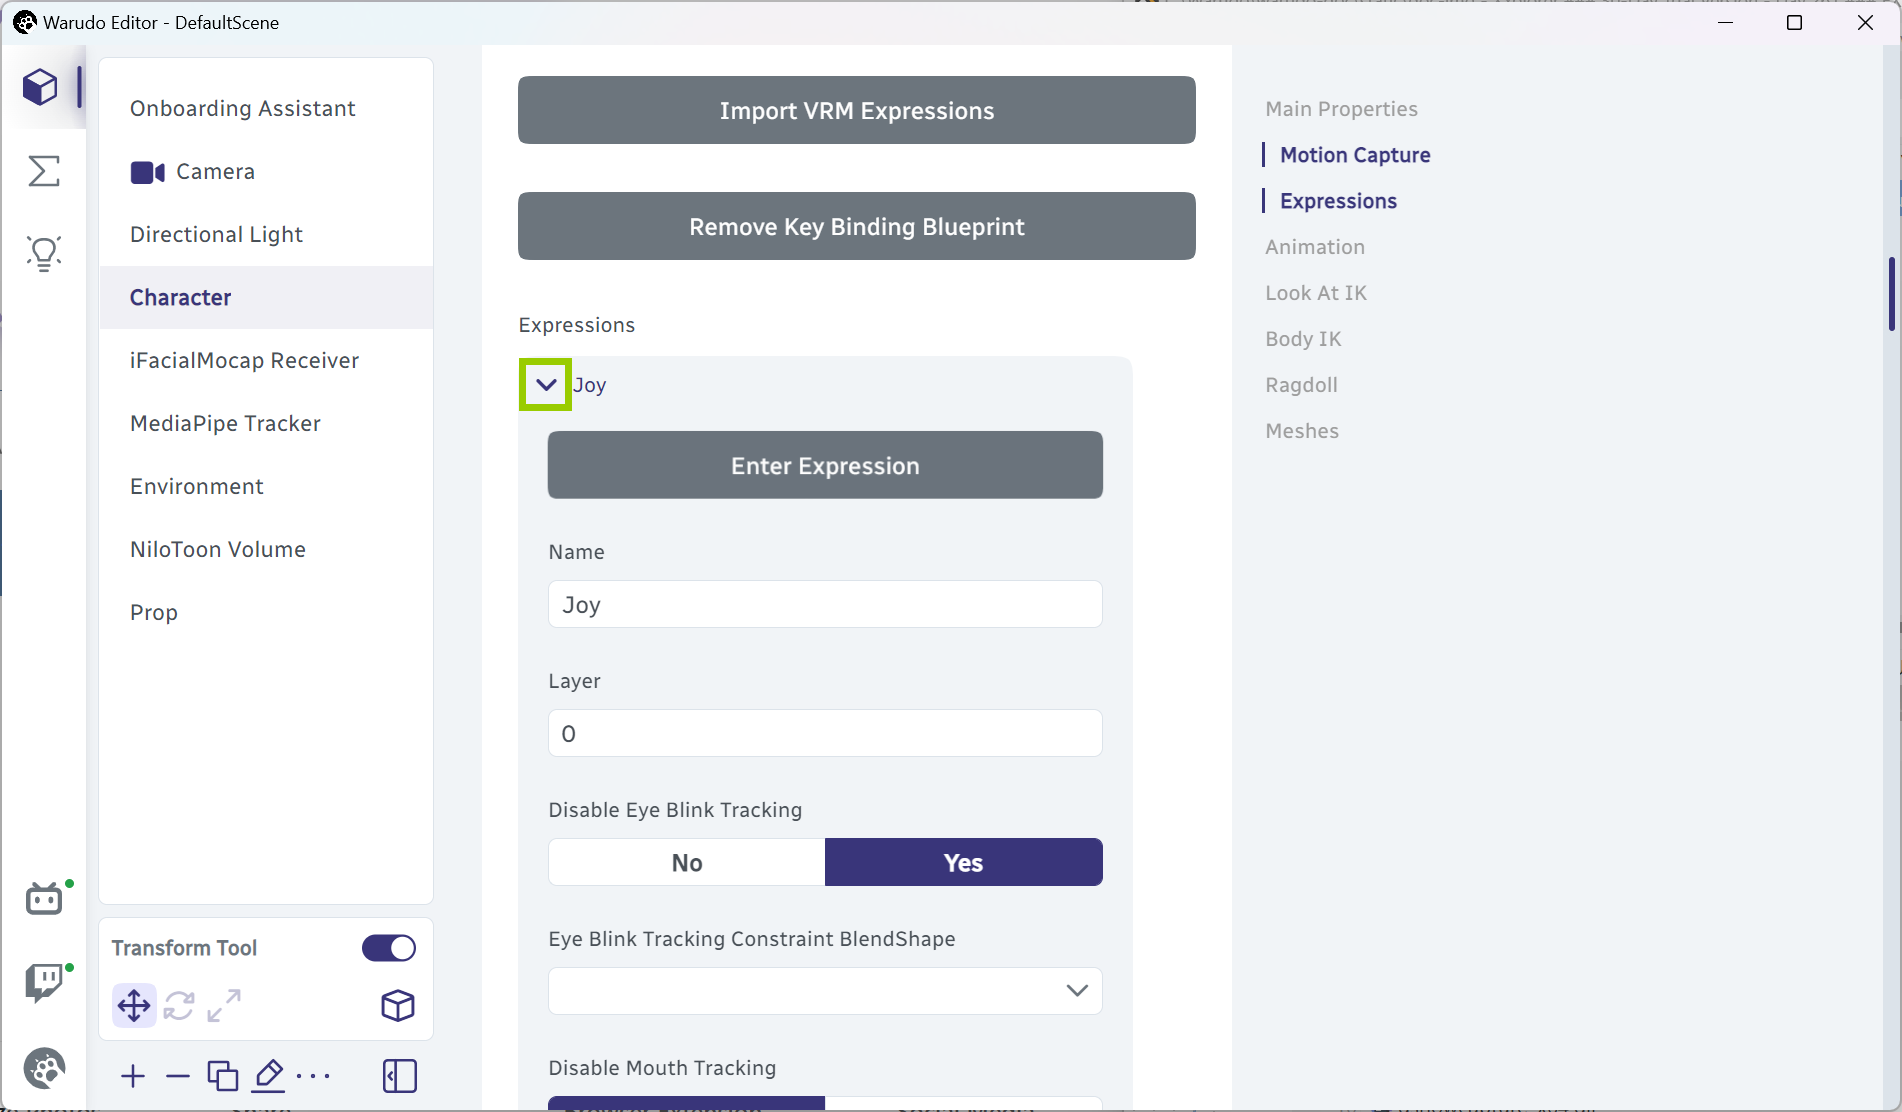
展开一个表情。
你可以给表情起个名字,用于在蓝图里定位到该表情。你也可以设置表情的层。在切换表情时,同一层的表情会淡出,而不同层的表情可以叠加。
在导入 VRM 表情时,VRM 模型中的默认 BlendShapeClips(即 Joy, Angry, Sorrow, Fun 和 Surprised)会被放在第 0 层,而模型制作师添加的 BlendShapeClips 会被放在第 1, 2, 3, ... 层。
如果一个表情已经把你的模型眼睛闭了起来,那你可能想要 禁用眨眼追踪 来防止眼睛进一步闭合。类似地,禁用嘴部追踪和禁用眉毛追踪也可以防止对应的部位被面部追踪所控制。
在表情激活时,目标 BlendShape 列表里显示的所有 BlendShape 都会被控制。你可以往这个列表里添加或移除 BlendShape,也可以分别为每个 BlendShape 自定义 目标值、淡入时长、淡入缓动函数、淡入延迟、淡出时长、淡出缓动函数、淡出延迟 这些参数。
默认情况下,Warudo 在切换表情时会有 0.4s 的淡入与淡出时长。在目标 BlendShape 列表里,你可以修改每个 Blendshape 的淡入时长和淡出时长来自定义这个时间。如果你完全不想使用淡入淡出效果,你可以把仅二值调整为是。
触发条件
表情通常是由热键触发的,但是只通过面部捕捉的方式也可以触发一个表情!
如果要实现这样的效果,请在触发条件里添加一个元素,然后设置好对应的条件与其他需要自定义的选项。比如,下图中的设置将会在 mouthSmileLeft 和 mouthSmileRight BlendShape 都大于 0.5 时触发该表情。
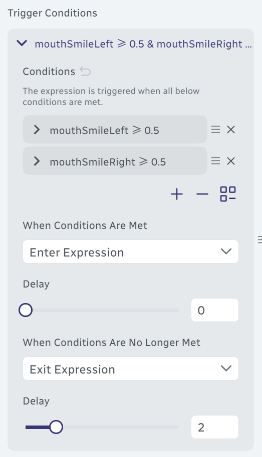
每个表情可以有多条触发条件。只要其中任意一条的条件满足时,就可以触发到对应的表情。
需要注意的是,这些条件都是基于模型 BlendShapes 而非脸部追踪 BlendShapes。如果你使用的是 ARKit 兼容的模型,那么你可以直接选择 ARKit Blendshapes 作为条件。不然的话,你可能需要找到你的脸部追踪所使用的模型 BlendShapes。
高级
The Target Material Properties list contains the Unity material properties controlled by this expression. Note you need to know the material name and the property name in advance; you can inspect these in Unity.
The Constrained BlendShapes list contains all the blendshapes that will be constrained when this expression is active. Constraining blendshapes allows you to precisely control your character's facial expressions, ensuring the transition between blendshapes is always smooth. For example, if you want to make sure your model's mouth does not open more than a certain amount when the expression is active, you can add a new entry to this list, set the Constrained BlendShape to the mouth blendshape (e.g., JawOpen), and set the Constrained Value Min and Constrained Value Max to the desired range (e.g., 0 to 0.5).
Optionally, you can set the Constraint BlendShape to establish a mapping between it and the constrained blendshape. For example, the following settings will make the JawOpen blendshape value follow the Smile blendshape value such that when Smile is 0, JawOpen can take from 0 to 1, and when Smile is 1, JawOpen is constrained from 0 to 0.25.
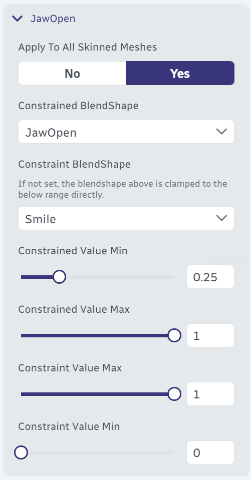
Constraining the JawOpen blendshape.
The Toggle GameObjects list contains all the child GameObjects that will be toggled when this expression is active. For example, you can use this to toggle the visibility of a particle effect when the character is smiling.
Finally, below the expression list, you will find Default BlendShapes and Default Material Properties, which are used when neither any expression nor face tracking is active.
Animation
Warudo supports playing animations on your character. Better yet, if you are using a compatible upper body tracking blueprint (e.g., MediaPipe, RhyLive), animations are automatically blended with motion capture, allowing you to interact with your audience in fun or intimate ways.
Here, bending of the upper body comes from the idle animation, while the head and hand movements come from motion capture. When tracking of the hands is lost, the avatar's hands smoothly transitions into the idle animation.
In Warudo, there are three types of animations:
-
Idle Animation: The default animation that plays when no other animations are playing.
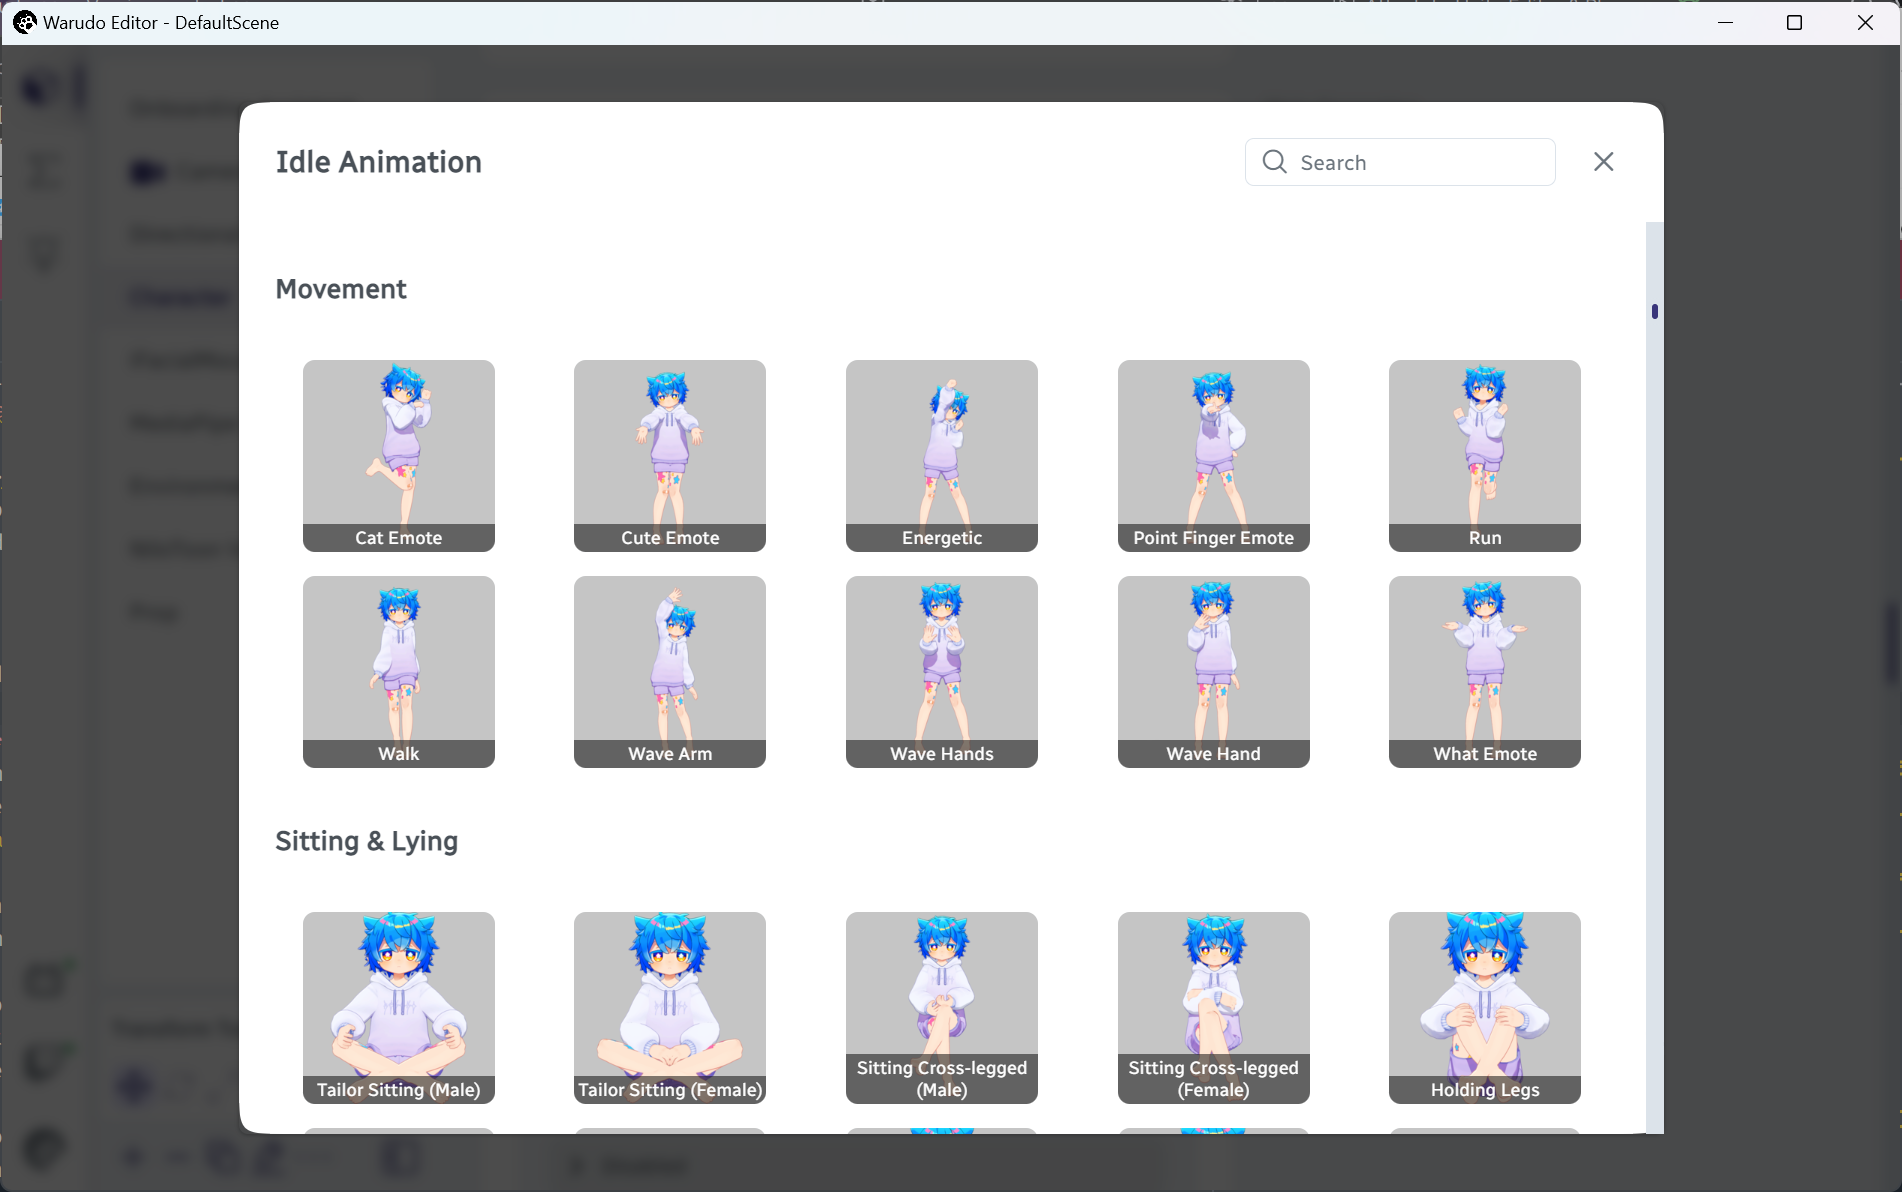
Selecting an idle animation.
-
Overlaying Animations: Animations overlaid on top of the idle animation.
For example, let's say you like the "Cat" animation and want to use it. However, you also want your character to sit down on a bed. To combine the two animations, you can set Idle Animation to a sitting animation, while adding a new entry to the Overlaying Animations list, setting the Animation to "Cat", and click Mask Upper Body to ensure the "Cat" animation only affects the upper body.
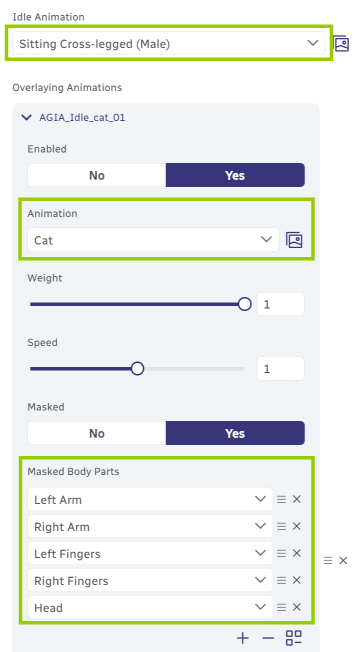
Combining the "Cat" animation with a sitting animation using overlaying animations.
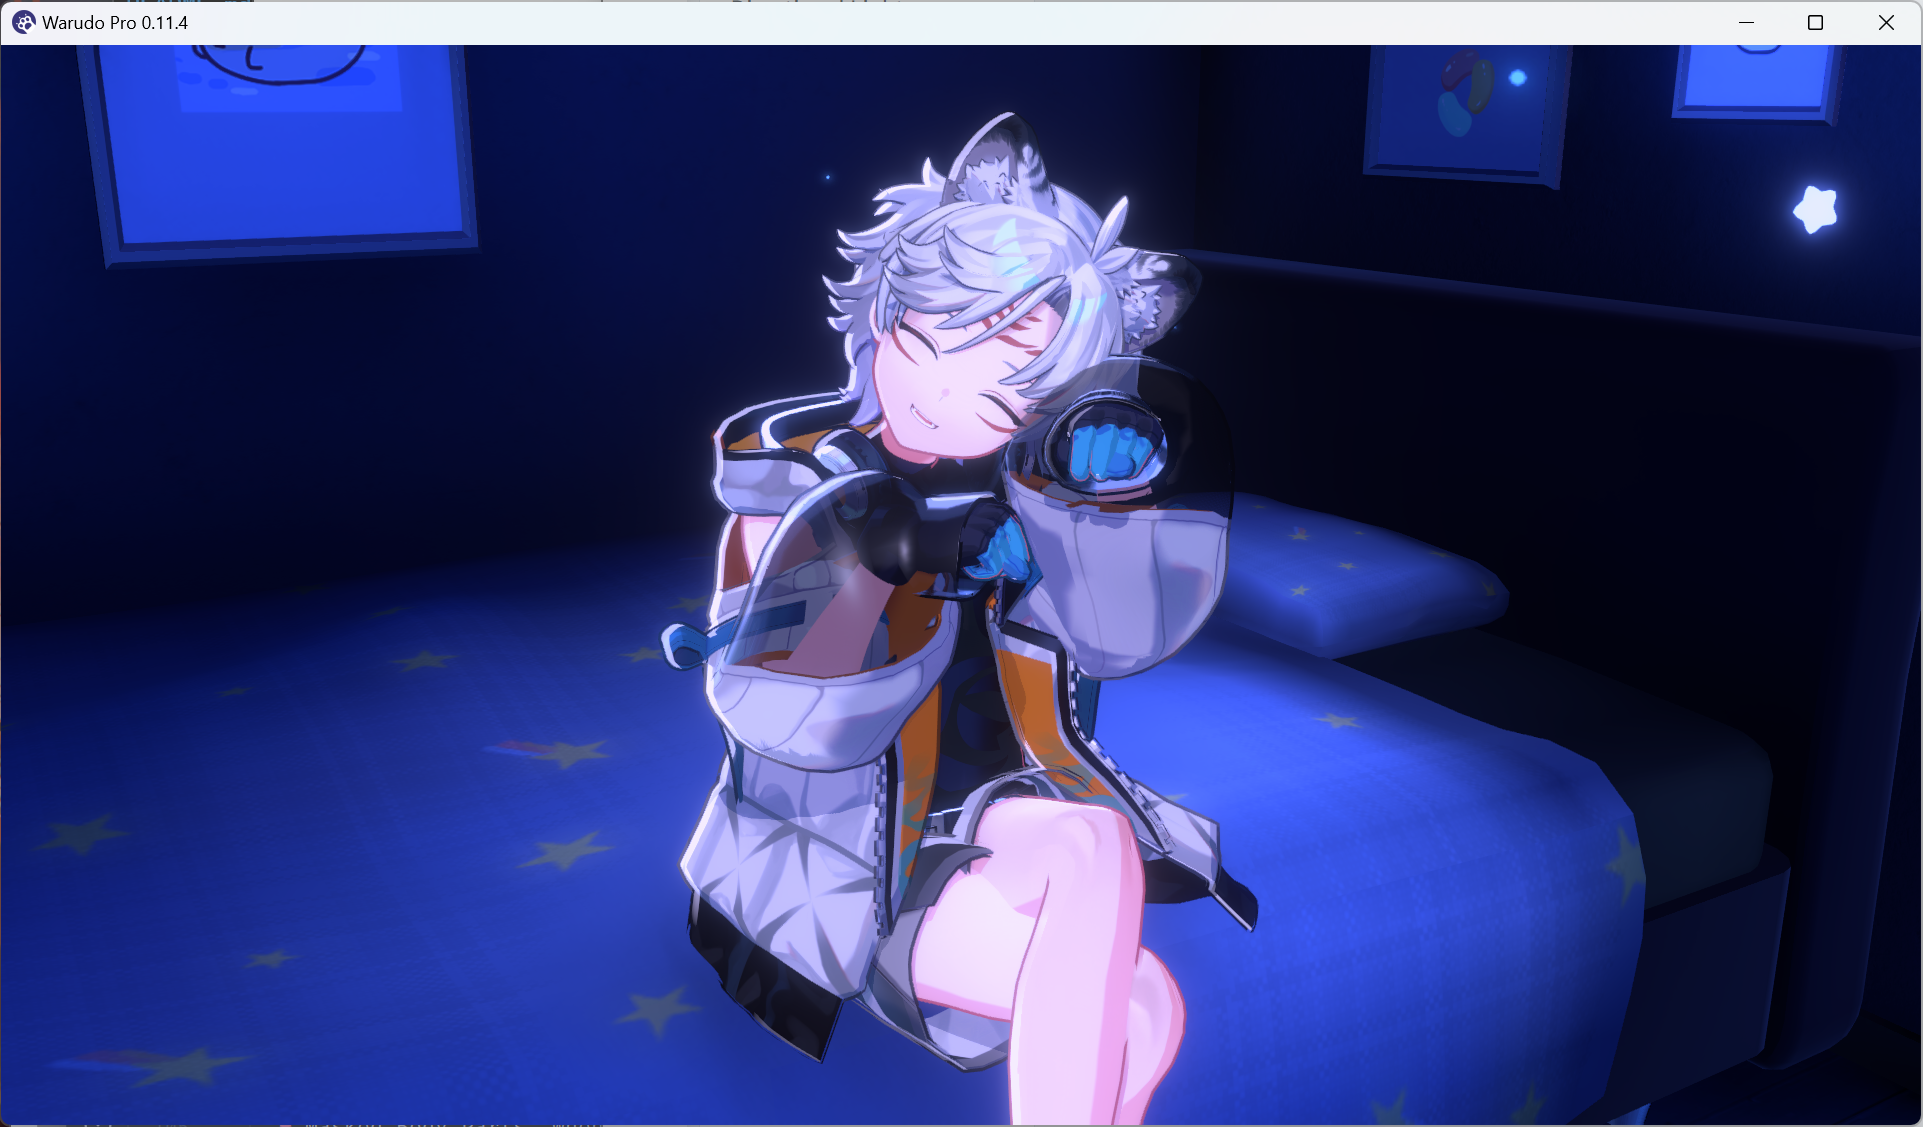
The "Cat" animation only affects the upper body.
You can add as many overlaying animations as you want; each layer of animation can be assigned its own Masked Body Parts, Weight and Speed, allowing different parts of the body to play different animations. The lower an animation is in the list, the higher its priority.
Demo of overlaying animations. Source: https://www.bilibili.com/video/BV1Zt4y1c7Re
-
Transient animations: One-shot animations that are triggered by blueprints——for example, a short dance animation that is played when you receive a Twitch redeem. Check out our blueprint tutorials for more details.
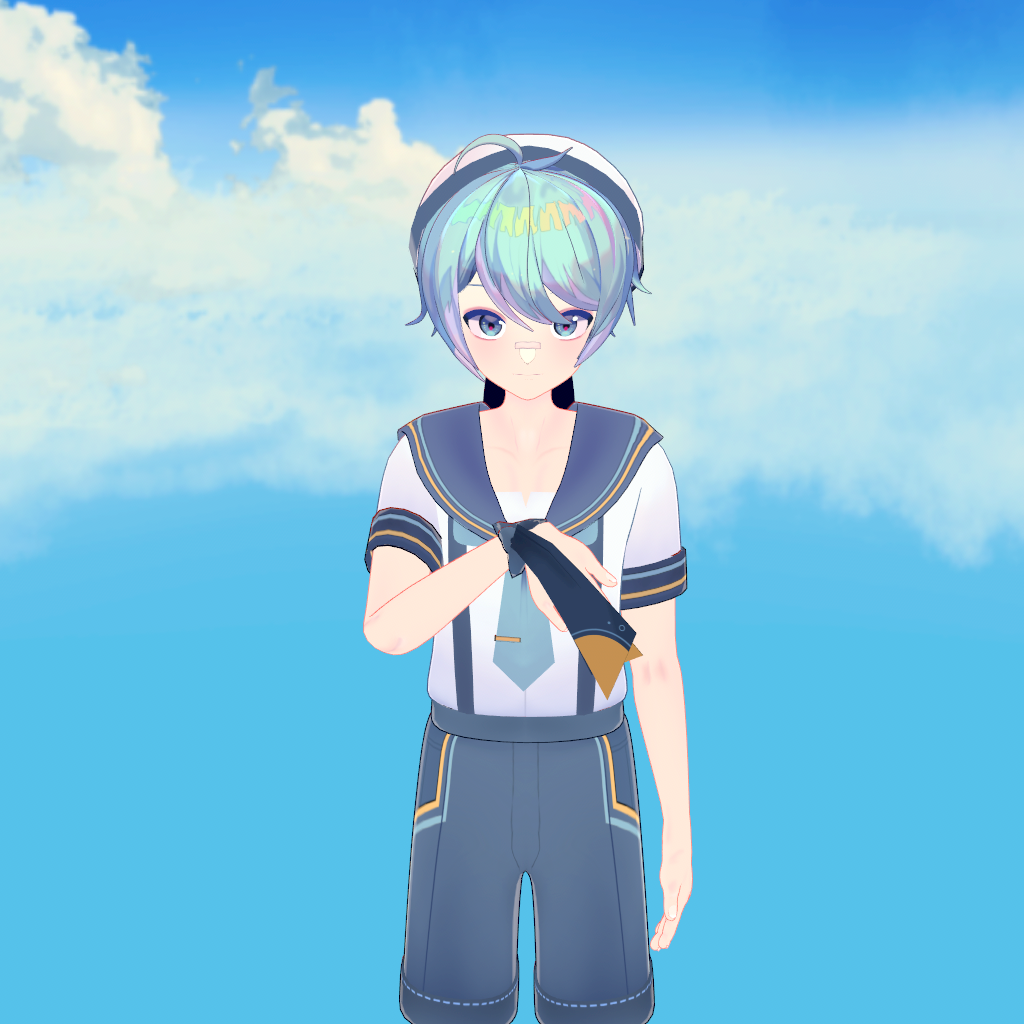
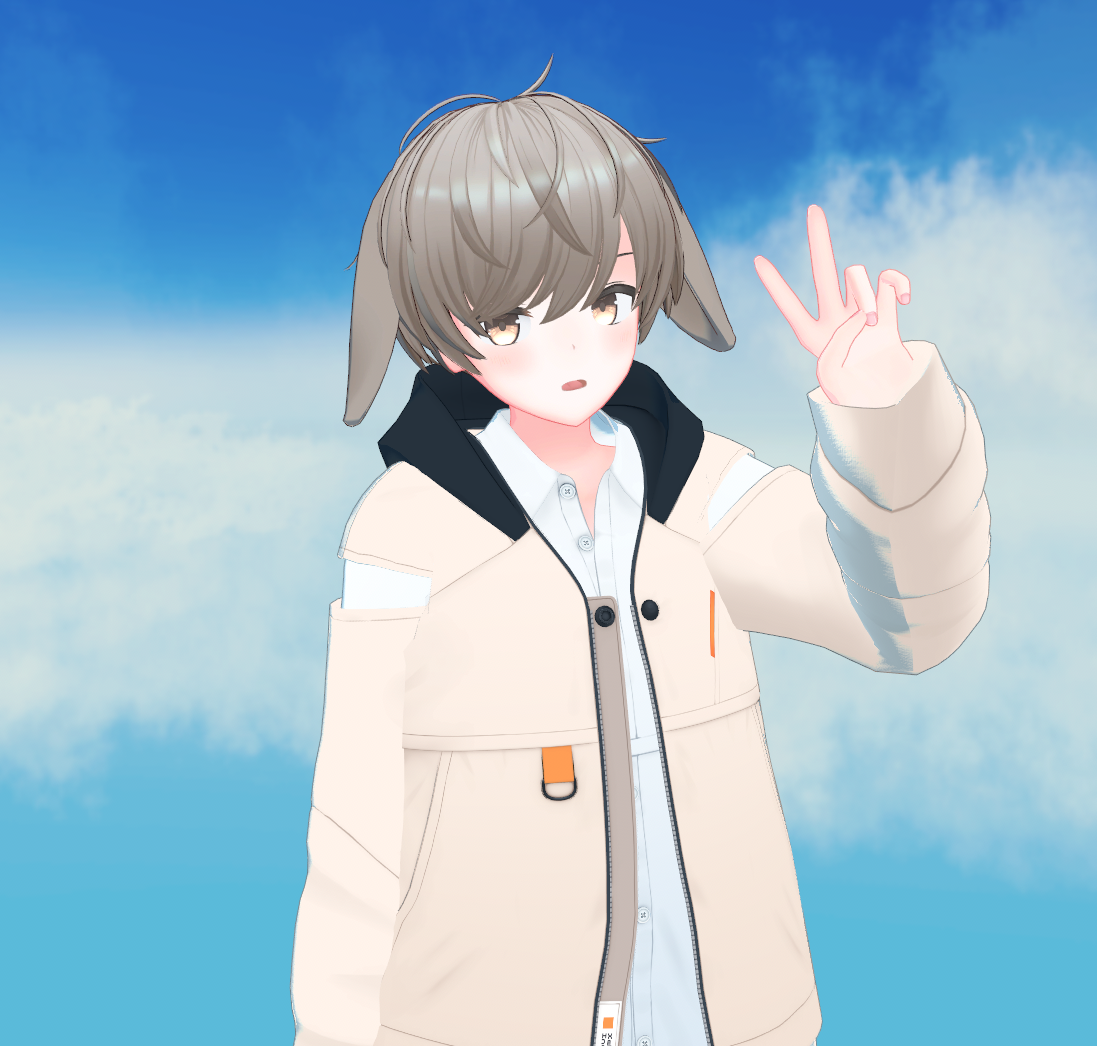
In addition to body animations, you can also set up Breathing Animation and Swaying Animation, as well as Override Hand Poses, i.e., setting the pose of the character's hands to a specific pose, like a peace sign.
Finally, you can use Additional Bone Offsets to make small adjustments to the character's posture; for example, if you want to make the character's head tilt a few degrees to one side.
By default, the priority of the idle animation, overlay animations, override hand poses, and body IK are all lower than motion capture.
For example, even if you have set an override hand pose for your right hand, if your right hand is being tracked, say by MediaPipe, the model follows your right hand's pose instead of the override hand pose. To make the override hand pose take priority over motion capture, you can enable High Priority in the hand pose settings.
Look At IK
Look At IK is used to make the character look at a specified target in the scene, like the camera. This is useful for capturing the perfect selfie!
If you just want to maintain eye contact with your audience, we recommend to enable Look At when you set up face tracking instead (it is by default enabled). See Customizing Face Tracking for more details.
To use Look At IK, simply enable it and set Target to the target that the character should look at. You can adjust the different weights to control how much the character's head, eyes, and body should rotate to look at the target. The Clamp Weight options can be used to limit the rotation of the head, eyes, and body. The greater they are, the smaller the range of rotation.
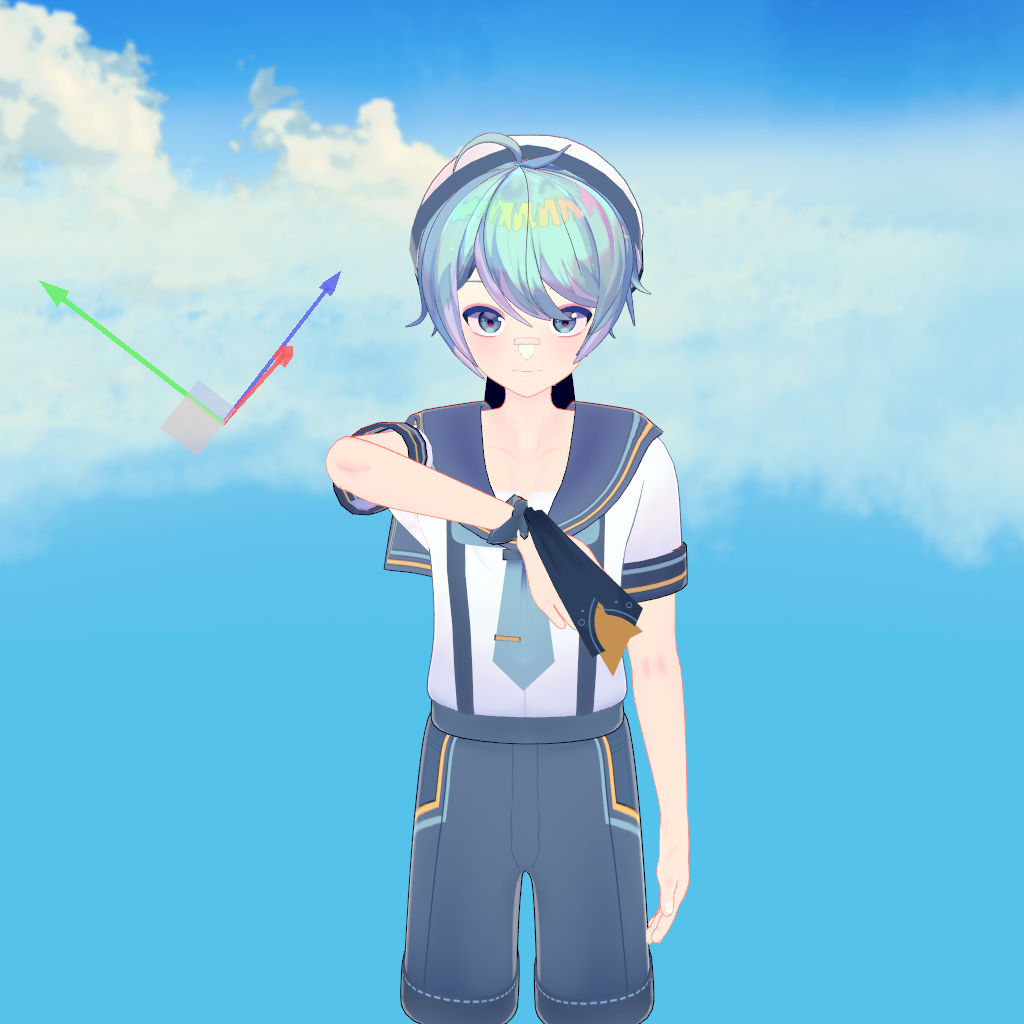
Body IK
Body IK is used to make the character's spine or limbs follow a specified target in the scene.
Body IK in a nutshell.
To use Body IK, simply enable it for the spine or a hand/foot, and set IK Target to the target that the character should follow. The IK target is usually a camera, prop, or an anchor. If you want to create a temporary anchor at the current position of the body part, you can click Create Temporary IK Target Anchor At Current Position. When you are done, you can click Remove Temporary IK Target Anchor to remove the temporary anchor.
Creating a temporary anchor allows you to fix the model's hands in an ideal position, preventing the hands from drifting left and right due to head movements. This can be quite useful for some poses.
Before
After
The Bend Goal Target and Bend Goal Weight options can be used to control the rotation of the elbows and knees. The Bend Goal Target is usually an anchor.
Bend goal disabled.
Bend goal enabled
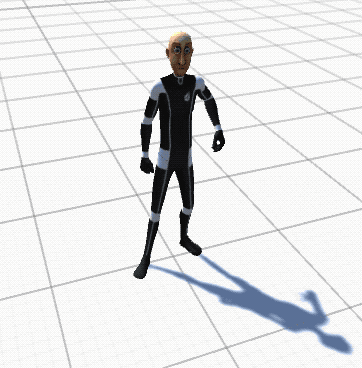
Ragdoll
Ragdoll allows your character to be hit by physics objects, and prevent the character from penetrating through objects in the scene.
Muscle Spring and Muscle Damper can be used to control the stiffness of the character's muscles. The greater they are, the stiffer the character's muscles are.
To prevent self-penetration, such as the character's hands penetrating through the body, you can enable Internal Collisions. For best results, you will need to adjust the colliders manually by clicking Edit Ragdoll.
Although enabling ragdoll can make the character look more realistic, it can also cause the character to behave in unexpected ways due to glitches in the physics engine. We recommend to only enable ragdoll when you are sure it is necessary.
Note that some nodes temporarily enable ragdoll regardless of the asset setting. For example, the Throw Prop At Character node will temporarily enable ragdoll on the character when the prop hits the character.
Meshes
You can toggle meshes and skinned meshes on the model.
Note that models exported by VRoid Studio only have two meshes: Body and Face. More detailed models often split the character's clothes, accessories, tail, animal ears, etc. into separate meshes, for which this feature is useful, such as toggling the character's jacket.
To toggle meshes in blueprints, you can use the Toggle Character Meshes node.
Frequently Asked Questions
How can I trigger an expression automatically with face tracking?
You can use the Trigger Conditions feature to trigger an expression automatically. Please refer to the Trigger Conditions section for more details.
The model's pose is too aggressive / too soft / the arms are sinking into the body / the arms are too far away from the body.
Try setting Animation → Additional Bone Offsets. The rotation angle of the two shoulder joints actually quite affects the perception of the character's personality!
Additional bone offsets disabled.
Additional bone offsets enabled:LeftShoulder: (10, 0, -10), RightShoulder: (10, 0, 10).
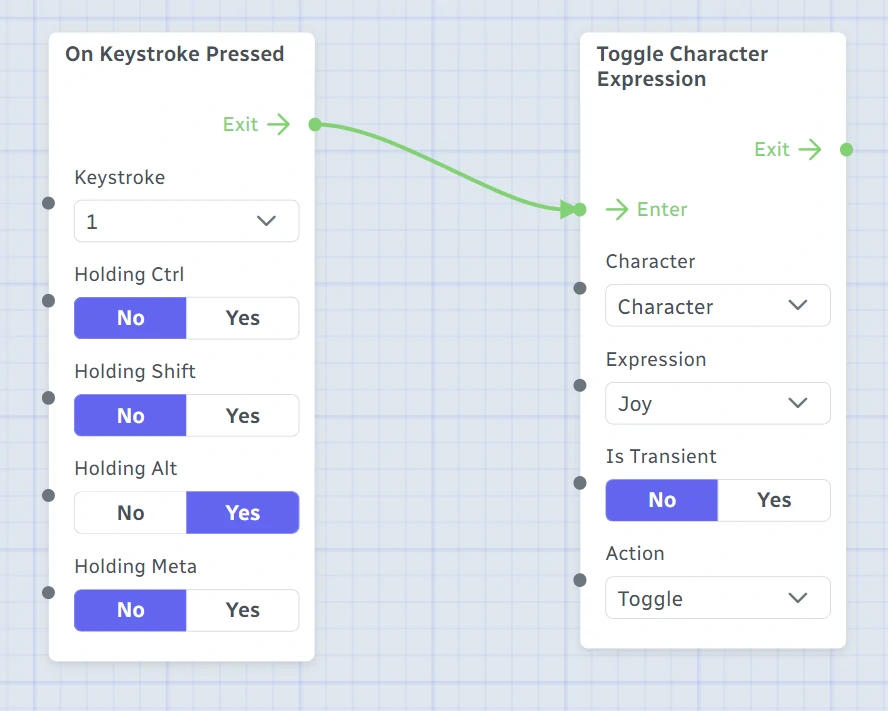
How can I change the hotkey for an expression?
Open the Expression Key Bindings blueprint and locate the On Keystroke Pressed node. Then, modify it as needed. For example, in the original blueprint, pressing Alt+1 will activate the Joy expression:
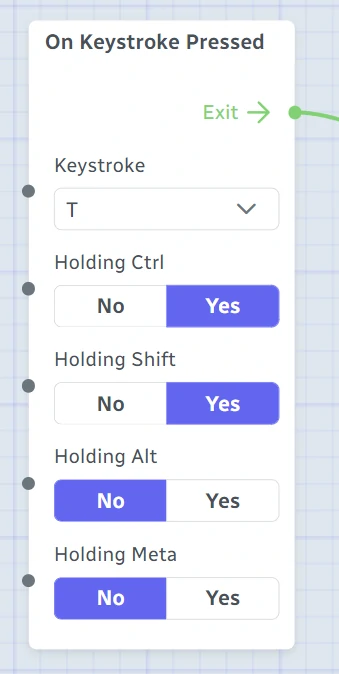
The following changes the hotkey to Ctrl+Shift+T.
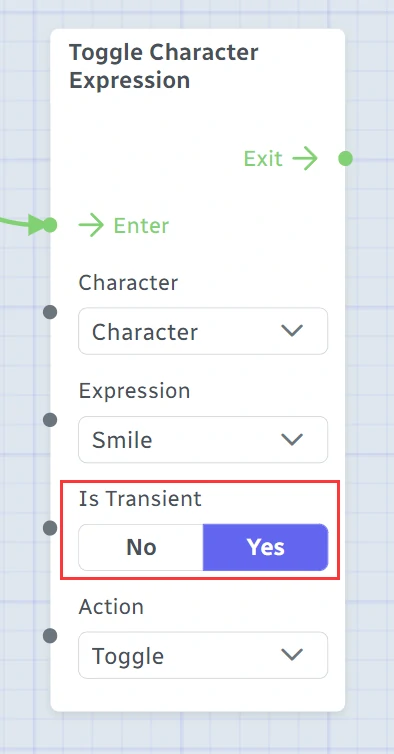
Can I enable an expression for a certain period of time and then automatically disable it after a while?
To do this, enable Is Transient on the Toggle Character Expression node in the Expression Key Bindings blueprint. The duration of the expression will be determined by Exit Delay of each BlendShape in the expression.