Character
Characters are the core of Warudo. Warudo supports the standard VRM model format. If your model format is not VRM (for example, it is a MMD or a VRChat model), you can use the Mod SDK to export it to .warudo format and load it into Warudo.
Character files should be placed in the Characters subfolder of Warudo's data folder.
Can't find the data folder? Click Menu → Open Data Folder to open it.
Setup
By default, your scene should already have a character. To add a new character, use the Add Asset menu.
We recommend to use Onboarding Assistant → Basic Setup → Get Started to set up your character. This will automatically import your character file, set up motion capture, and import VRM expressions.
Alternatively, you can manually set up your character by selecting a Source in the character asset, setting up motion capture by clicking Setup Motion Capture, and importing VRM expressions by clicking Import VRM Expressions.
Motion Capture
To set up motion capture for your character, please refer to the Motion Capture page. Once you have set up motion capture, you can calibrate tracking and access specific parts of the tracking blueprints directly in the character asset.
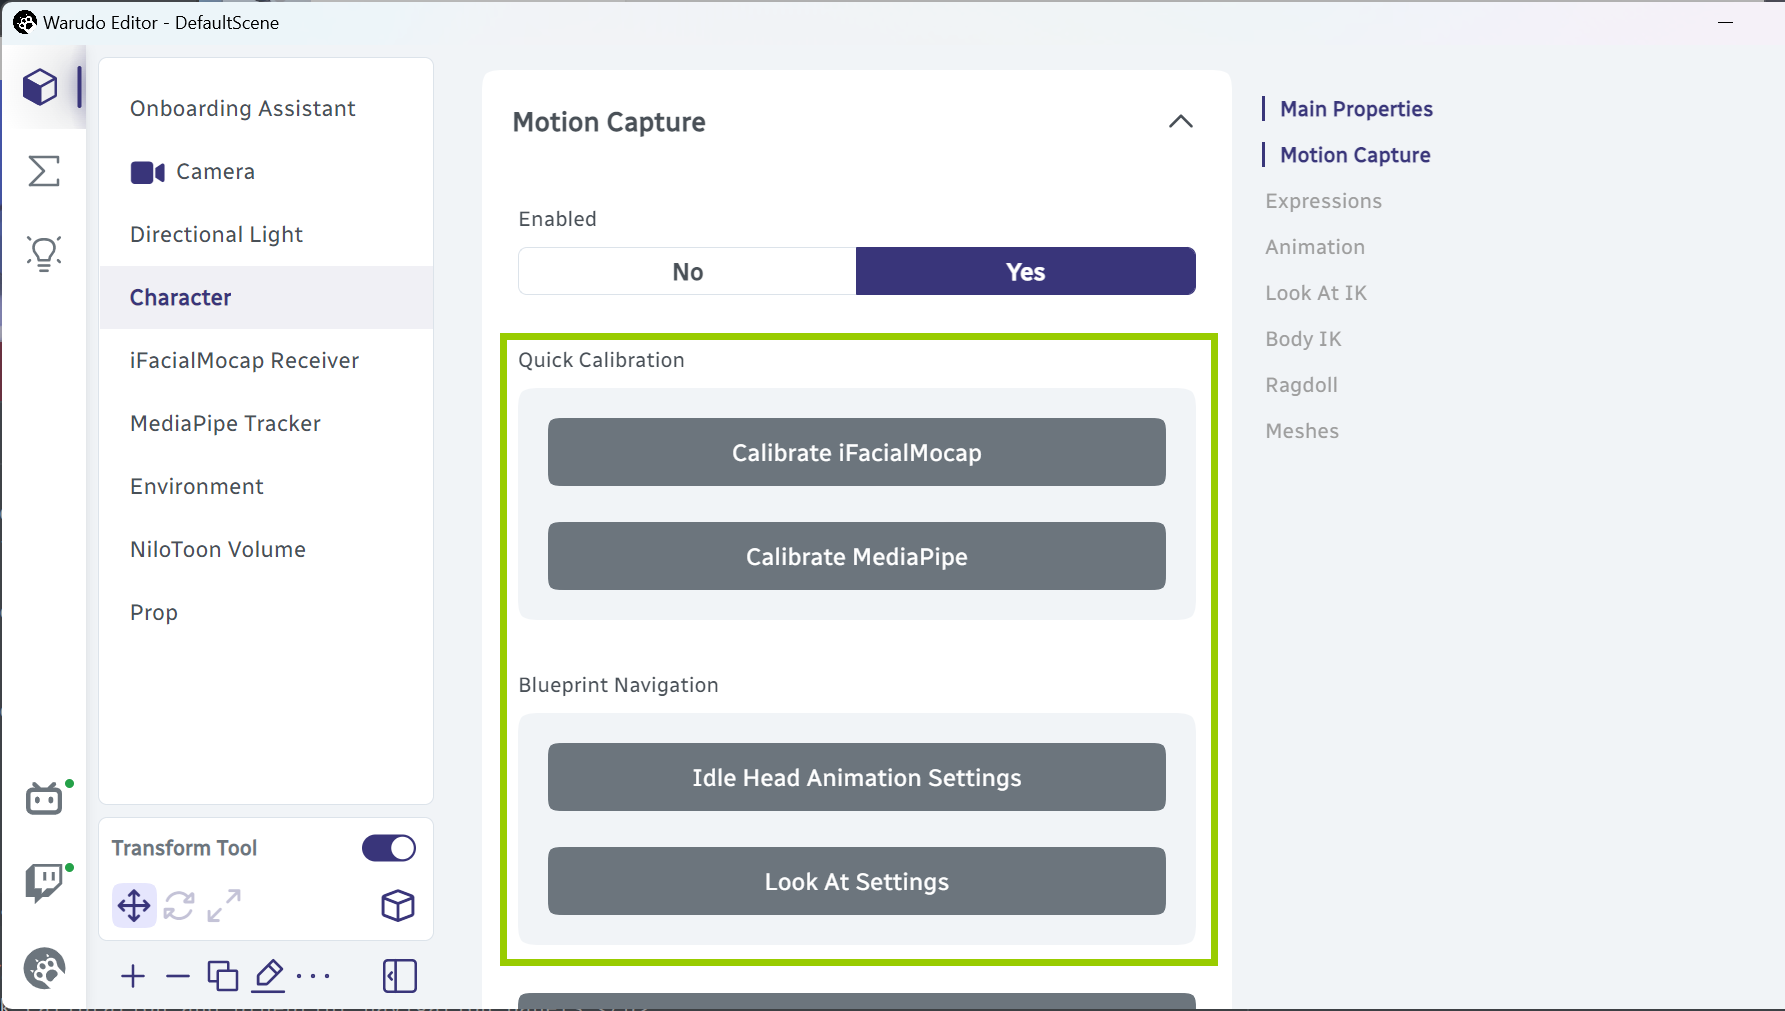
Quick calibration and blueprint navigation panels.
Expressions
Expressions are a way to control the character's facial expressions on top of your face tracking. The character asset supports both VRM expressions (also known as VRM BlendShapeClips) and custom expressions.
During onboarding, Warudo will automatically import all of the VRM expressions in your character, and generate a blueprint to add hotkeys for them. You can also import VRM expressions manually by clicking Import VRM Expressions, and generate a blueprint for key binding by clicking Generate Key Binding Blueprint.
If you are using a .warudo model, but there is a VRMBlendShapeProxy component on the GameObject, then Warudo will still be able to import the VRM expressions.
You can expand each expression in the expression list to preview it (Enter Expression) and customize its settings.
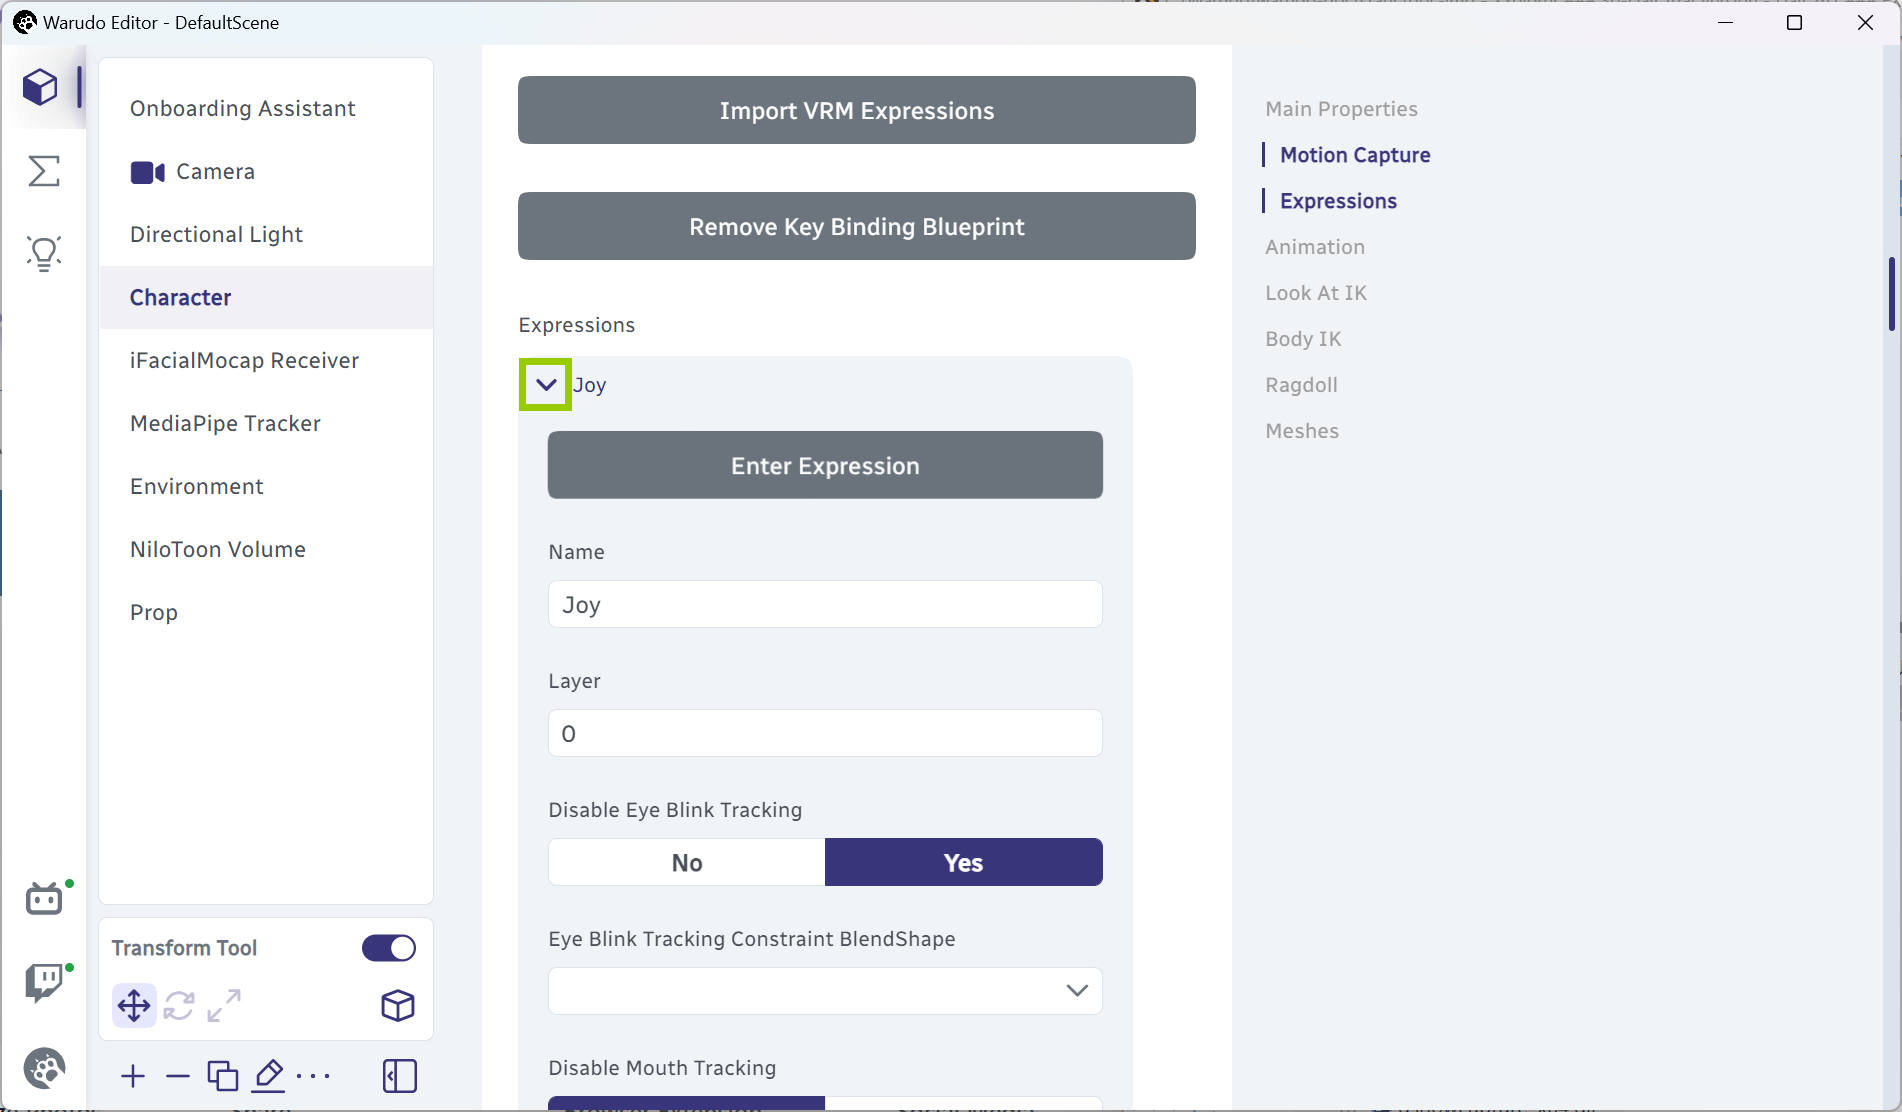
Expanding an expression.
You can set the Name of the expression, which is used for identification in the blueprint. You can also set the Layer of the expression. When switching expressions, expressions on the same layer will fade out, while expressions on different layers can overlap.
When importing VRM expressions, the default BlendShapeClips (i.e. Joy, Angry, Sorrow, Fun/Surprised) in the VRM model will be placed on layer 0, while the BlendShapeClips added by the modeler will be placed on layer 1, 2, 3, etc.
If an expression already closes your model's eyes, you may want to Disable Eye Blink Tracking to prevent the eyes from closing further. Similarly, the Disable Mouth Tracking and Disable Brow Tracking options can be used to prevent the mouth and brow blendshapes from being controlled by face tracking.
The Target BlendShapes list contains all of the blendshapes that will be controlled when this expression is active. You can add or remove blendshapes from this list, and customize the Target Value, Enter Duration, Enter Easing, Enter Delay, Exit Duration, Exit Easing, and Exit Delay for each blendshape.
By default, Warudo uses a 0.4s fade-in and fade-out duration when switching expressions. You can customize the Enter Duration and Exit Duration for each blendshape in Target BlendShapes; alternatively, if you want to disable fading altogether, you can enable the Is Binary option.
Trigger Conditions
Expressions are usually triggered by hotkeys, but you can also trigger an expression using just face tracking!
To set up, add a new entry to the Trigger Conditions list. Set up the Conditions for your expression trigger, and customize other options as needed. For example, the below settings will trigger the expression when the mouthSmileLeft and mouthSmileRight blendshapes are both greater than 0.5.

You can have more than one entry in the Trigger Conditions list, and when any of the Conditions in an entry are met, the expression will be triggered.
Note the conditions are based on model blendshapes, not face tracking blendshapes. If you are using an ARKit-compatible model, you can simply select the ARKit blendshapes as the conditions. Otherwise, you may need to find the corresponding model blendshapes that your face tracking uses.
Advanced
The Target Material Properties list contains the Unity material properties controlled by this expression. Note you need to know the material name and the property name in advance; you can inspect these in Unity.
The Constrained BlendShapes list contains all the blendshapes that will be constrained when this expression is active. Constraining blendshapes allows you to precisely control your character's facial expressions, ensuring the transition between blendshapes is always smooth. For example, if you want to make sure your model's mouth does not open more than a certain amount when the expression is active, you can add a new entry to this list, set the Constrained BlendShape to the mouth blendshape (e.g., JawOpen), and set the Constrained Value Min and Constrained Value Max to the desired range (e.g., 0 to 0.5).
Optionally, you can set the Constraint BlendShape to establish a mapping between it and the constrained blendshape. For example, the following settings will make the JawOpen blendshape value follow the Smile blendshape value such that when Smile is 0, JawOpen can take from 0 to 1, and when Smile is 1, JawOpen is constrained from 0 to 0.25.
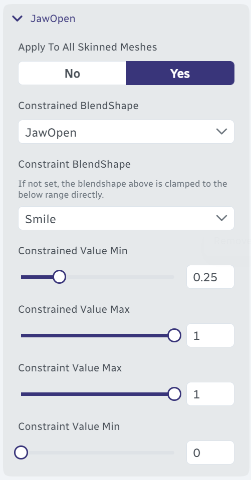
Constraining the JawOpen blendshape.
The Toggle GameObjects list contains all the child GameObjects that will be toggled when this expression is active. For example, you can use this to toggle the visibility of a particle effect when the character is smiling.
Finally, below the expression list, you will find Default BlendShapes and Default Material Properties, which are used when neither any expression nor face tracking is active.
Animation
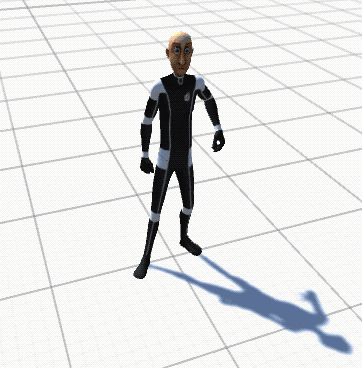
Warudo supports playing animations on your character. Better yet, if you are using a compatible upper body tracking blueprint (e.g., MediaPipe, RhyLive), animations are automatically blended with motion capture, allowing you to interact with your audience in fun or intimate ways.
Here, bending of the upper body comes from the idle animation, while the head and hand movements come from motion capture. When tracking of the hands is lost, the avatar's hands smoothly transitions into the idle animation.
In Warudo, there are three types of animations:
-
Idle Animation: The default animation that plays when no other animations are playing.
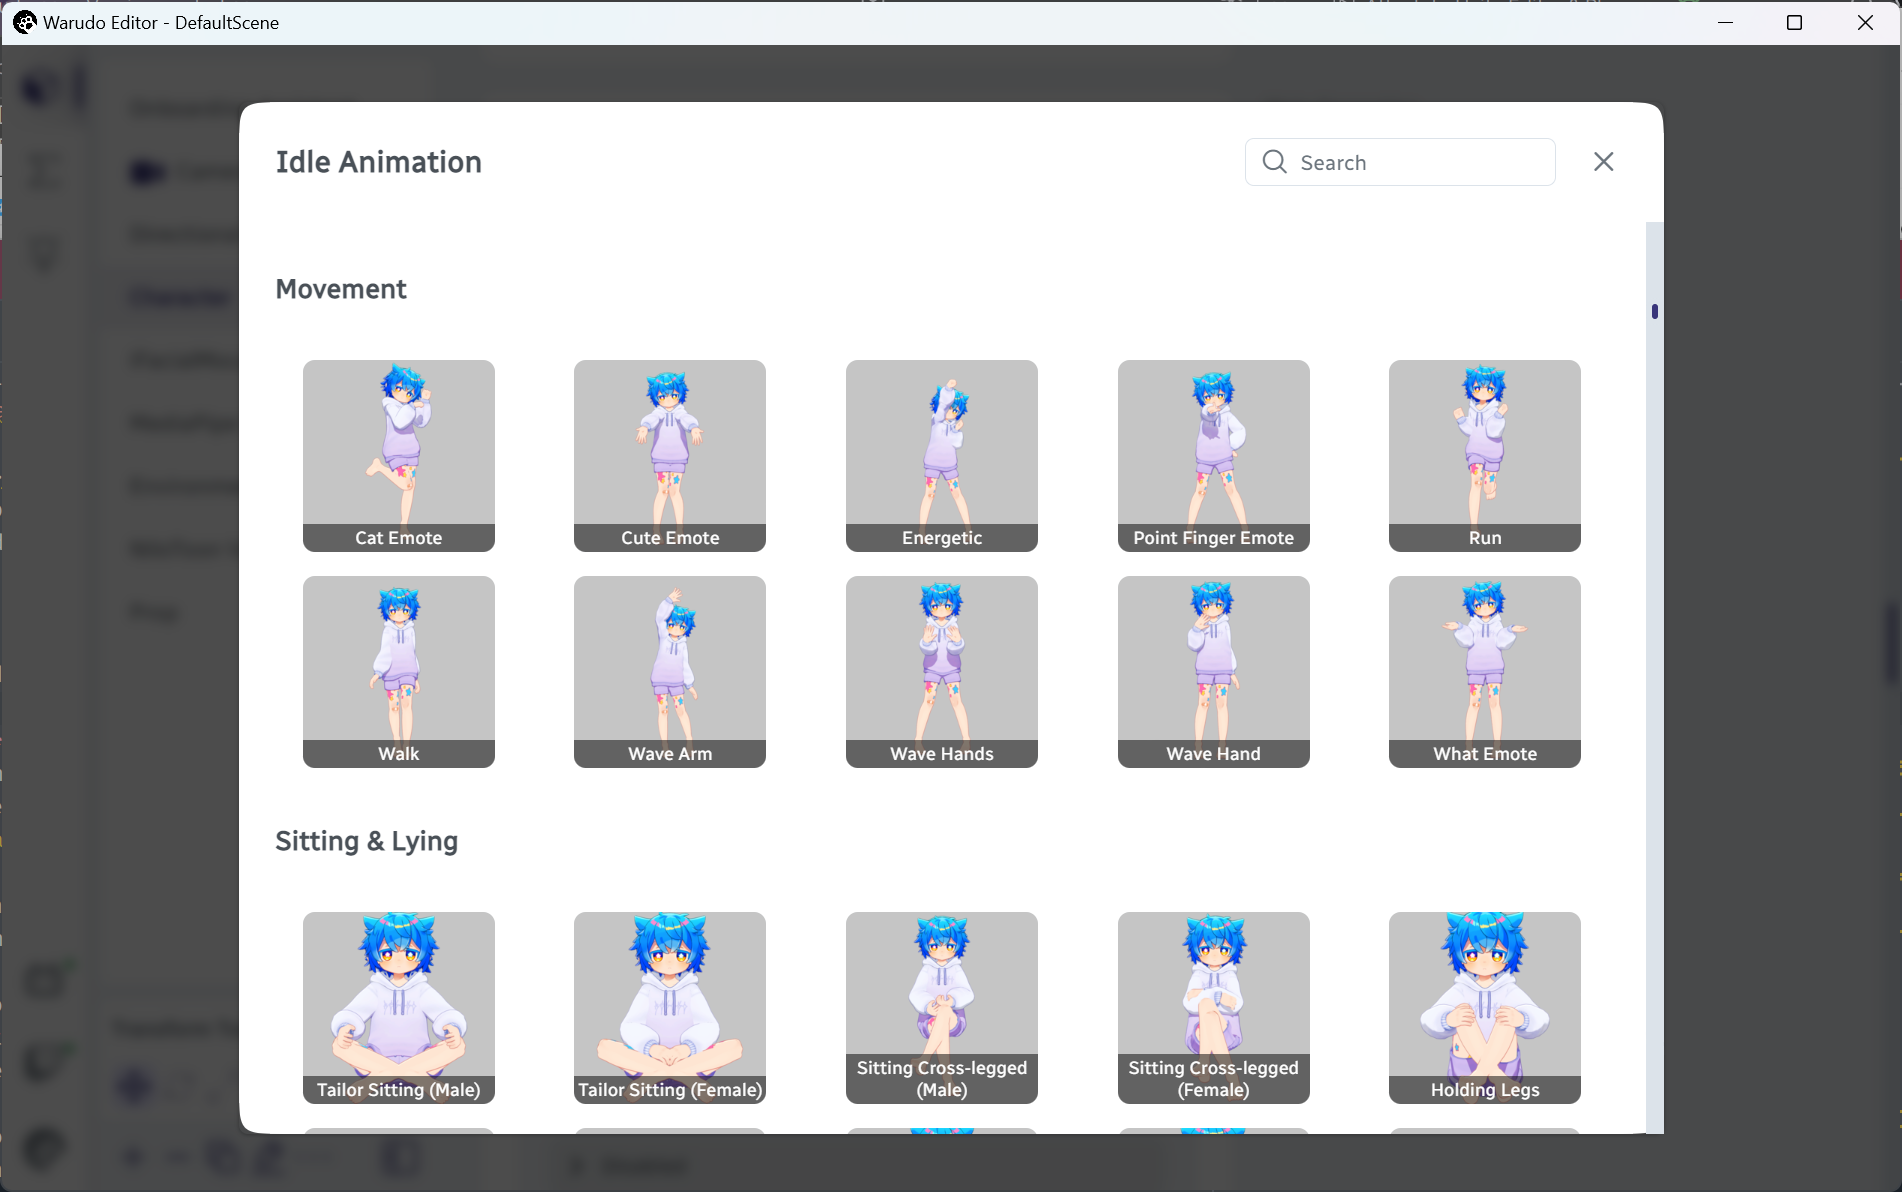
Selecting an idle animation.
-
Overlaying Animations: Animations overlaid on top of the idle animation.
For example, let's say you like the "Cat" animation and want to use it. However, you also want your character to sit down on a bed. To combine the two animations, you can set Idle Animation to a sitting animation, while adding a new entry to the Overlaying Animations list, setting the Animation to "Cat", and click Mask Upper Body to ensure the "Cat" animation only affects the upper body.
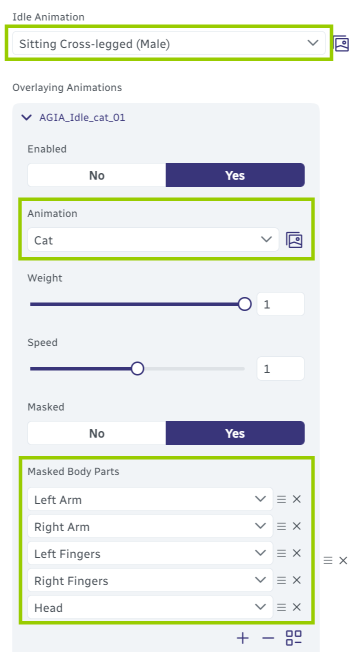
Combining the "Cat" animation with a sitting animation using overlaying animations.

The "Cat" animation only affects the upper body.
You can add as many overlaying animations as you want; each layer of animation can be assigned its own Masked Body Parts, Weight and Speed, allowing different parts of the body to play different animations. The lower an animation is in the list, the higher its priority.
Demo of overlaying animations. Source: https://www.bilibili.com/video/BV1Zt4y1c7Re
-
Transient animations: One-shot animations that are triggered by blueprints——for example, a short dance animation that is played when you receive a Twitch redeem. Check out our blueprint tutorials for more details.
In addition to body animations, you can also set up Breathing Animation and Swaying Animation, as well as Override Hand Poses, i.e., setting the pose of the character's hands to a specific pose, like a peace sign.
Finally, you can use Additional Bone Offsets to make small adjustments to the character's posture; for example, if you want to make the character's head tilt a few degrees to one side.
By default, the priority of the idle animation, overlay animations, override hand poses, and body IK are all lower than motion capture.
For example, even if you have set an override hand pose for your right hand, if your right hand is being tracked, say by MediaPipe, the model follows your right hand's pose instead of the override hand pose. To make the override hand pose take priority over motion capture, you can enable High Priority in the hand pose settings.
Look At IK
Look At IK is used to make the character look at a specified target in the scene, like the camera. This is useful for capturing the perfect selfie!
If you just want to maintain eye contact with your audience, we recommend to enable Look At when you set up face tracking instead (it is by default enabled). See Customizing Face Tracking for more details.
To use Look At IK, simply enable it and set Target to the target that the character should look at. You can adjust the different weights to control how much the character's head, eyes, and body should rotate to look at the target. The Clamp Weight options can be used to limit the rotation of the head, eyes, and body. The greater they are, the smaller the range of rotation.
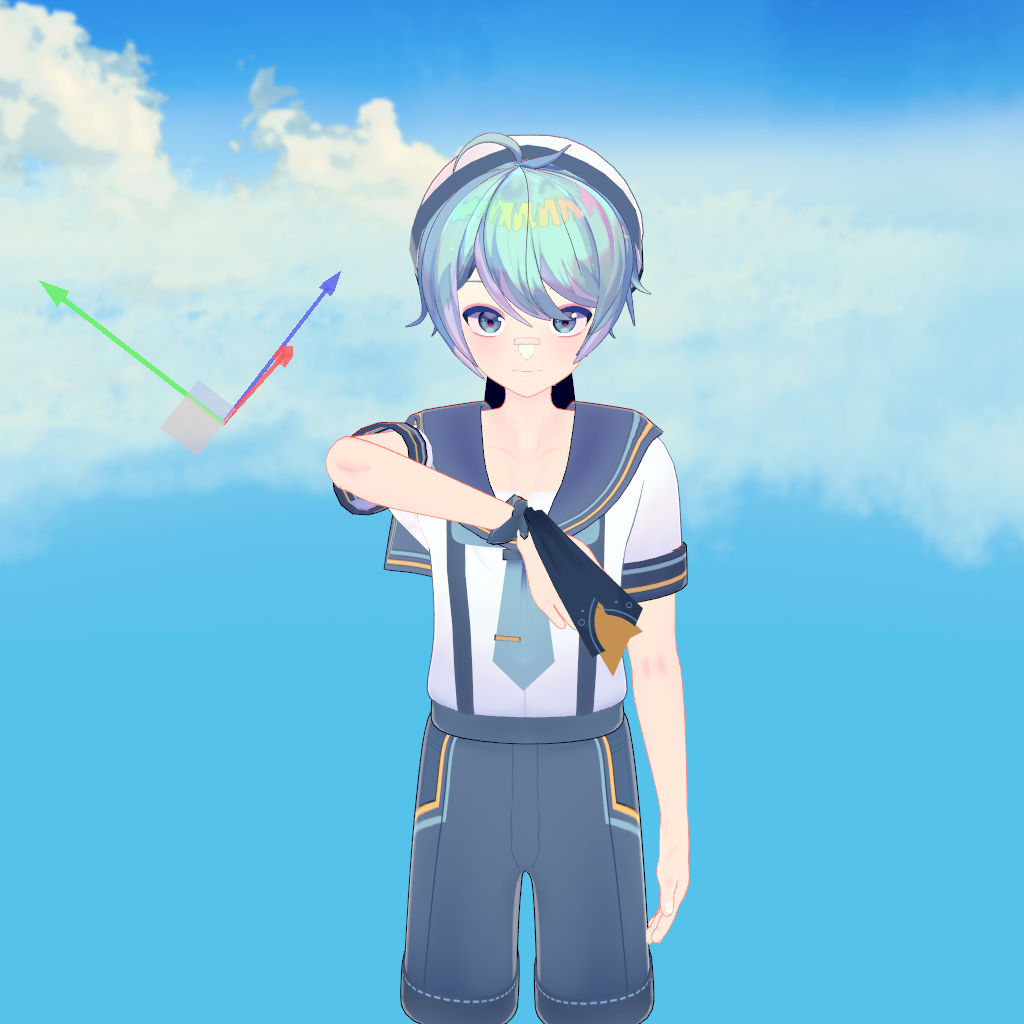
Body IK
Body IK is used to make the character's spine or limbs follow a specified target in the scene.
Body IK in a nutshell.
To use Body IK, simply enable it for the spine or a hand/foot, and set IK Target to the target that the character should follow. The IK target is usually a camera, prop, or an anchor. If you want to create a temporary anchor at the current position of the body part, you can click Create Temporary IK Target Anchor At Current Position. When you are done, you can click Remove Temporary IK Target Anchor to remove the temporary anchor.
Creating a temporary anchor allows you to fix the model's hands in an ideal position, preventing the hands from drifting left and right due to head movements. This can be quite useful for some poses.
Before
After
The Bend Goal Target and Bend Goal Weight options can be used to control the rotation of the elbows and knees. The Bend Goal Target is usually an anchor.
Bend goal disabled.
Bend goal enabled
Ragdoll
Ragdoll allows your character to be hit by physics objects, and prevent the character from penetrating through objects in the scene.
Muscle Spring and Muscle Damper can be used to control the stiffness of the character's muscles. The greater they are, the stiffer the character's muscles are.
To prevent self-penetration, such as the character's hands penetrating through the body, you can enable Internal Collisions. For best results, you will need to adjust the colliders manually by clicking Edit Ragdoll.
Although enabling ragdoll can make the character look more realistic, it can also cause the character to behave in unexpected ways due to glitches in the physics engine. We recommend to only enable ragdoll when you are sure it is necessary.
Note that some nodes temporarily enable ragdoll regardless of the asset setting. For example, the Throw Prop At Character node will temporarily enable ragdoll on the character when the prop hits the character.
Meshes
You can toggle meshes and skinned meshes on the model.
Note that models exported by VRoid Studio only have two meshes: Body and Face. More detailed models often split the character's clothes, accessories, tail, animal ears, etc. into separate meshes, for which this feature is useful, such as toggling the character's jacket.
To toggle meshes in blueprints, you can use the Toggle Character Meshes node.
Scaling
You can scale the character by using the Transform → Scale property. However, this may break features such as ragdoll, IK, and compatibility with some motion capture systems (e.g., Leap Motion). If you need to scale the character, we recommend to scale the character in the 3D modeling software instead, i.e., before you have imported the model into Unity or Warudo.
Frequently Asked Questions
How can I trigger an expression automatically with face tracking?
You can use the Trigger Conditions feature to trigger an expression automatically. Please refer to the Trigger Conditions section for more details.
The model's pose is too aggressive / too soft / the arms are sinking into the body / the arms are too far away from the body.
Try setting Animation → Additional Bone Offsets. The rotation angle of the two shoulder joints actually quite affects the perception of the character's personality!
Additional bone offsets disabled.
Additional bone offsets enabled:LeftShoulder: (10, 0, -10), RightShoulder: (10, 0, 10).
How can I change the hotkey for an expression?
Open the Expression Key Bindings blueprint and locate the On Keystroke Pressed node. Then, modify it as needed. For example, in the original blueprint, pressing Alt+1 will activate the Joy expression:
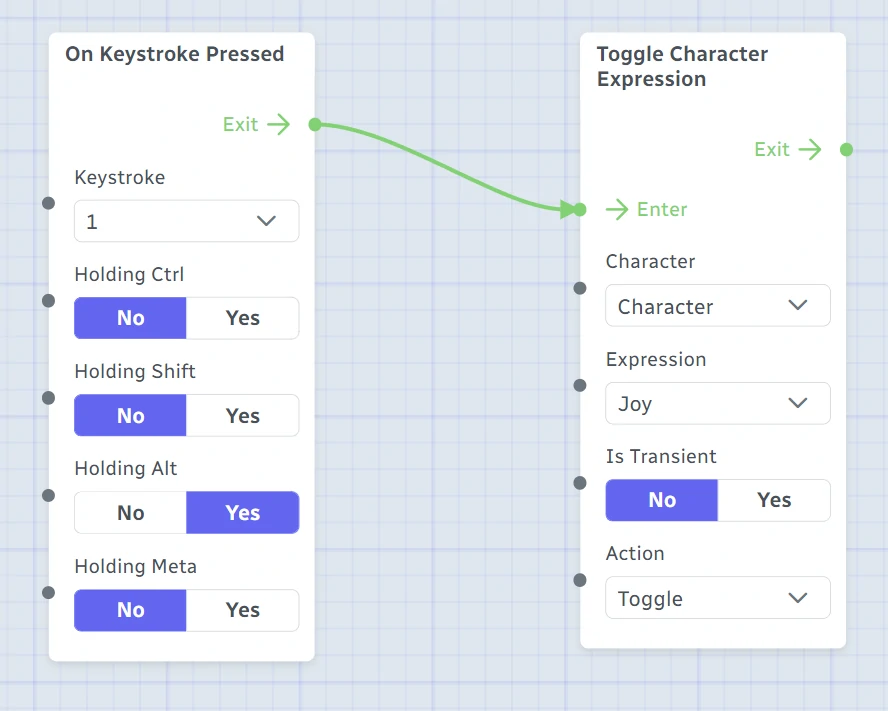
The following changes the hotkey to Ctrl+Shift+T.

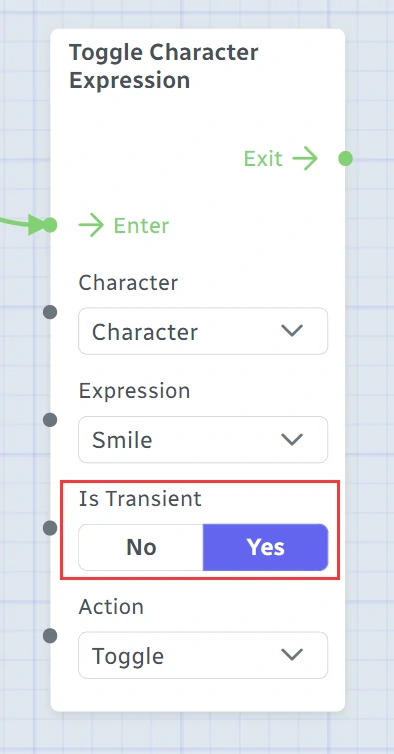
Can I enable an expression for a certain period of time and then automatically disable it after a while?
To do this, enable Is Transient on the Toggle Character Expression node in the Expression Key Bindings blueprint. The duration of the expression will be determined by Exit Delay of each BlendShape in the expression.
Authors