Animating the Camera
Enough fun with our character! Let's see how we can incorporate some cinematic camera movements into our stream. In this tutorial, we will learn how to add simple but effective camera animations.
If you are a Warudo Pro user, you can also use the director asset to create camera animations.
Our character is dancing, and the camera is moving along!
Animating an Orbit Character Camera
The protagonist of this tutorial is the Camera Orbit Character node. Let's drag it out to the node editor, and take a closer look:
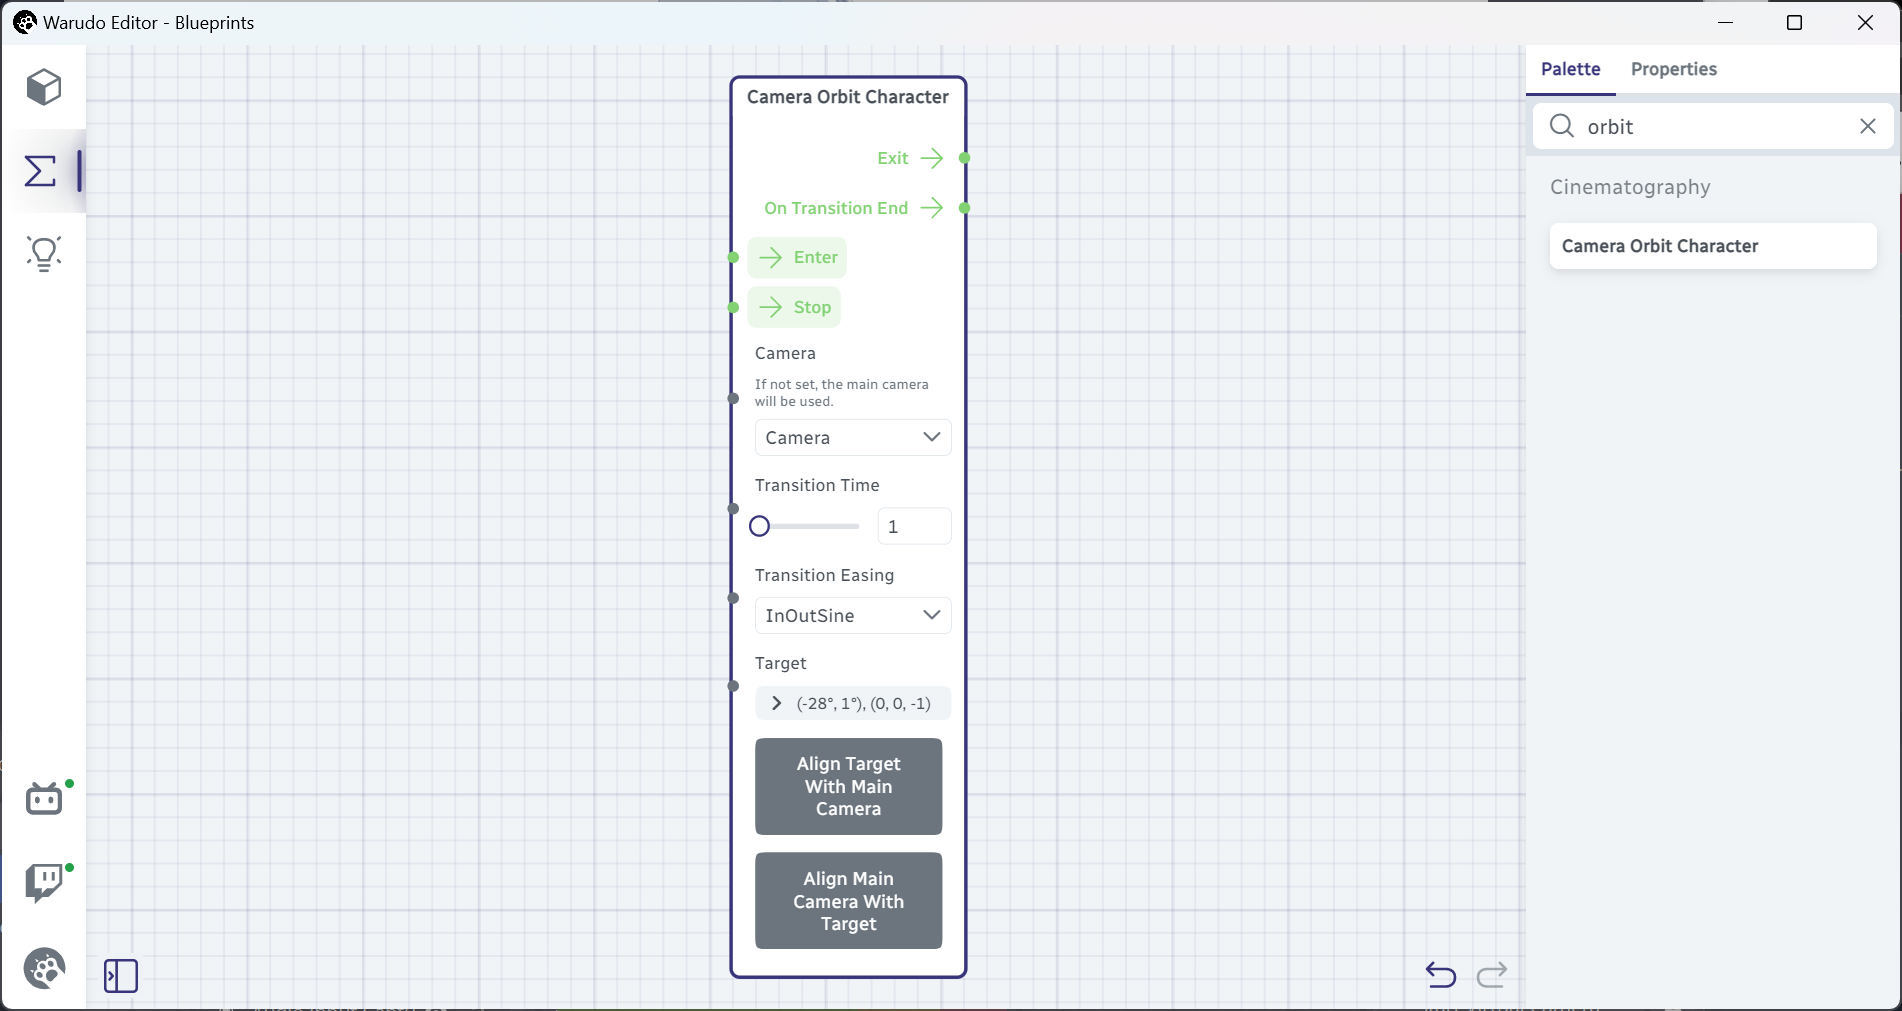
The Camera Orbit Character node essentially records and replays the camera's parameters under the Orbit Character control mode. We will simply use our mouse to move the camera around, and let the node record where we move the camera to, how much we zoom in and pan around, etc. Then, we can trigger the node at anytime so that the camera moves to the recorded position and orientation.
If you haven't yet, set Camera → Control Mode to Orbit Character.
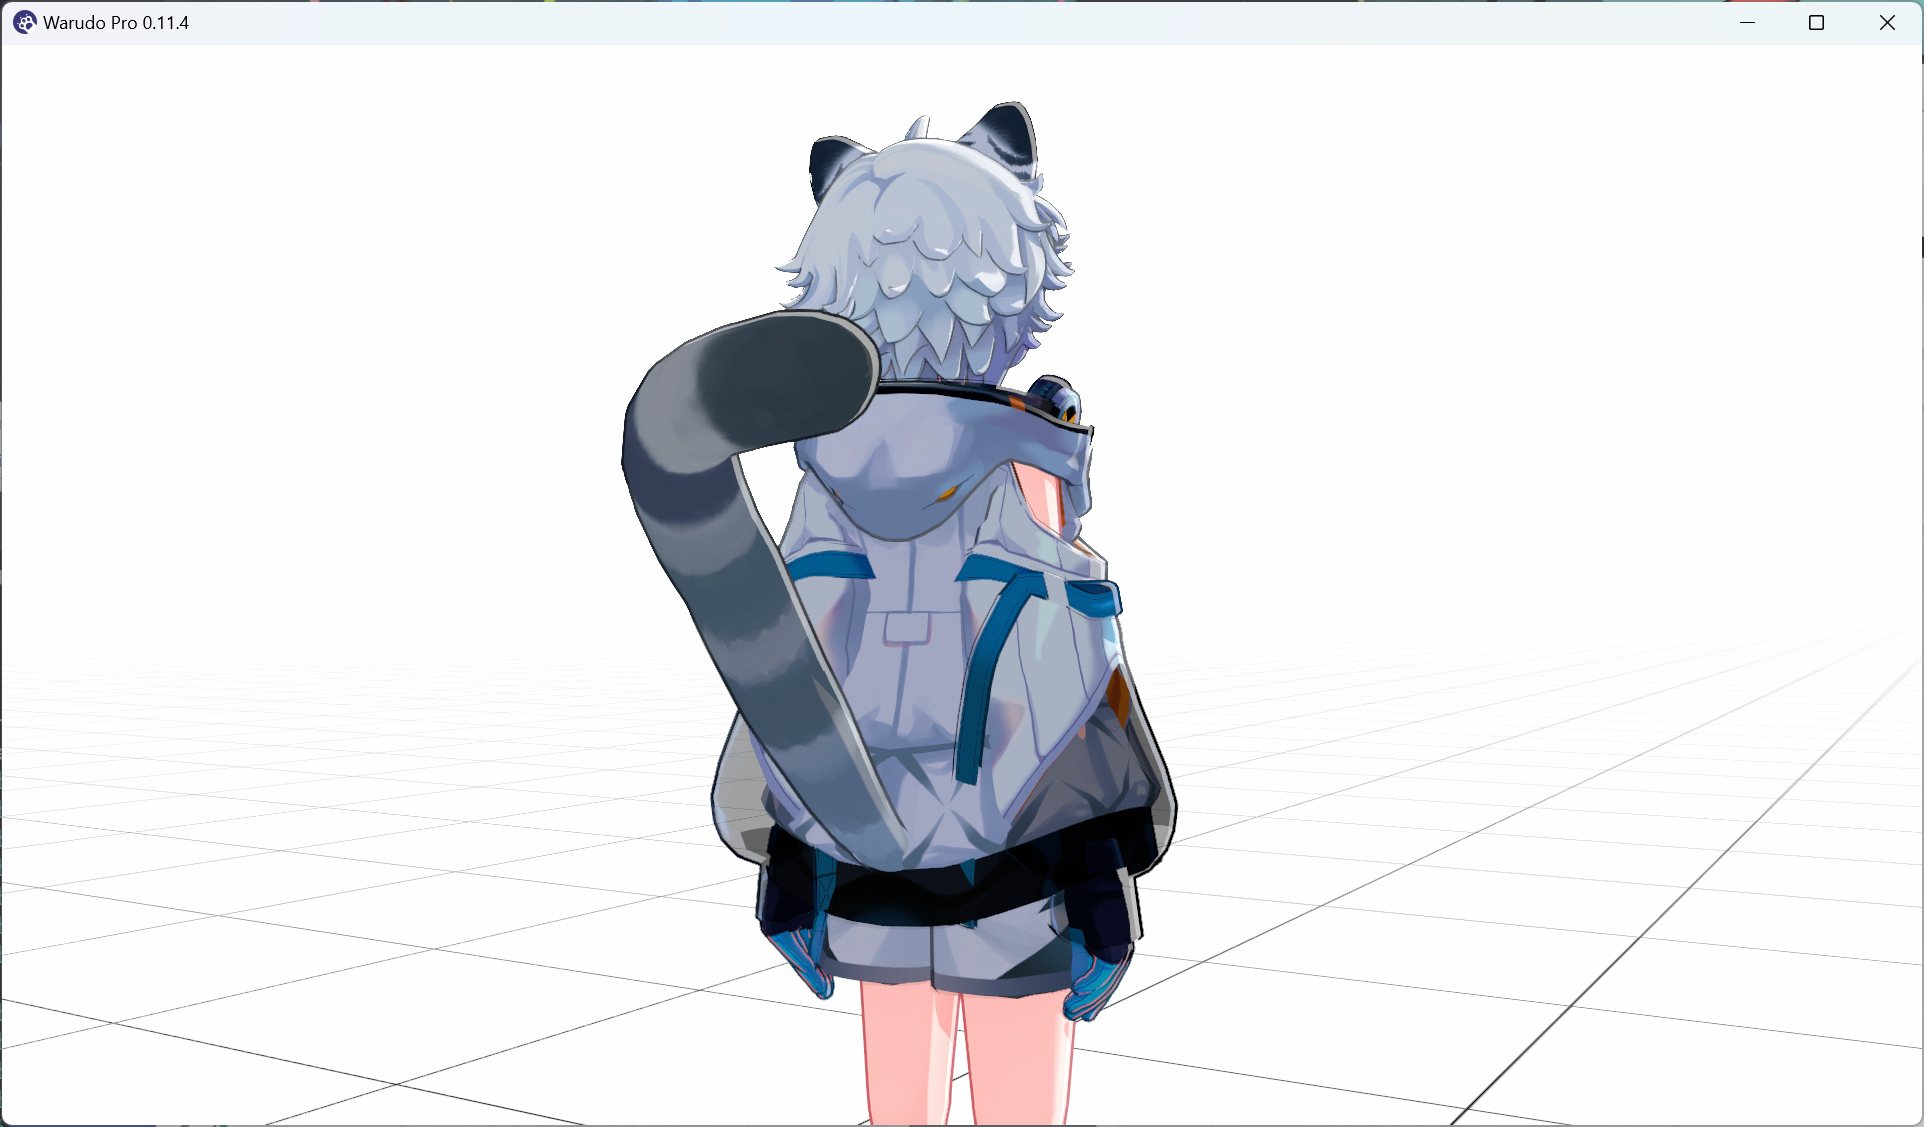
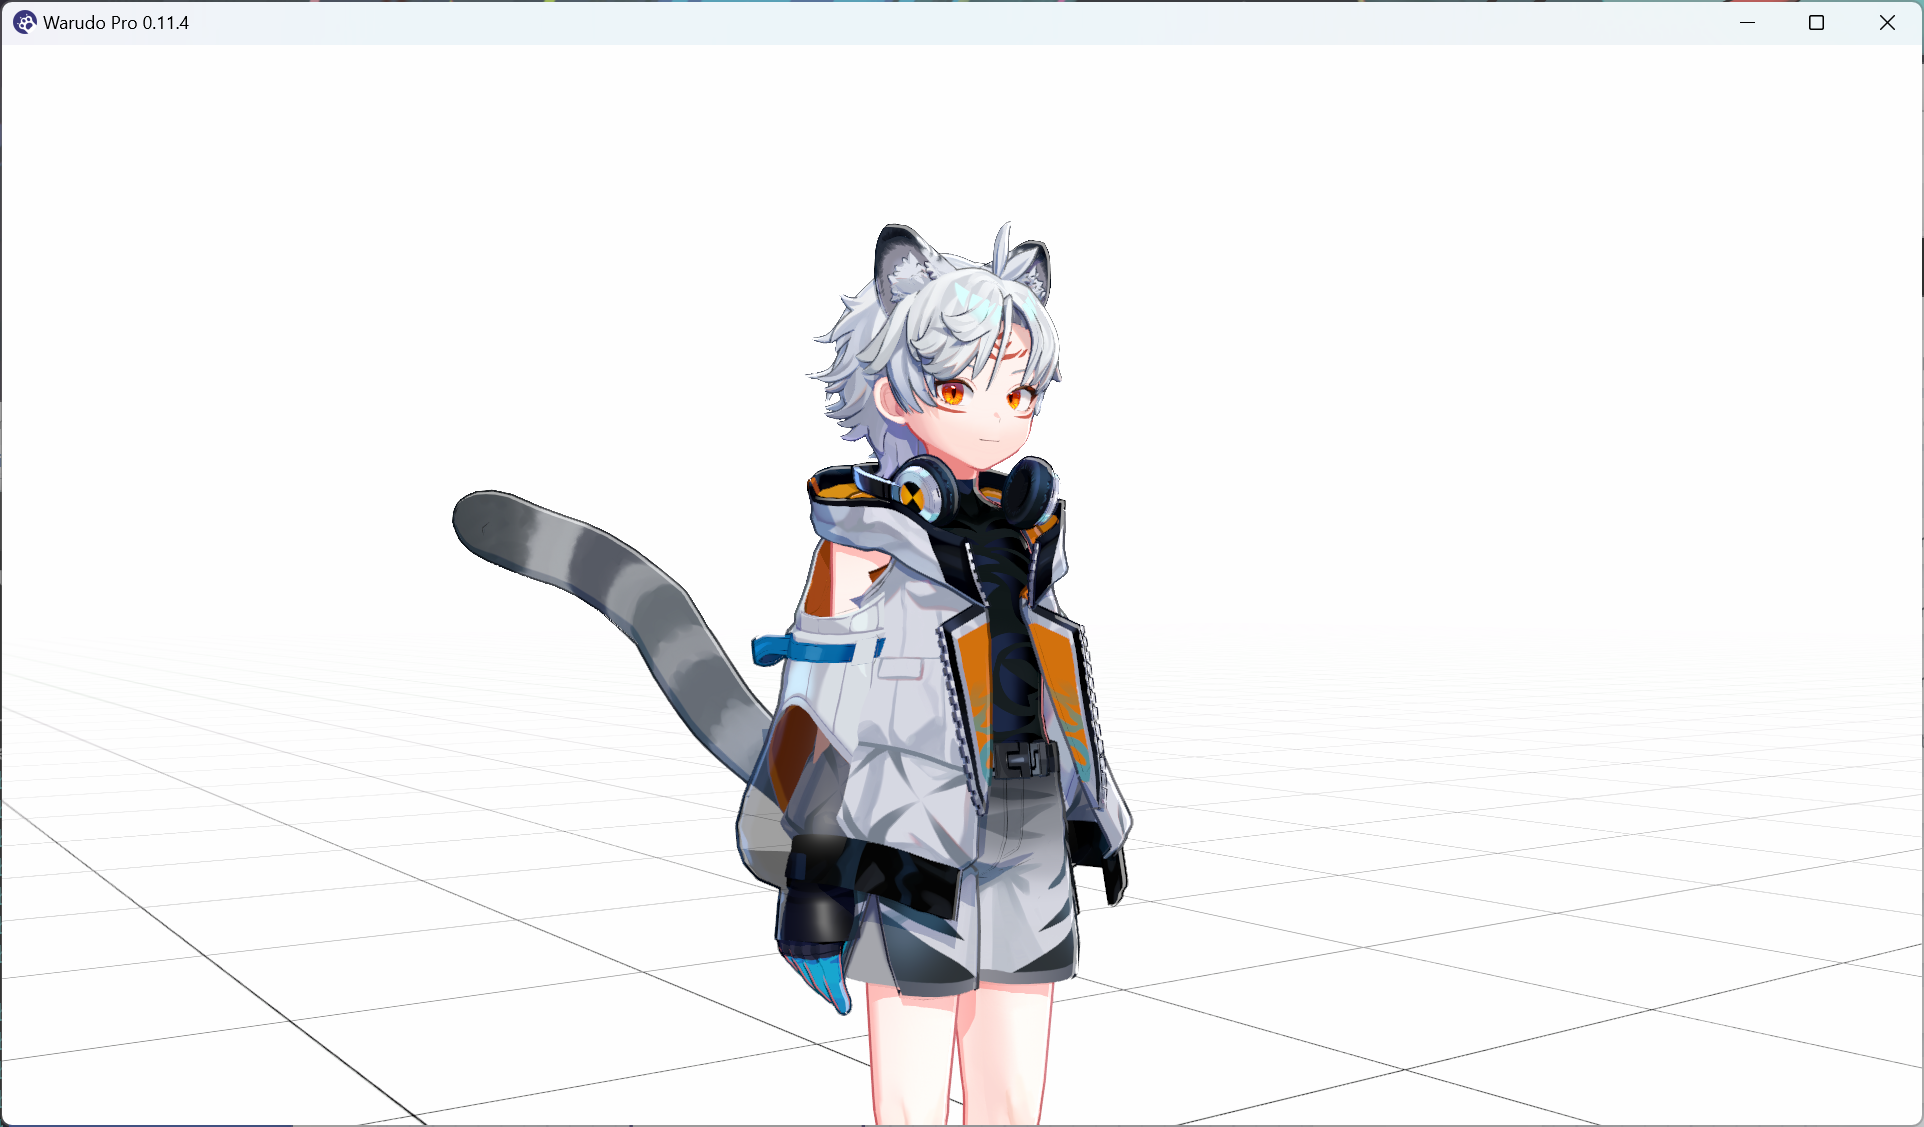
Let's try it out! For example, I want to showcase my character's fluffy tail to my viewers, so I rotate the camera around to the back of my character:
Then, I click on the Align Target With Main Camera button on the node; the node then records the camera's position and orientation in the Target data input. Now, I can rotate my camera back to the front, but whenever I trigger the node, the camera will move to the back of my character and show my tail!
We can easily come up with a blueprint like this:
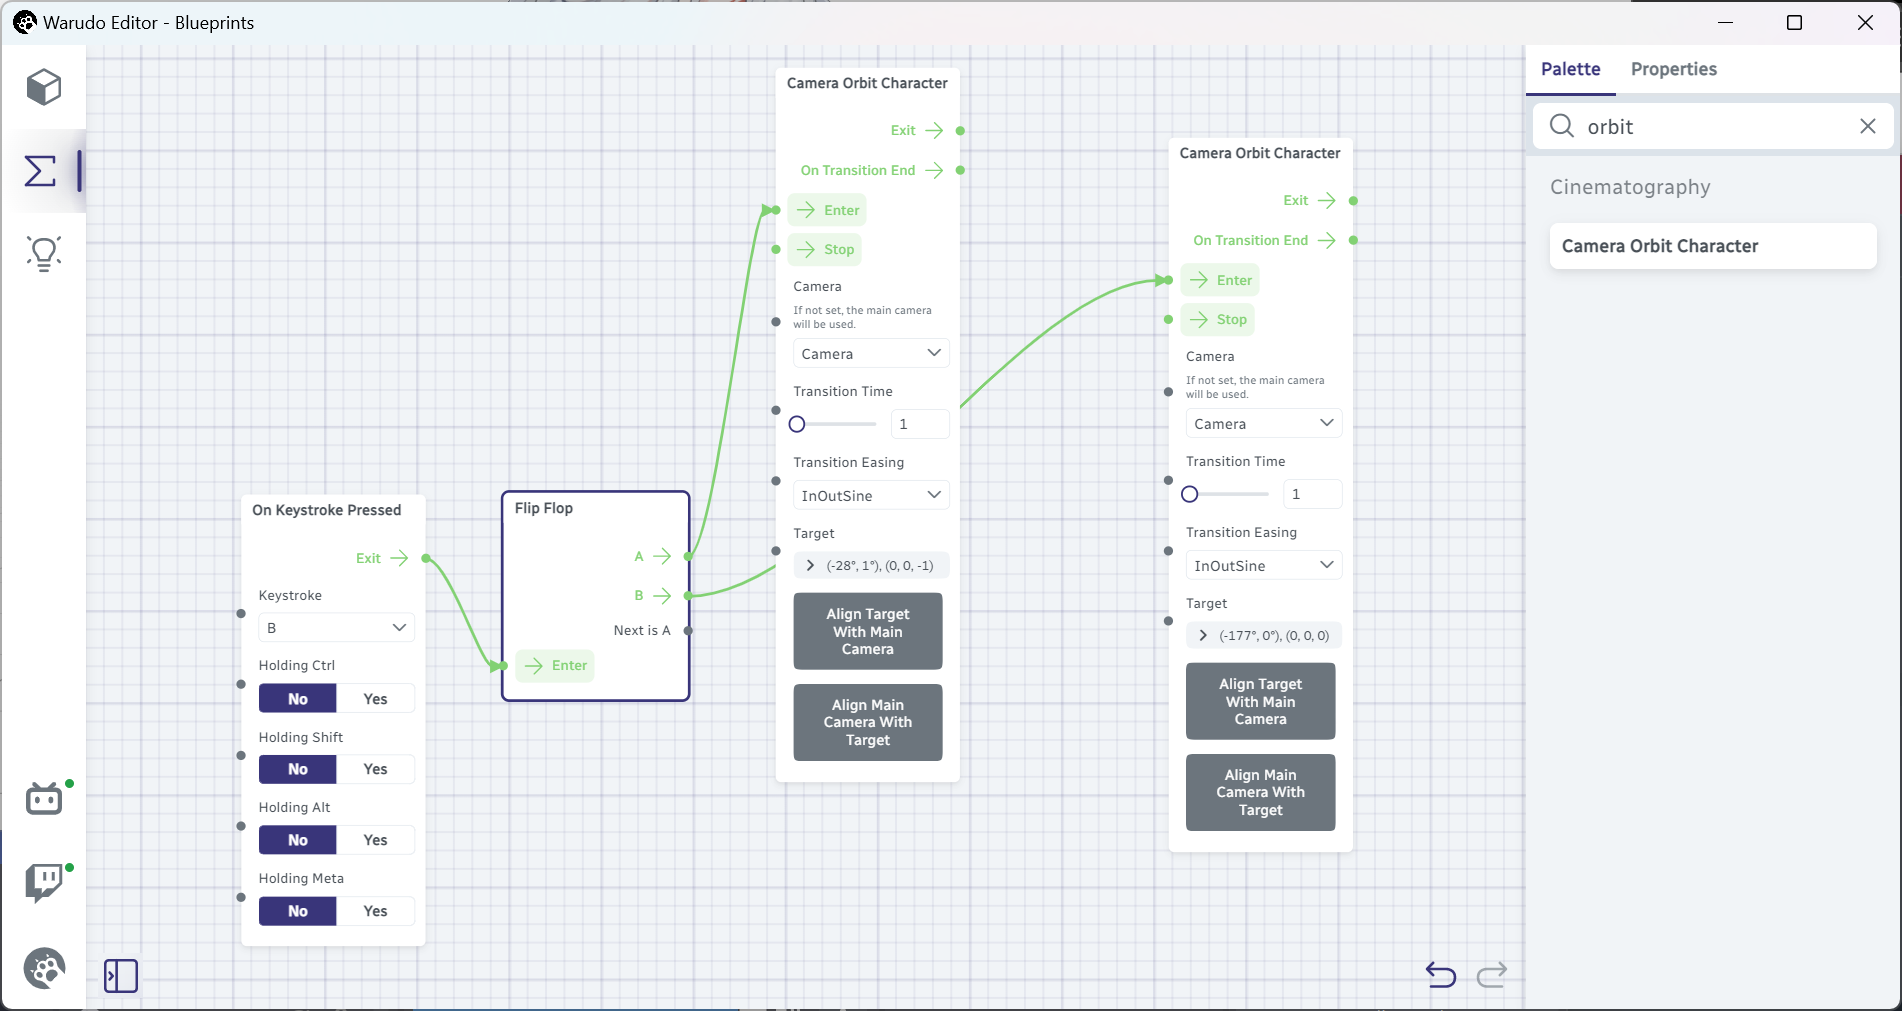
This allows me to press B to toggle between the front and back of my character anytime!
Now it's your time! Try to create a camera blueprint of your own, and see what interesting camera movements you can come up with for your character.
Play around with the Transition Time and Transition Easing options to see how they affect the camera movement! For Transition Easing, InOutSine is a great starting choice for natural camera movements.
Looping the Animation��
Everything is great, but there is one problem: we need to manually trigger the back and forth animation. Is there a way to let the camera automatically move on its own?
Well yes, there is! Let's see how we can do this. First, set up two Camera Orbit Character nodes with two different camera positions and orientations. Here's what I have for the first node:
And here's what I have for the second node:
So, triggering the first node moves the camera to the left side of my character, while triggering the second node moves the camera to the right side of my character. Now, if we want the camera to move to the left first, then to the right, all we need to do is to connect On Transition End to Enter, like below:
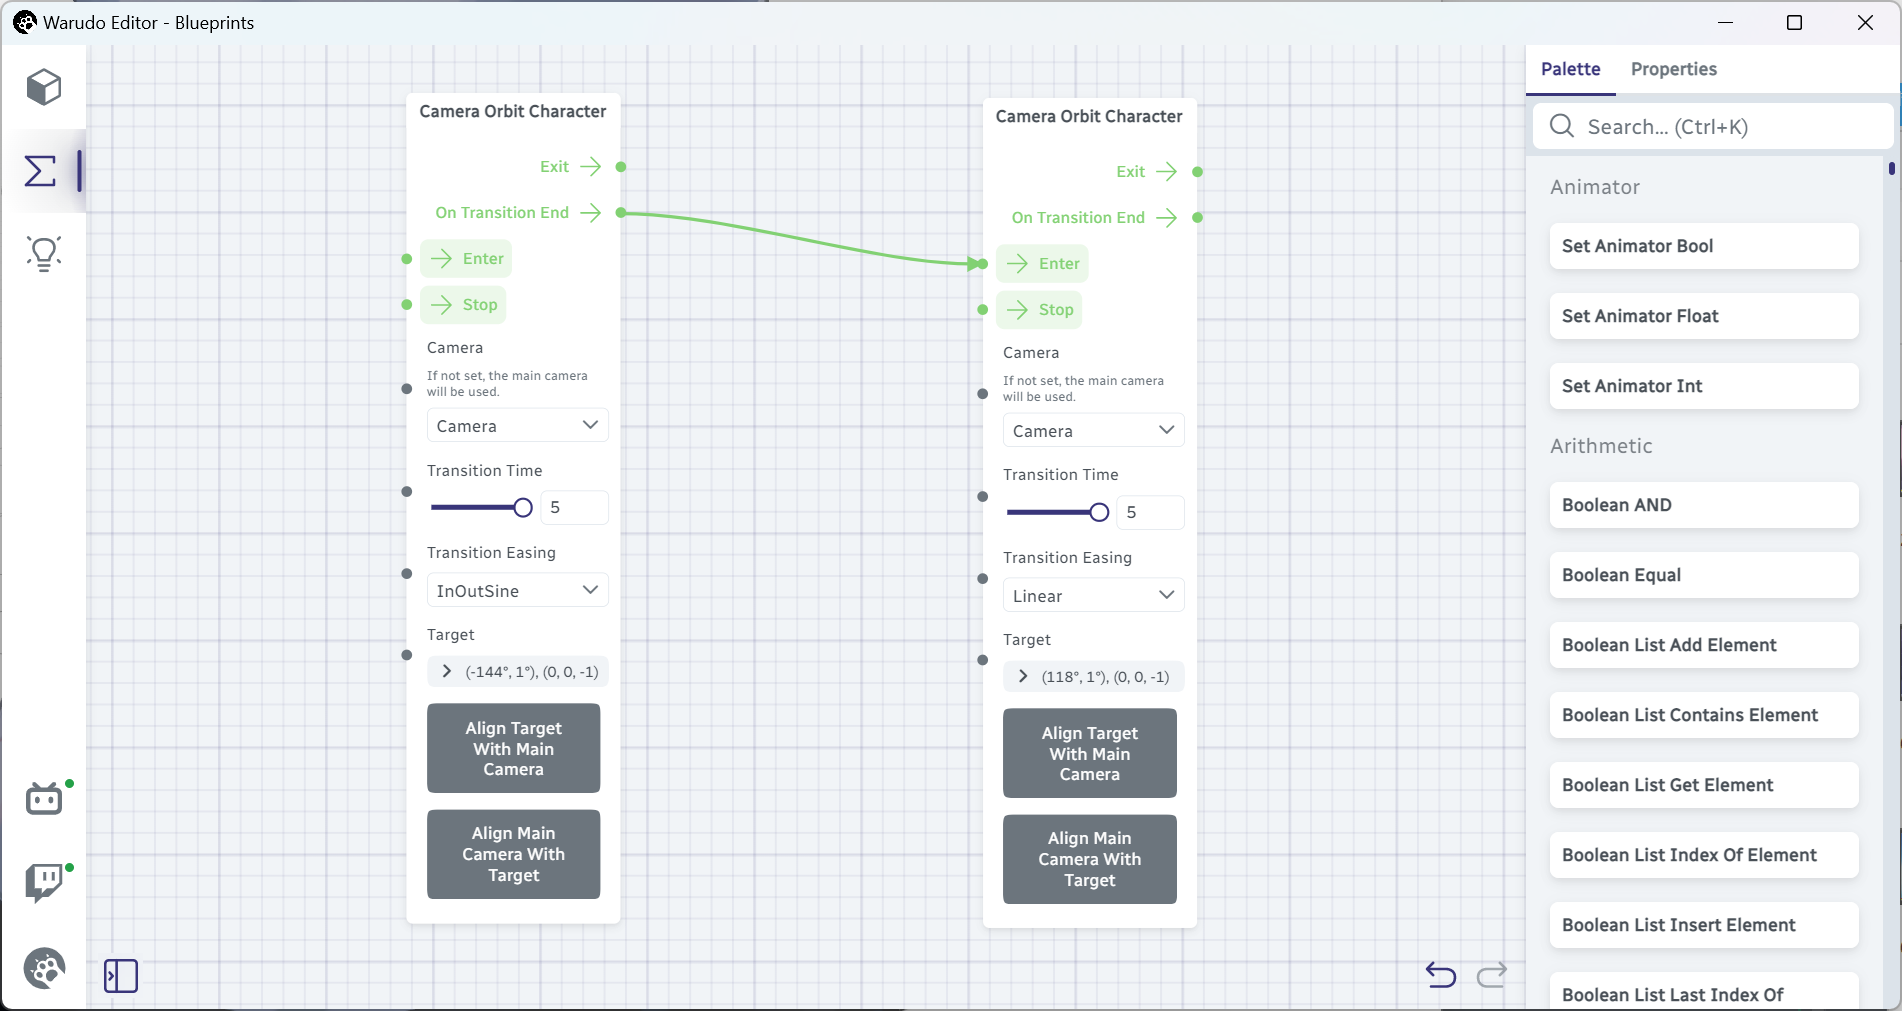
Note we are connecting from On Transition End, not Exit. This is because the Exit flow output is triggered when the node is triggered, i.e., when the camera starts moving, while the On Transition End flow output is triggered when the camera finishes moving.
Now, when we click on the left Camera Orbit Character node's Enter flow input, we will see the camera moving to the left side of our character, then automatically moving to the right side of our character. Looks good so far! What should we do next?
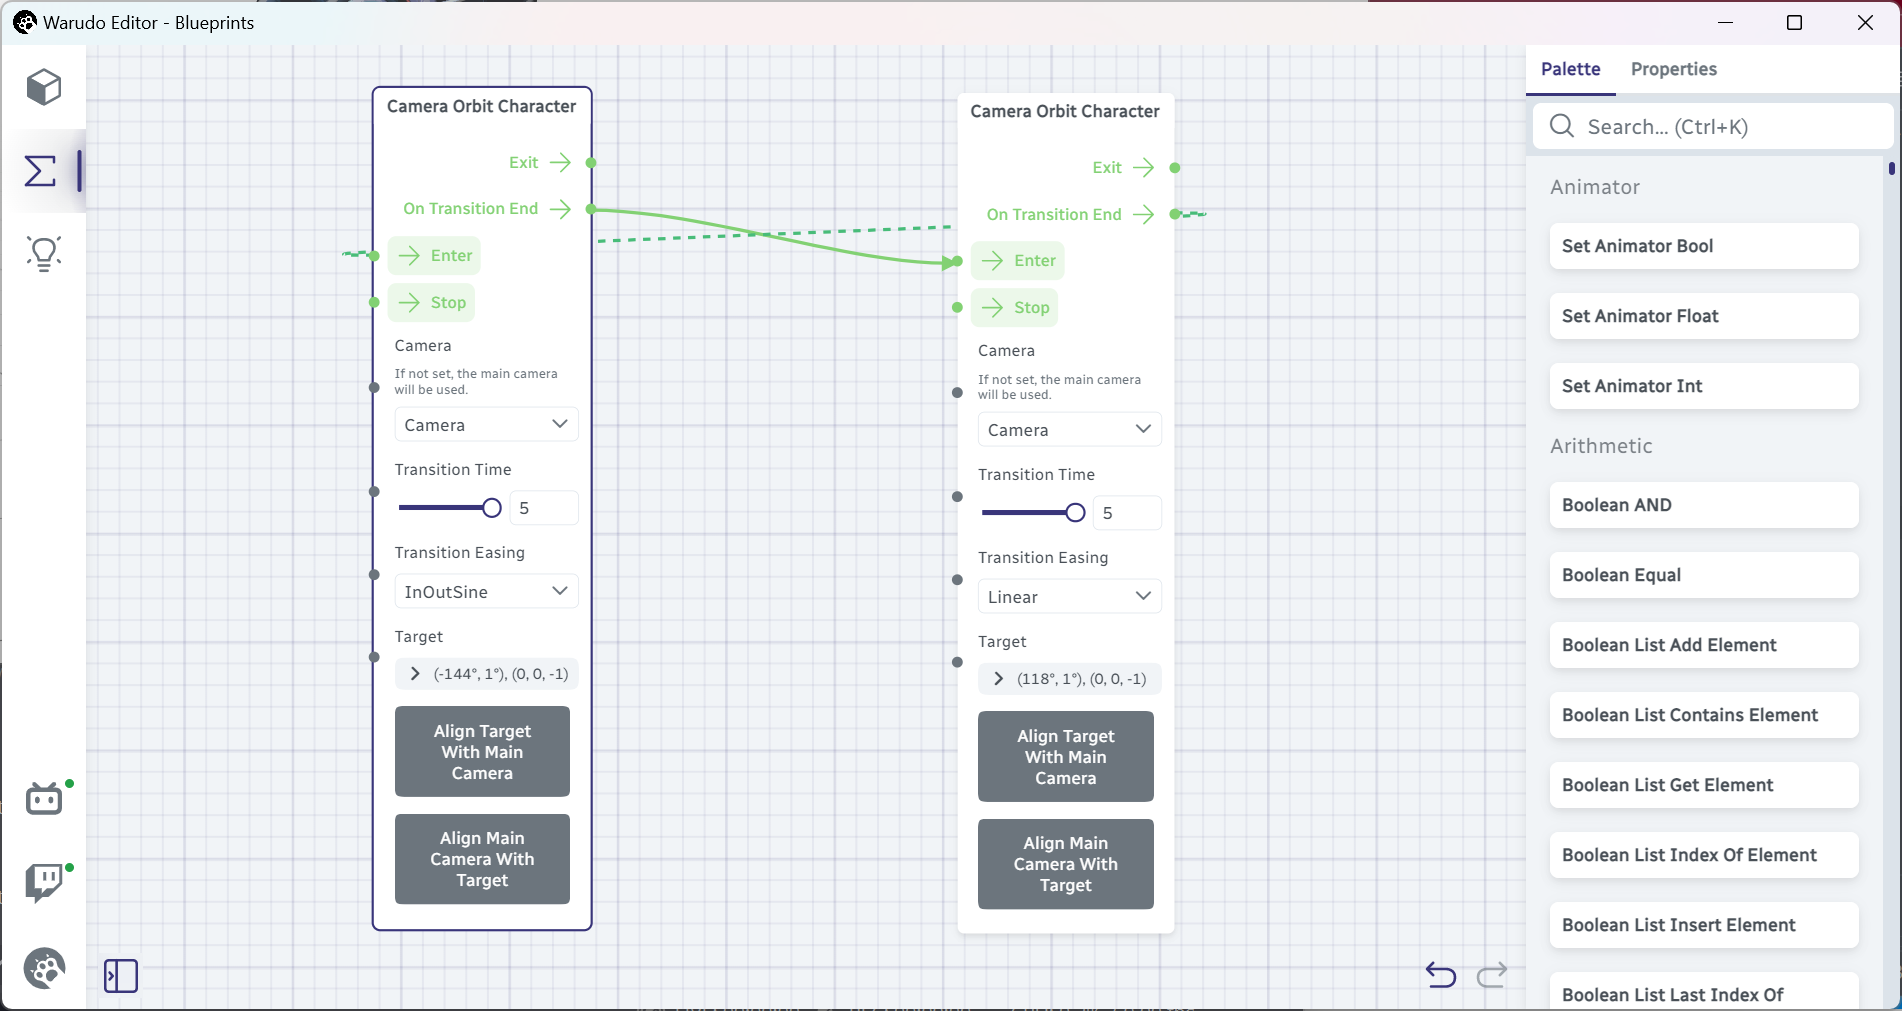
"That's easy," you say. "I can just connect the right Camera Orbit Character node's On Transition End to the left Camera Orbit Character node's Enter, and we are done!"
Well, not quite. If we try to do that:
An error message will pop up!
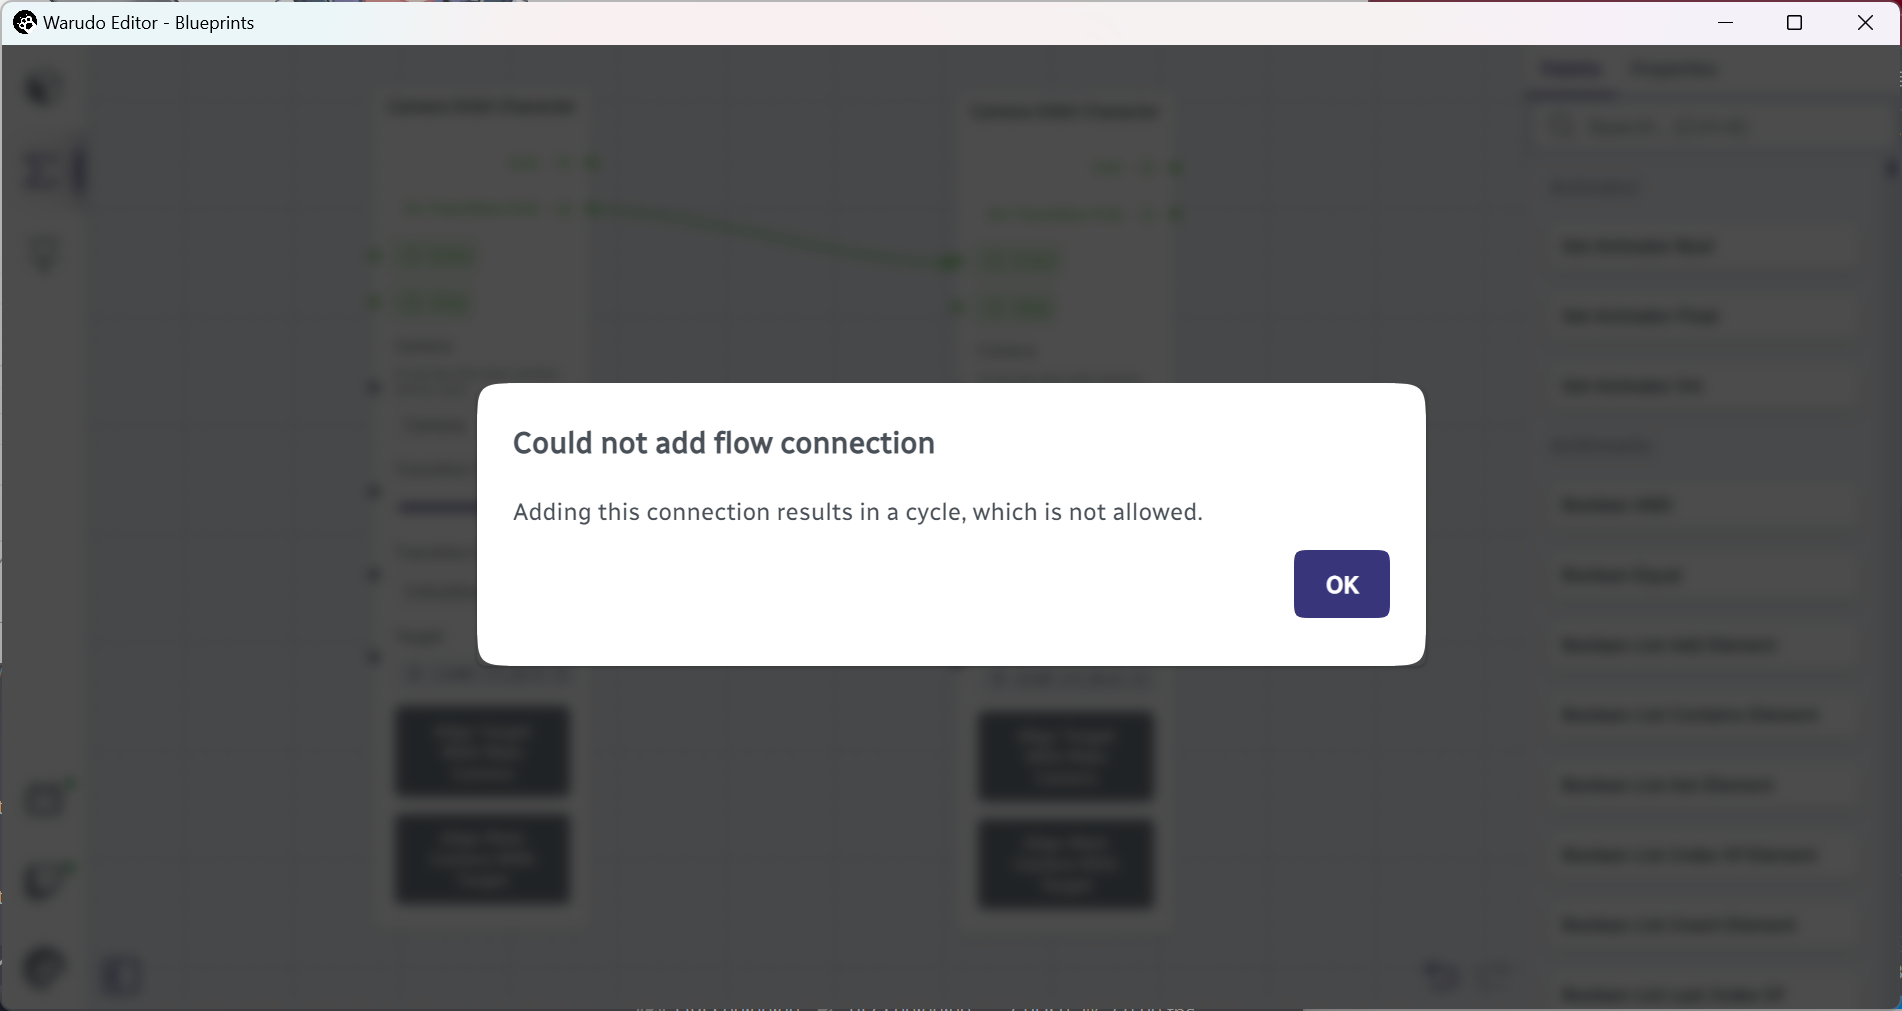
We could not add this connection because it would create a loop in the blueprint, which is not allowed. This is to prevent accidental infinite loops, which would cause Warudo to freeze.
To see what could happen if we allow loops, if both nodes have Transition Time set to 0, then the camera will move back and forth infinitely fast, causing Warudo to crash!
But there's a way to get around this, using functions. A function is essentially an entry point that you can trigger from anywhere in the blueprint, even from other blueprints. Let's learn this by example; go ahead and add a Define Function node to the left of the left Camera Orbit Character node, and set the function Name to AnimateCamera:
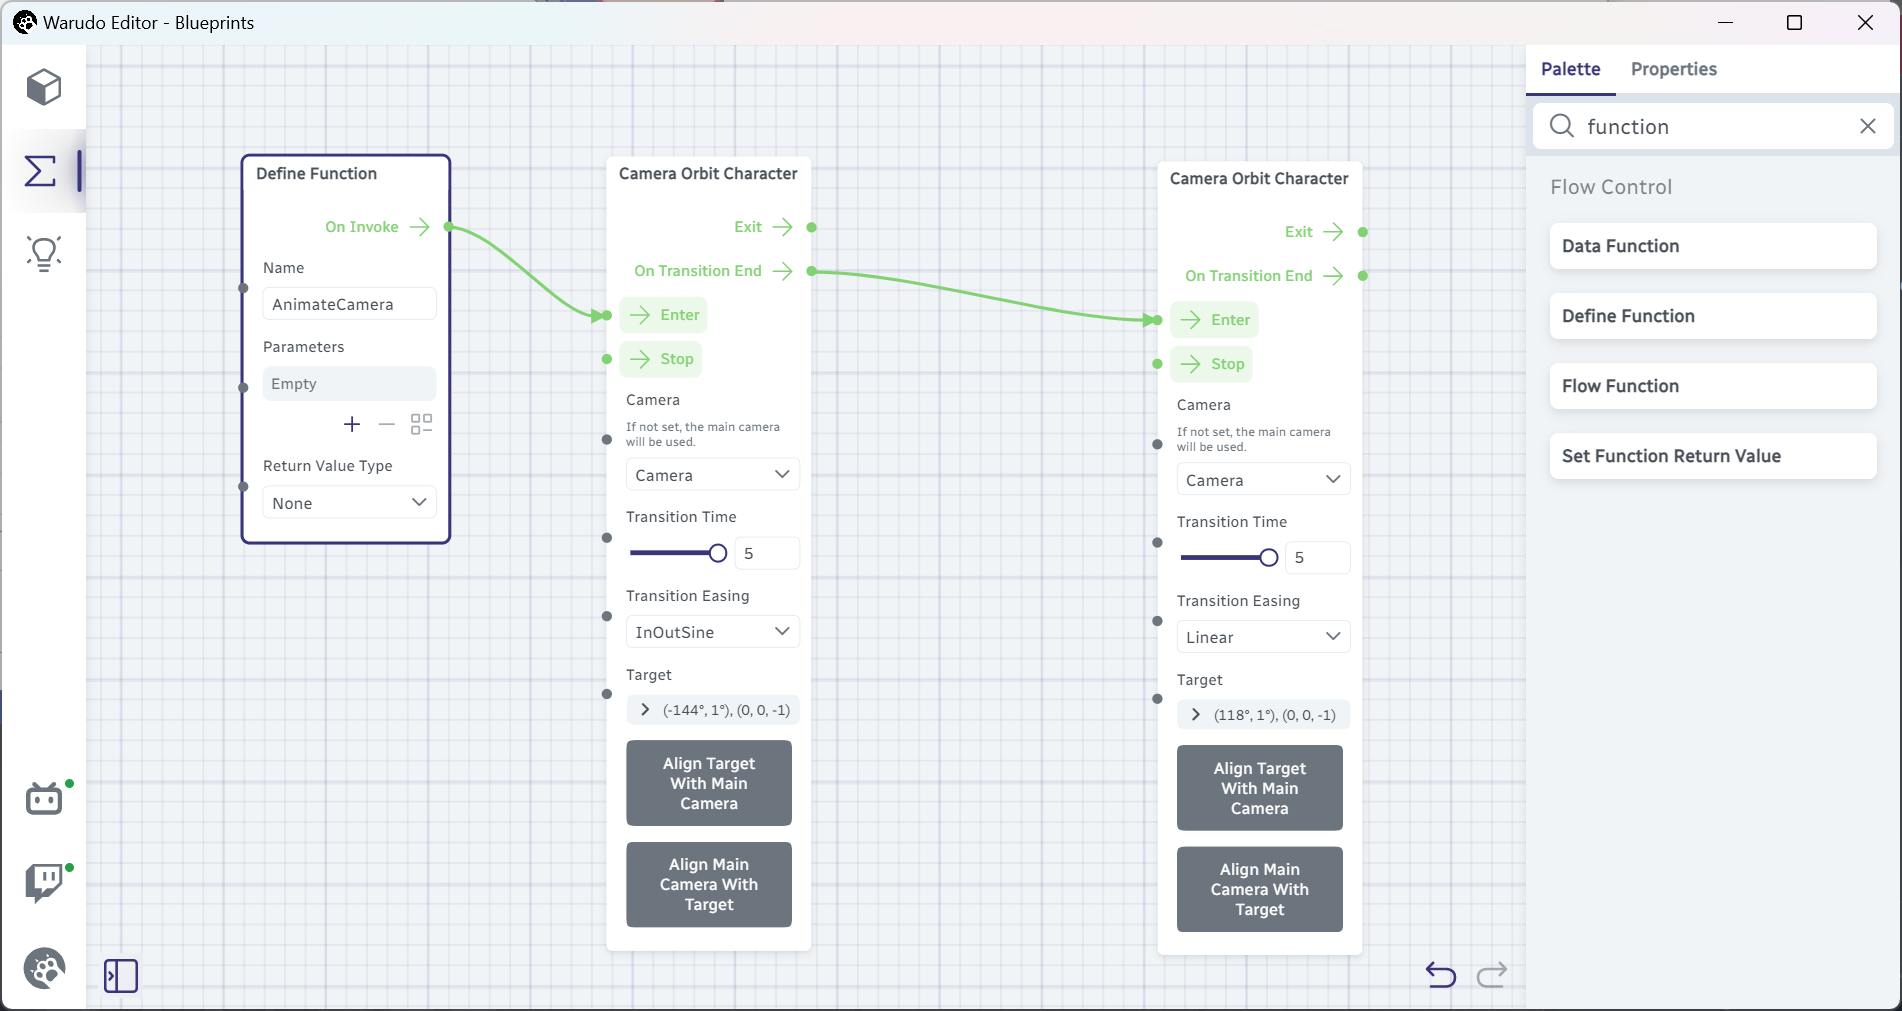
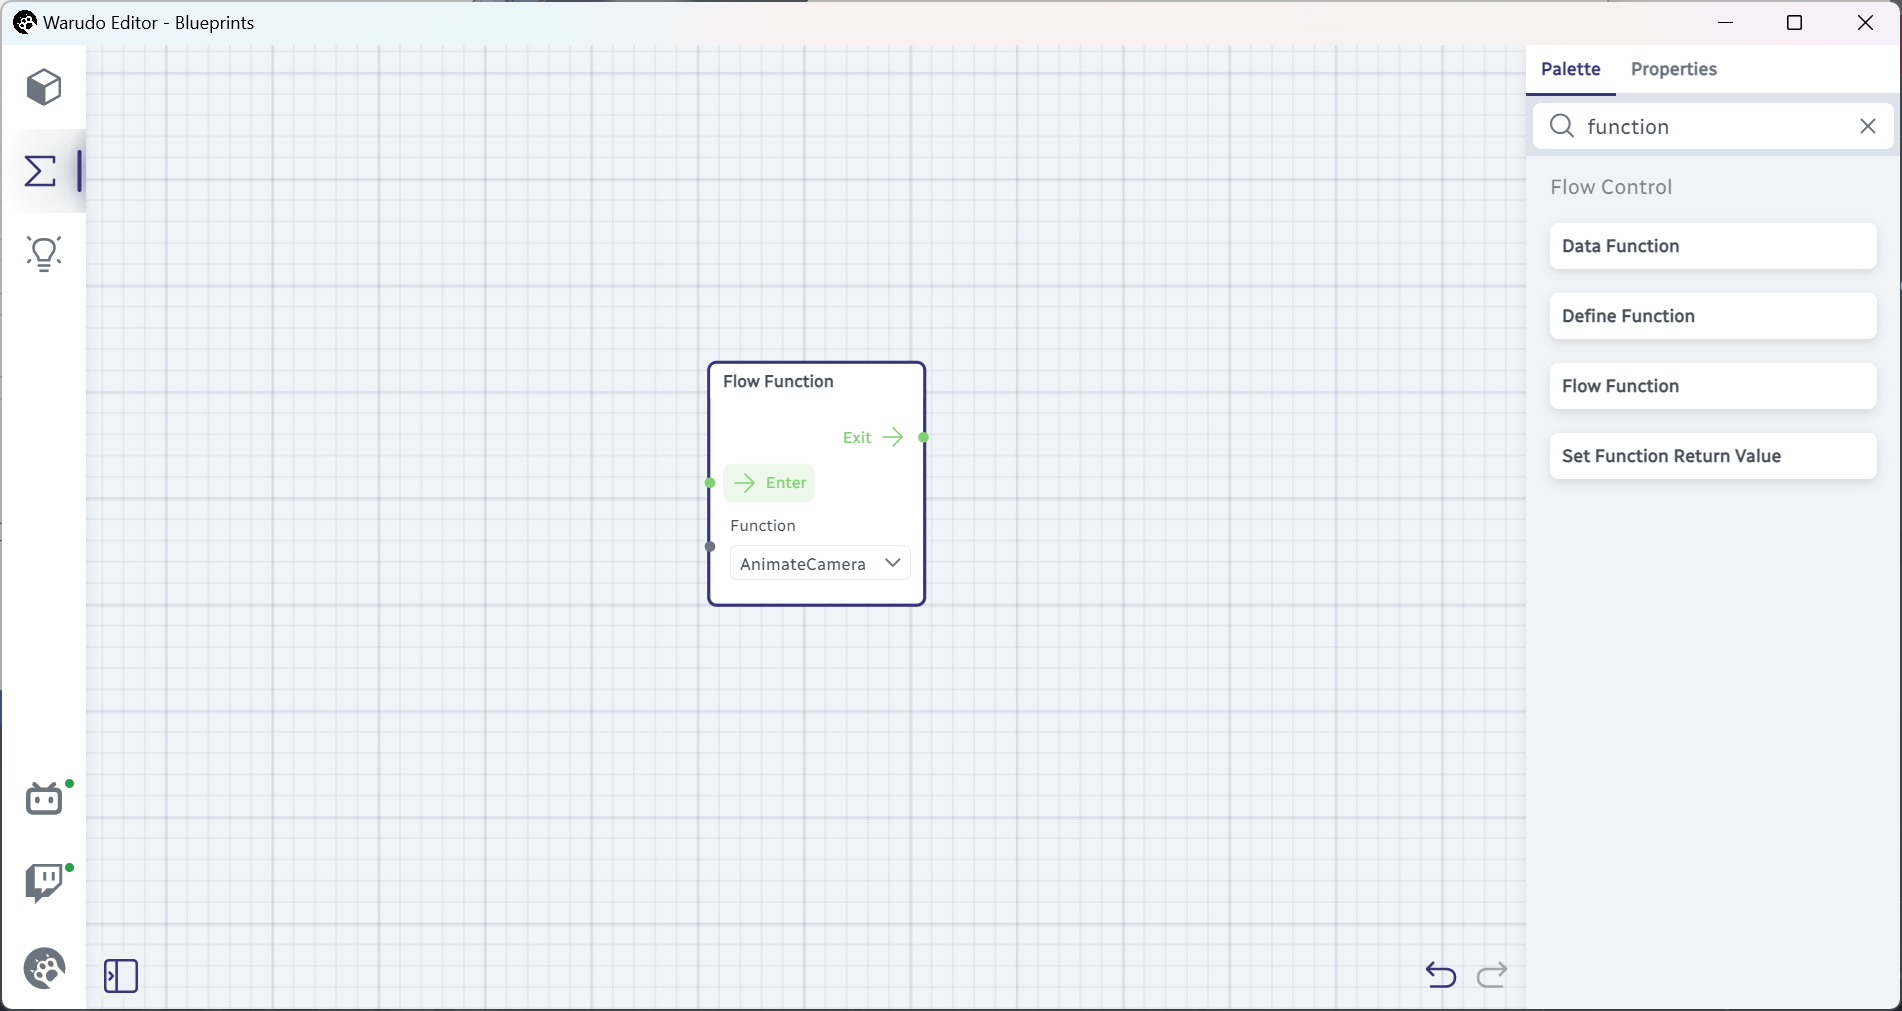
We have just defined a function! Whenever the AnimateCamera function is triggered, it will trigger the first Camera Orbit Character node. How do we trigger this AnimateCamera function, though? Using the Flow Function node! Add it to the node editor, select our function from the dropdown, and try clicking on the Enter flow input:
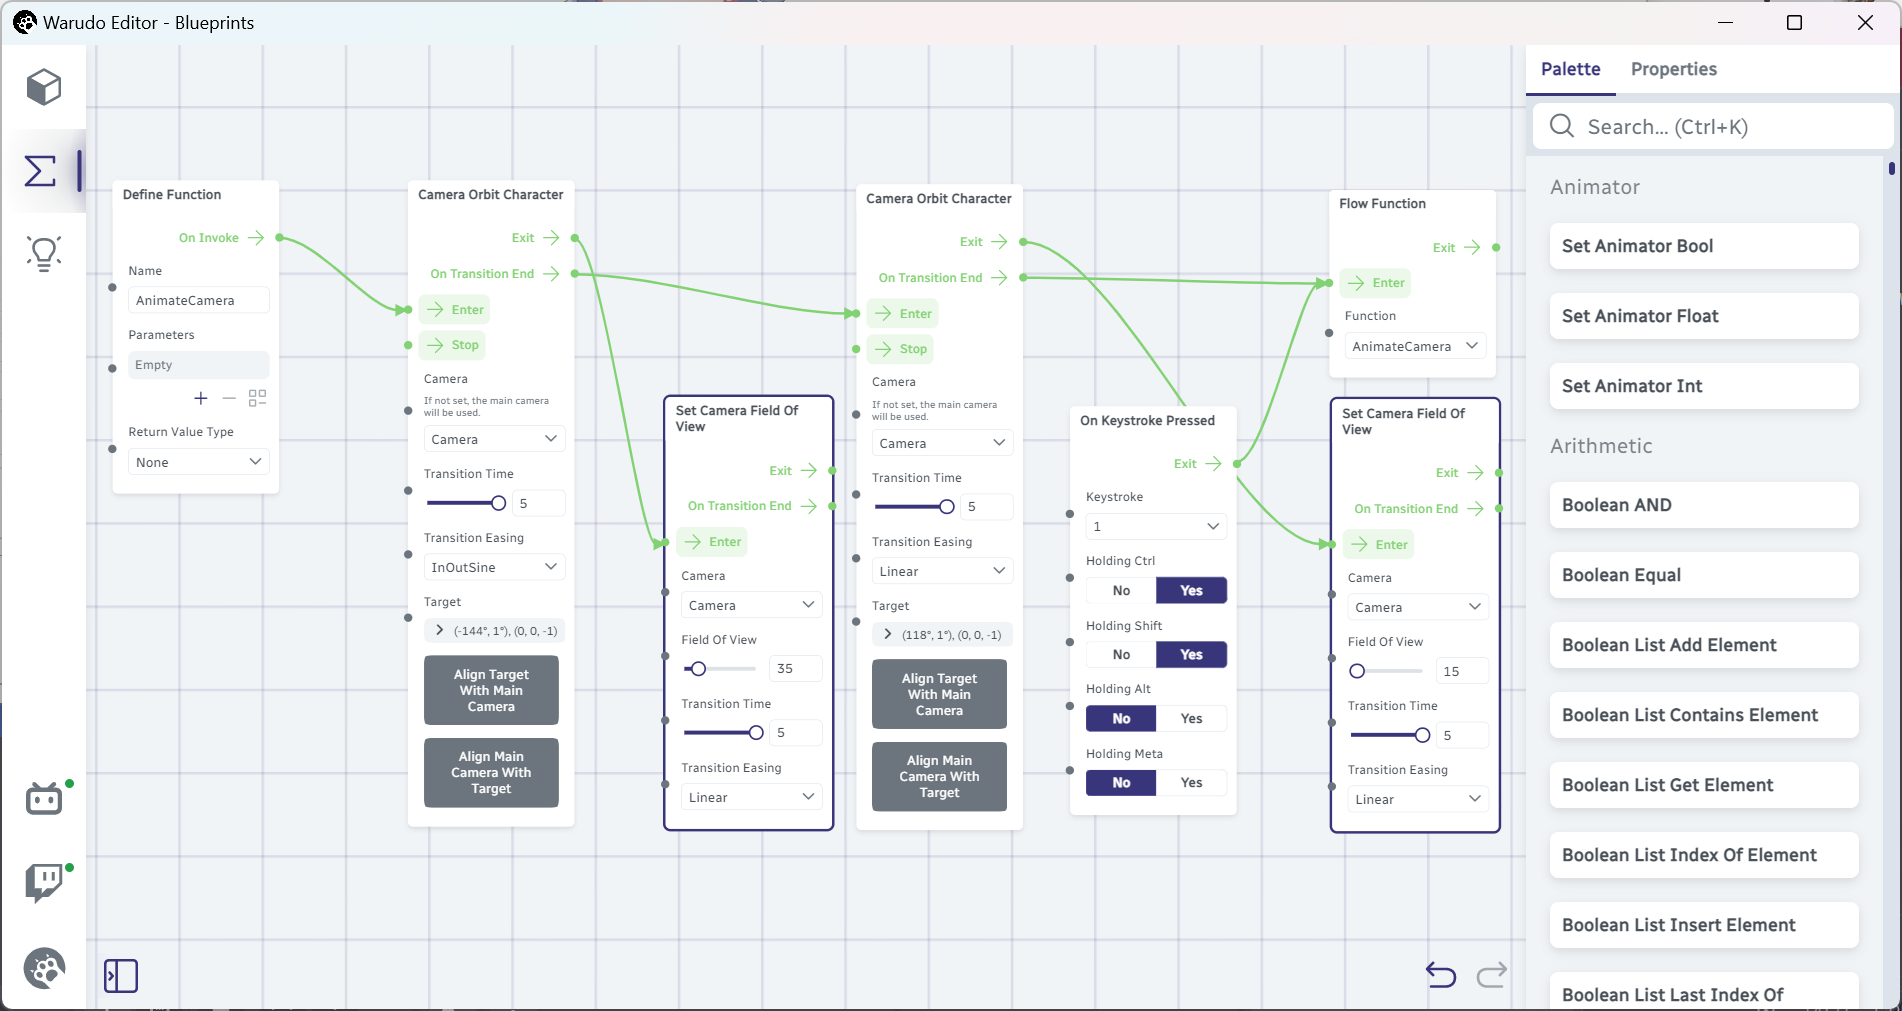
You should see the camera moves to the left side of your character, then automatically moves to the right side of your character. That means our function is working. Finally, let's trigger the function automatically when the right Camera Orbit Character node finishes moving. Connect Camera Orbit Character → On Transition End to Flow Function → Enter:

Now, when we click on Flow Function → Enter again, the camera starts moving to the left side of our character, then automatically moves to the right side of our character, then automatically moves to the left side of our character, and so on. That's exactly what we want!
Note that the camera animation generated by the Camera Orbit Character node is immediately stopped when we try to take over the camera control. To start the animation more conveniently, we can assign a hotkey to the AnimateCamera function:

Animating Other Camera Parameters
Besides the camera position and orientation, we can also animate other camera parameters, like the Field of View. For example, the below blueprint also starts a zooming animation when the camera starts moving:
Feel free to experiment with other camera nodes!
Animating a Free Look Camera
So far we have animated the camera under the Orbit Character control mode, but some cinematic camera movements don't orbit around the character, or you simply want the camera move between two fixed positions regardless of where the character is. In this case, you can use the Set Asset Transform node:
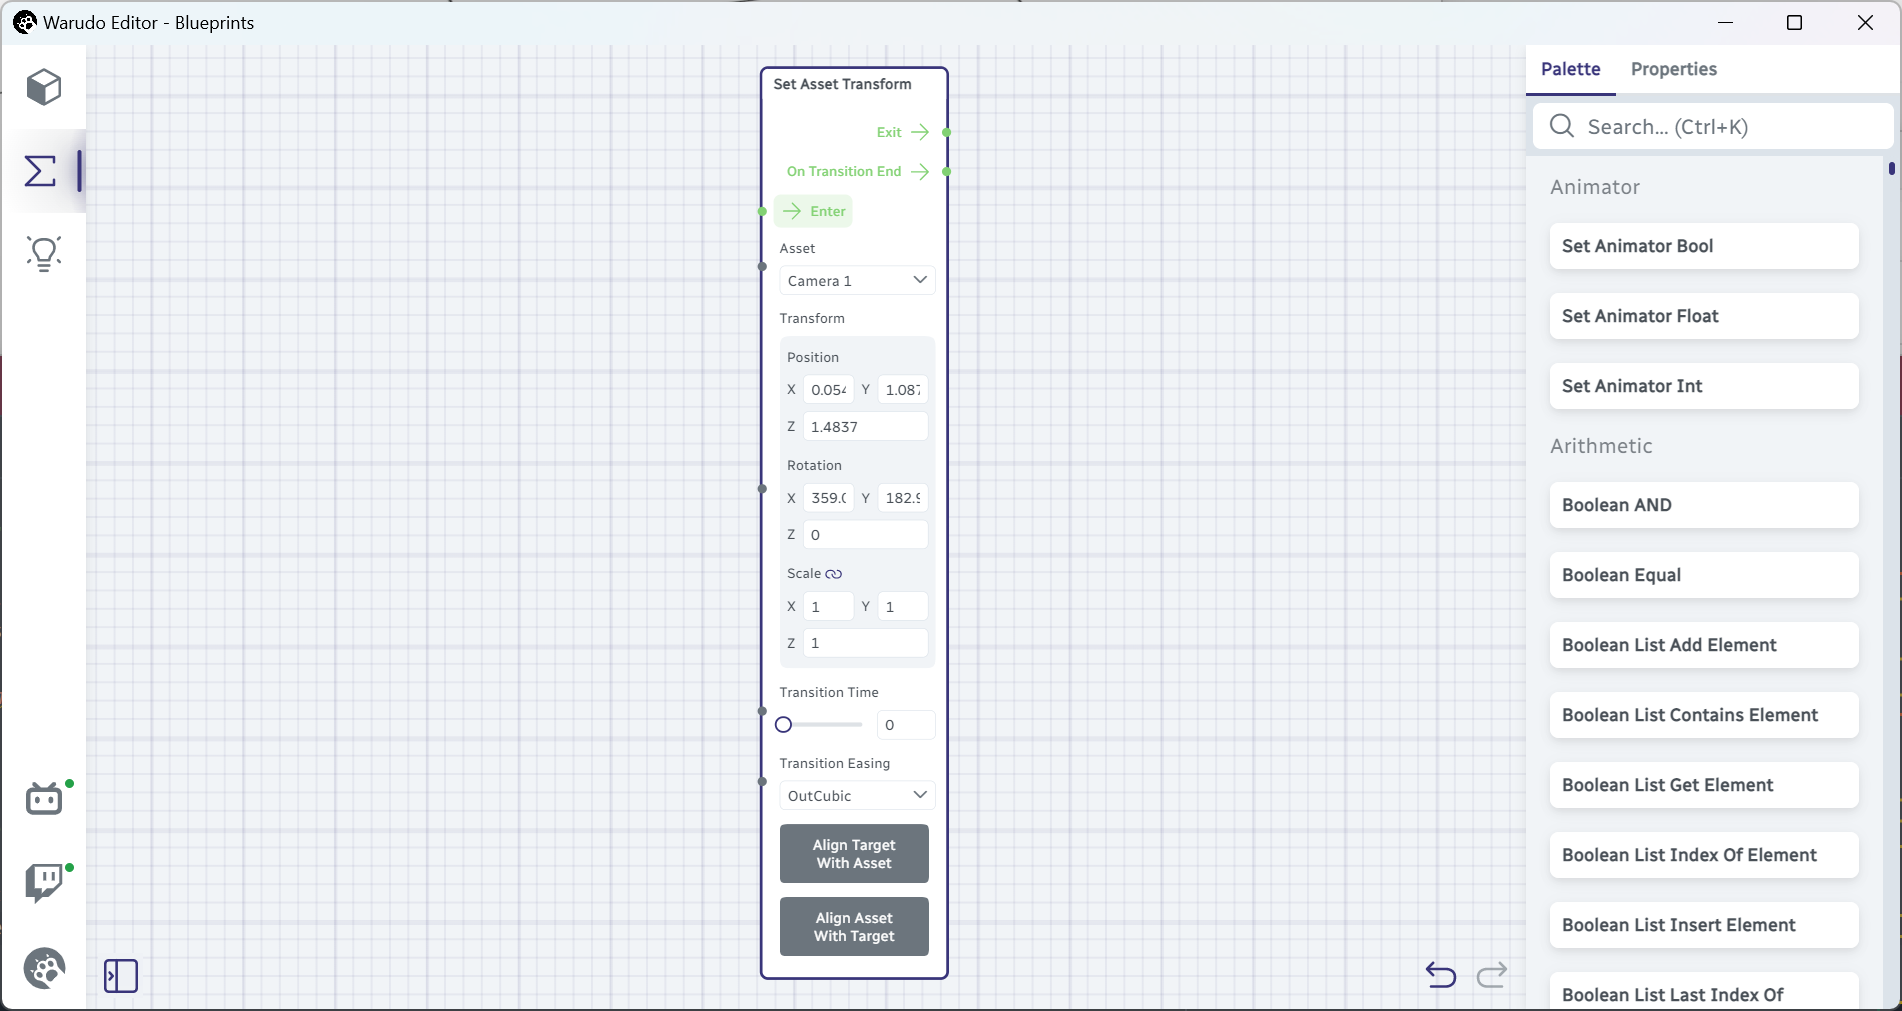
It works just like the Camera Orbit Character node, except that it records and replays the camera's parameters under the Free Look control mode. To record a target position and orientation, use the Align Target With Asset button.
Note the node is called Set Asset Transform, not Set Camera Transform. That means you can also use this node to move and animate other assets, such as props and characters!
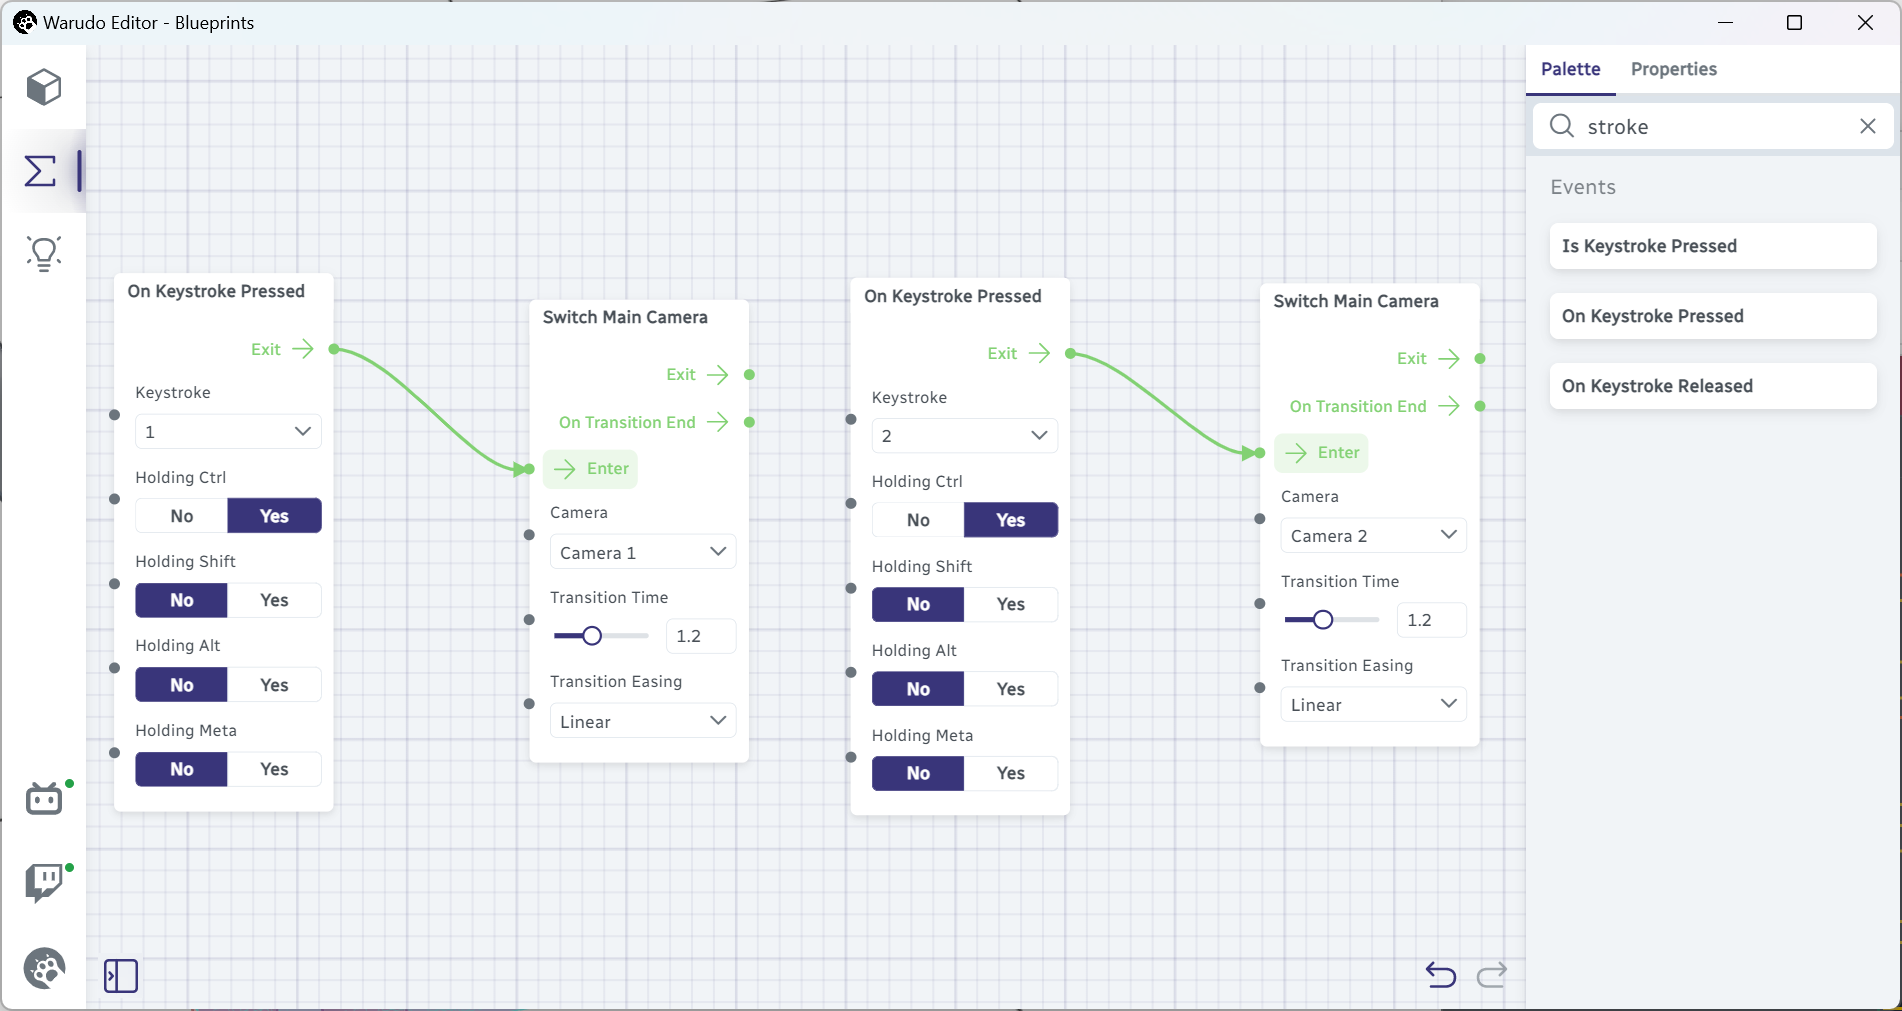
Toggling between Cameras
Did I mention there is a Switch Main Camera node? It does exactly what it says: it switches between two cameras with an optional fade transition. For example, the below blueprint switches between two cameras when I press Ctrl+1 and Ctrl+2:
Here's the result: