Environment Mod
Any Unity scene can be imported into Warudo as an environment mod!
Setup
Step 1: Prepare Scene
Set up your Unity scene as you like. Note that Post Processing Stack v2 is supported, so you can add post-processing effects to your scene.
We recommend you to optimize your scene, for example:
- Don't use too many high-poly models;
- Disable collision on models that don't need collision;
- If only a small part of the scene will be visible in your streams, disable or remove the rest of the scene if possible;
- Use as few realtime lights as possible, and use baked lights whenever possible.
Do not add more than one "Camera" resource in the scene, otherwise it will increase the performance load of the environment and may even cause errors.
Step 2: Bake Lighting (Optional)
We generally recommend to bake lighting in the scene, as it can significantly improve the visual quality and performance of your environment mod.
Currently, the baking of the "Standard" materials is not supported in the Unity's Built-in Render Pipeline (BiRP).
If you need to bake lightmaps, it is recommended to use other materials for best results.
Unity's Built-in Lightmapper
Most of the time, using Unity's built-in lightmapper is sufficient.
Note that Warudo uses directional lightmaps, so make sure Directional Mode is set to Directional in Windows → Rendering → Lighting:
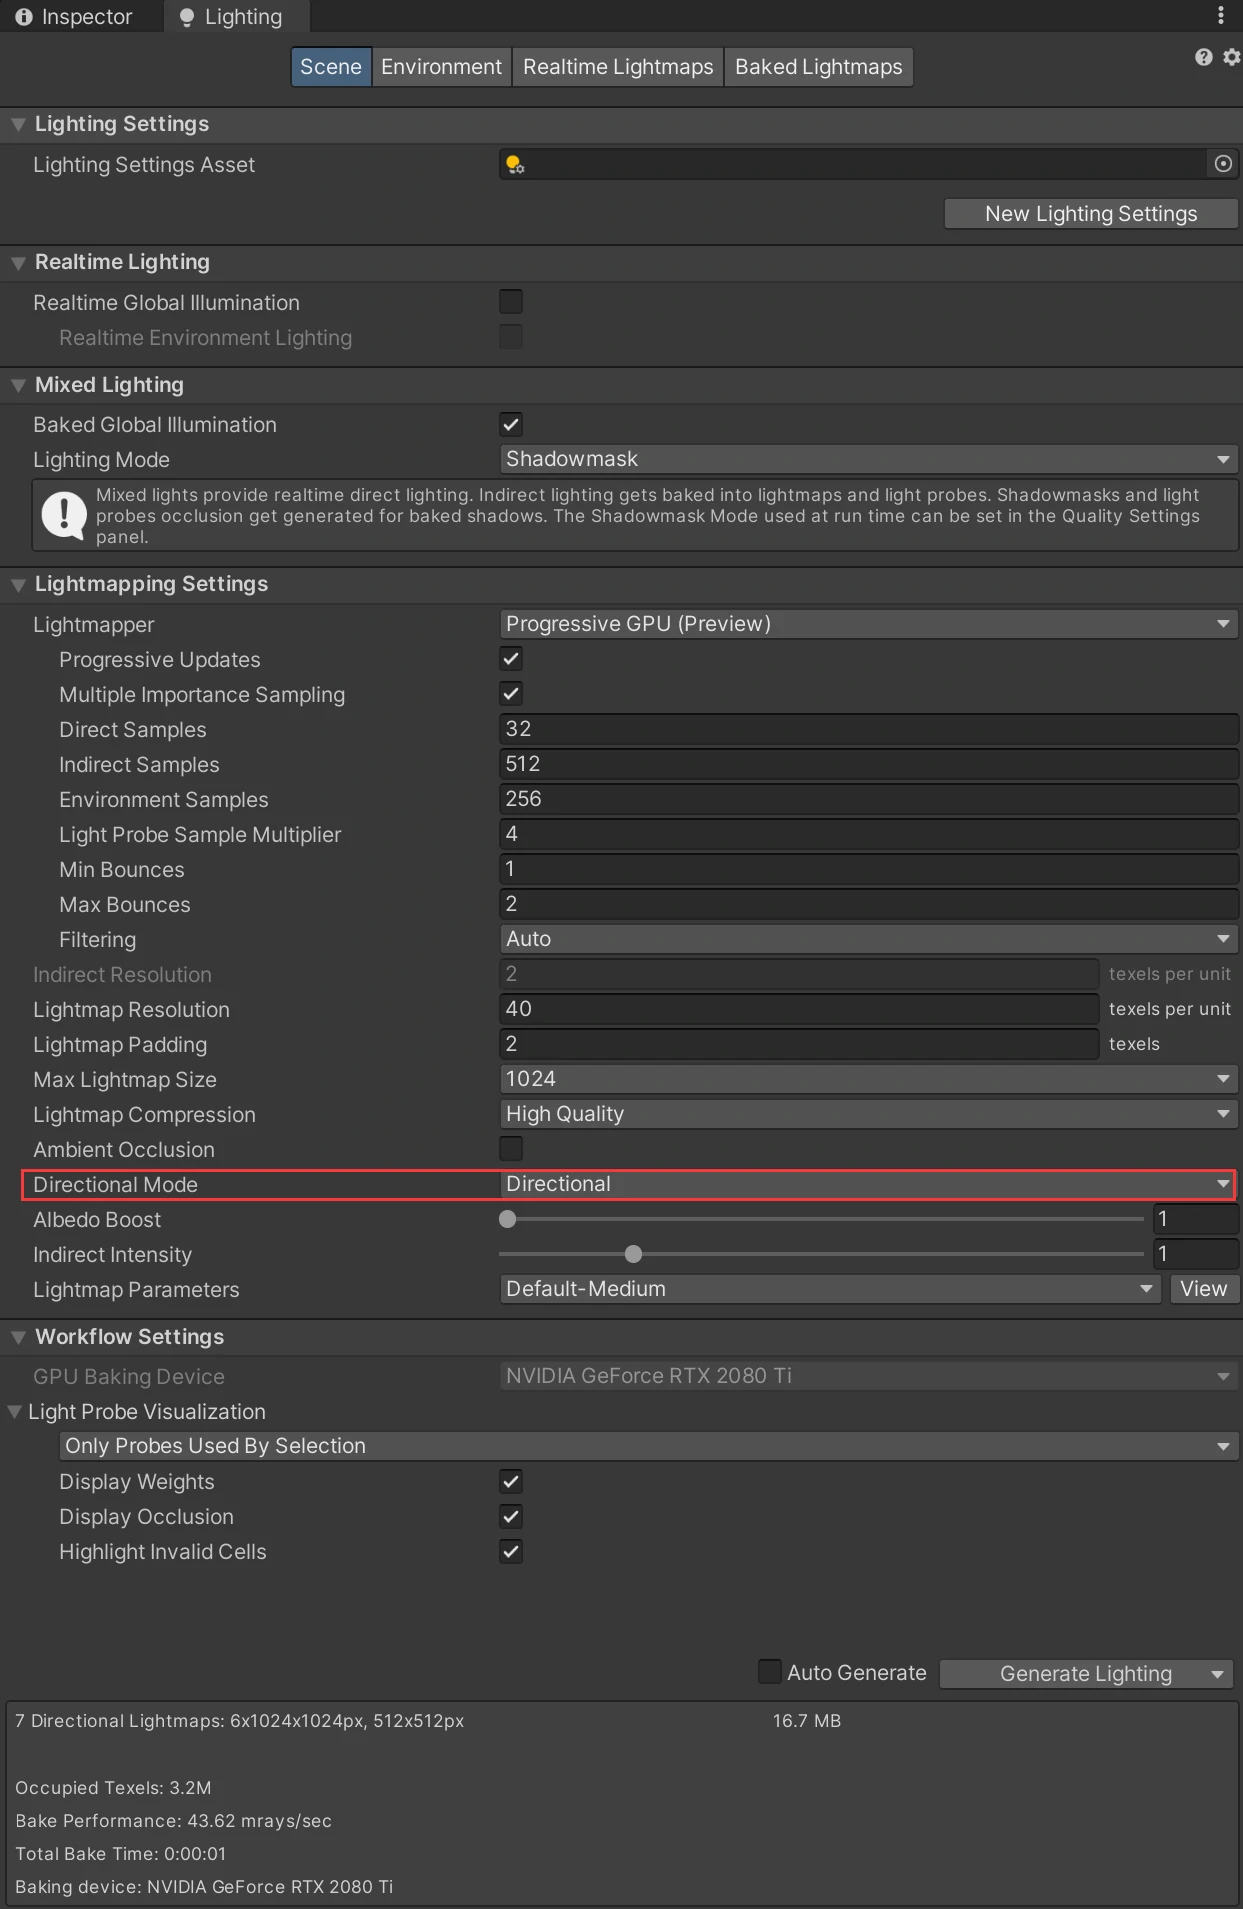
Otherwise, the lighting in the scene may be incorrect.
If the scene already has lightmaps baked, after switching the lightmapping directional mode, you need to click Generate Lighting to rebake the lightmaps.
Bakery
You can also use Bakery, a third-party lightmapper, as long as you bake directional lightmaps. For example, in Bakery, you can set Directional Mode to Dominant Direction or MonoSH.
To ensure Bakery works correctly with Warudo, please follow these steps:
- Copy the
Bakeryfolder into your mod folder (by default it should be at theAssetsroot); - In Bakery settings, check Use scene named output path. This makes sure Bakery lightmaps are stored in the mod folder. For Directional Mode, you should choose one that would generate directional lightmaps, such as Dominant Direction or MonoSH;
- Click Render to render the lightmaps. Then, click Render reflection probes if you want to bake reflection probes as well;
- Important: Go to
Bakery/_tempScenefolder and delete the_tempSceneUnity scene that was generated during baking.
Step 3: Add EnvironmentSettings Script
Open the Unity scene you want to export and add the EnvironmentSettings script (included in Warudo SDK) to a new GameObject or any existing GameObject. Click the Copy from current environment settings button. This script stores Unity's environment settings so that skybox, shadow color, etc. are exported to the environment mod.
Step 4: Rename Scene
Name the scene "Environment" and make sure the scene is placed in the mod folder (can be placed in any subfolder).
Step 5: Export Mod
Select Warudo → Build Mod and make sure the generated .warudo file is put into the Environments data folder.
Troubleshooting
Creating an environment mod is definitely trickier than creating other types of mods, so if you notice the environment in Warudo does not look like the one in your editor, you can go through this checklist to see if you missed anything:
- Did you place the
EnvironmentSettingsscript on a GameObject in the scene? - Did you make sure the scene is named "Environment"?
- Did you make sure all the materials, shaders, etc. are included in the mod folder?
- If you use baked lighting, did you make sure the lightmaps and the
LightingSettingsasset are included in the mod folder? - If you use baked lighting, did you make sure there is only one set of lightmaps and
LightingSettingsasset in the mod folder?
Some users have reported that having multiple sets of lightmaps and LightingSettings assets can cause issues, even if they are outside the mod folder. Try deleting all except one set of lightmaps and LightingSettings asset if everything else fails.
- If you use baked lighting, was the lightmap directional mode set to Directional? (Or Dominant Direction / MonoSH if you use Bakery)
- Did you have more than one Unity scene in the mod folder? If so, please delete the other scenes. (There may be scenes inside subfolders, so make sure to check all your subfolders!)
- Did your scene have prefabs with unapplied changes? If so, please apply the changes. If you see the vertical lines (which means the changes could not be fully applied), right click on them and select Prefab → Unpack Completely to unpack the prefabs, and export the mod again.

Authors