Customizing Face Tracking
Blueprint Customization
During the onboarding process, you can click Customize Face Tracking... to customize the tracking blueprint.
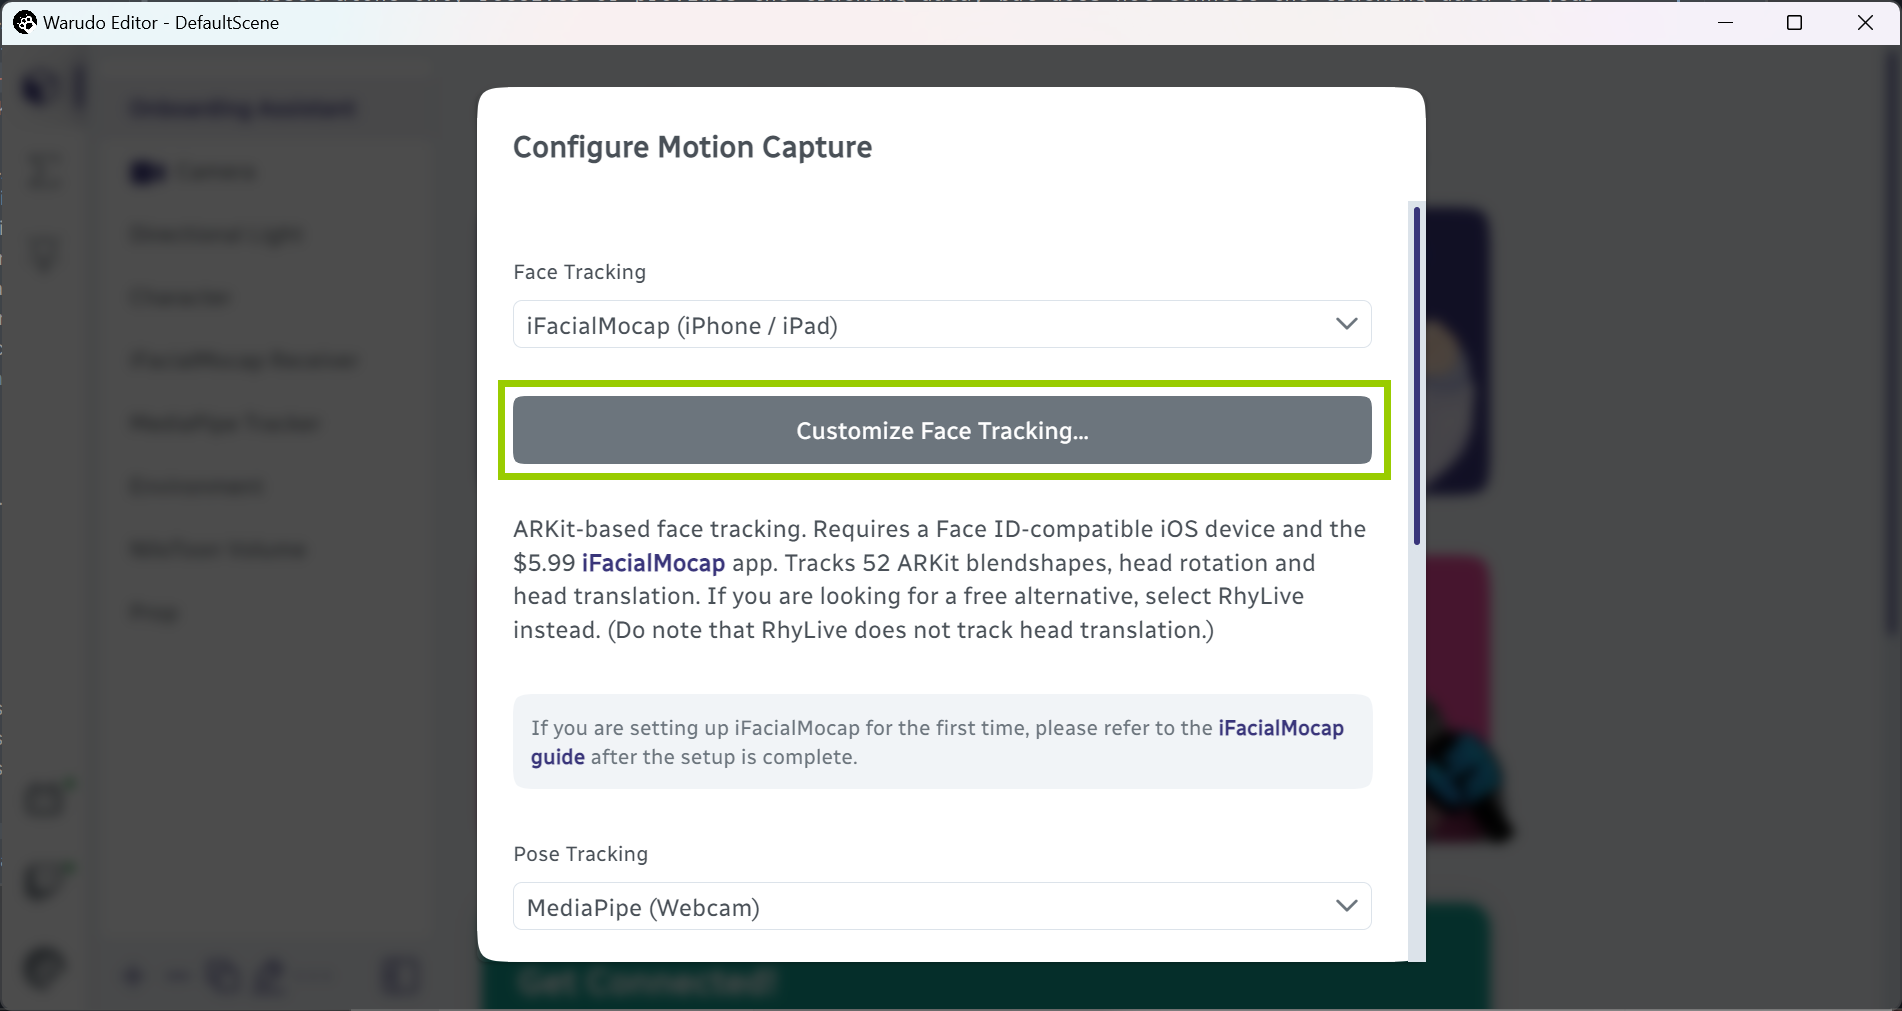
Customizing face tracking.
The following options are available:
- BlendShape Mapping: Select the blendshape mapping that matches your model. For example, if your model has "Perfect Sync"/ARKit blendshapes, select ARKit; if your model is converted from a MMD model, select MikuMikuDance; otherwise, select VRM. By default, Warudo will try to automatically detect the blendshape mapping, but you can override it here.
- Enable Head and Body Movements: If enabled, Warudo will move your character's head and body according to the tracking data. If disabled, only the face (blendshapes and eye bones) will be animated. This is automatically set to No by the onboarding assistant if you use a full-body pose tracking system that already tracks the head and body.
- Idle Head Animation (Auto Blinking / Auto Eye Movements / Auto Head Movements): If enabled, Warudo will add subtle head motion, eye movement, and blinking to your character.
- Look At: If enabled, your character will look at a target (default to the camera) when you look forward. This helps your character / you maintain eye contact with the audience regardless of the camera position, while still allowing your character / you to look around freely.
- Lip Sync: If enabled, Warudo will animate your character's mouth based on your speech. You can choose to enable lip sync only when tracking is lost, or always enable it.
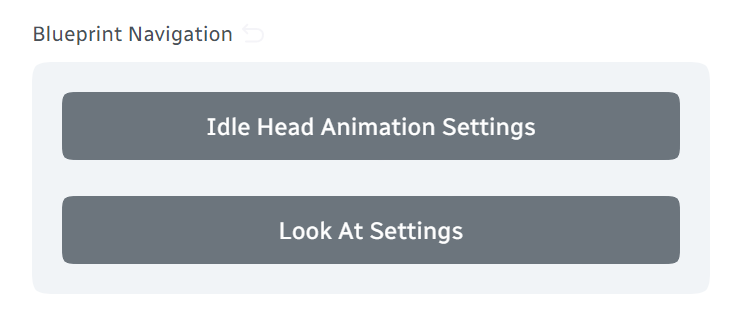
These options above affect the generated blueprint; therefore, to change these options after the setup, you need to re-run the setup, or manually modify the face tracking blueprint. Character → Motion Capture → Blueprint Navigation provides shortcuts to the specific parts of the blueprint that you may want to modify:
Tracker Customization
After onboarding, you can go to the corresponding face tracking asset (e.g., iFacialMocap Receiver, MediaPipe Tracker) to customize the tracking data itself. The following options are available:
- Mirrored Tracking: If enabled, Warudo will mirror the tracking data.
- BlendShape Sensitivity: Adjust the sensitivity of the character's facial expressions. If your expressions are too subtle, increase the sensitivity; if your expressions are too exaggerated, decrease the sensitivity.
- Configure BlendShapes Mapping: Adjust each individual blendshape's threshold and sensitivity. This is useful if you want to disable certain blendshapes, or if you want to adjust the sensitivity of each blendshape individually.
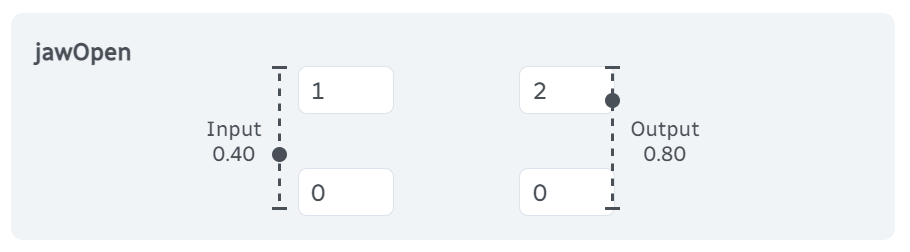 The left two values are the range of the input blendshape value from the tracker, and the right two values are the range of the output blendshape value to the character. For example, if the input range is 0-1 and the output range is 0-2, then when the input blendshape value is 0.40, the output blendshape value will be 0.80.
- To disable a blendshape, set the top right value to 0.
- To make a blendshape more sensitive, increase the top right value; to make a blendshape less sensitive, decrease the top right value.
- To trigger a blendshape at a higher threshold (e.g., your character mouth is already slightly opened but your mouth is still closed), increase the bottom right value. To trigger a blendshape at a lower threshold, decrease the bottom right value.
- Head Movement/Rotation Intensity: Adjust the intensity of the head movement/rotation.
- Body Movement Intensity: Adjust the intensity of the automatic body movement due to head movement.
- Body Rotation Type: Makes the body rotate naturally when the head rotates. When set to None, the body will not rotate when the head rotates. When set to Normal, the body rotates in the same direction as the head. When set to Inverted, the body rotates in the same direction as the head on the X and Y axes, but in the opposite direction on the Z axis. You can also set Body Rotation Type to Custom, which allows you to customize both the direction and magnitude of each rotation axis.
- Eye Movement Intensity: Adjust the intensity of the pupil movement.
- Eye Blink Sensitivity: Adjust the sensitivity of the eye blink; this is a shortcut for adjusting the sensitivity of the eye blink blendshape in Configure BlendShapes Mapping.
- Linked Eye Blinking: If enabled, force both eyes to blink at the same time. Useful if your tracking is not accurate enough to blink each eye individually.
- Use Bones/BlendShapes for Eye Movement: Whether to use eye bones or blendshapes for eye movement. If your model has eye bones, it is recommended to use eye bones, as they are more accurate and allow for IK. There are two cases where you may want to enable Use BlendShapes For Eye Movement:
- Your model does not have eye bones.
- Your model's eye blendshapes are supplementary to the eye bones, i.e., the eye blendshapes change the shape of the eyes, in addition to the eye bones moving the pupils. (Your modeler should be able to tell you whether this is the case.)
Frequently Asked Questions
When I move my head, my character's body also moves. How do I disable this?
This is caused by the Body Movement Intensity option in the motion capture receiver asset. Set it to 0 to disable body movement.
How do I enable lip sync?
During the onboarding process, you can enable lip sync by clicking Customize Face Tracking... and enabling Lip Sync.
You can adjust lip sync settings after onboarding by clicking Character → Motion Capture → Blueprint Navigation → Lip Sync Settings.
My model's mouth is slightly open even when my mouth is closed.
This is usually caused by applying ARKit tracking on a non-ARKit-compatible model. To fix this, you can either:
- Add "Perfect Sync" / ARKit blendshapes to your model. This is recommended since ARKit-based face tracking is much more expressive, and you already have the tracking data.
- Click Configure BlendShapes Mapping in the tracker asset, and increase the threshold (i.e., set the bottom right value to a negative number like
-0.25) of the ARKit mouth blendshapesjawOpen,mouthFunnel,mouthPucker.
My body rotates in the opposite direction when I turn my head.
By default, Body Rotation Type is set to Inverted to mimic Live2D models and achieve a more anime look. If you want to disable this, set Body Rotation Type to Normal or None.
Authors