Grabbing the Tail
Does your character have a tail? If so, this tutorial is for you! In this tutorial, we will make our character grab their tail when we press a hotkey.
Gonna grab that tail!
If your character doesn't have a tail, that's fine too! You can read the tutorial anyway and learn how to use the Set Asset Property and Invoke Asset Trigger nodes.
Tail IK
Before we start working on the blueprint, let's set up our scene first! First, create an Anchor asset and attach it to the character's right hand:
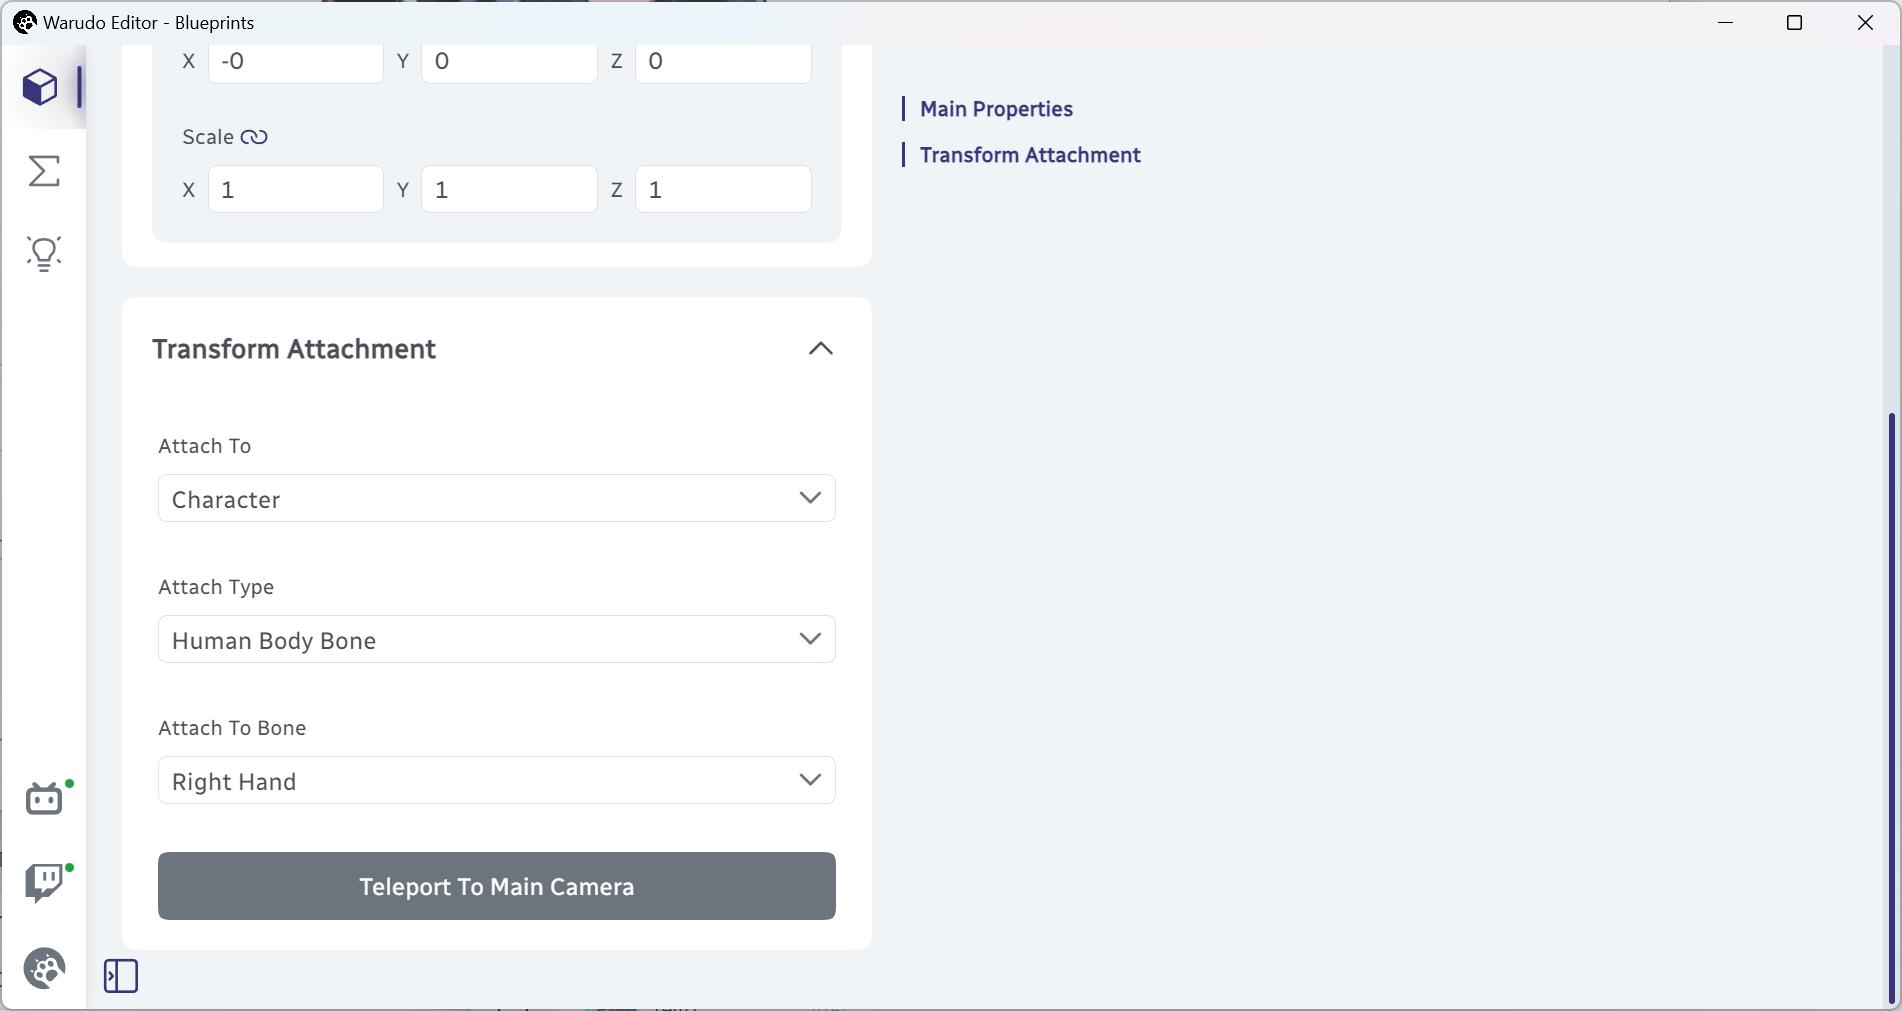
This will be helpful later when we want to point the tail to our character's right hand.
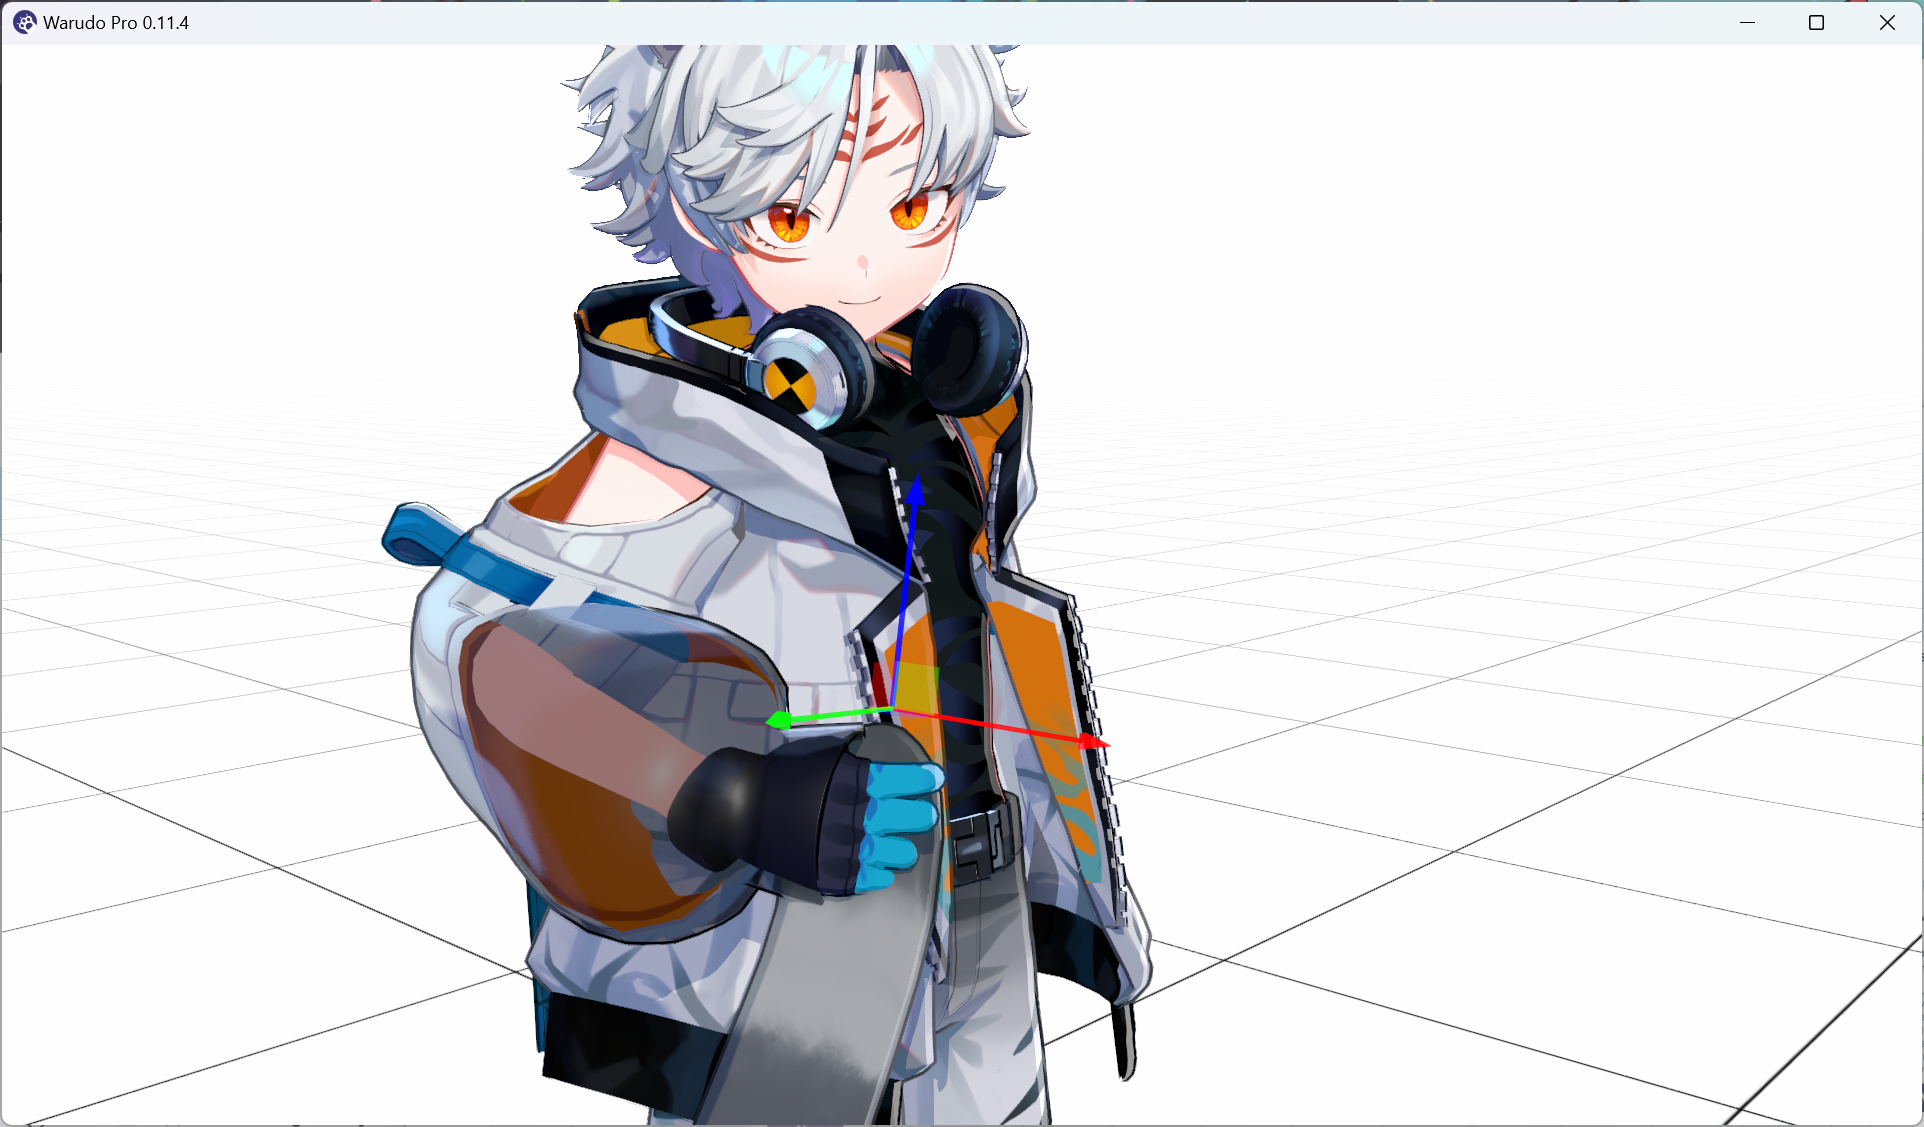
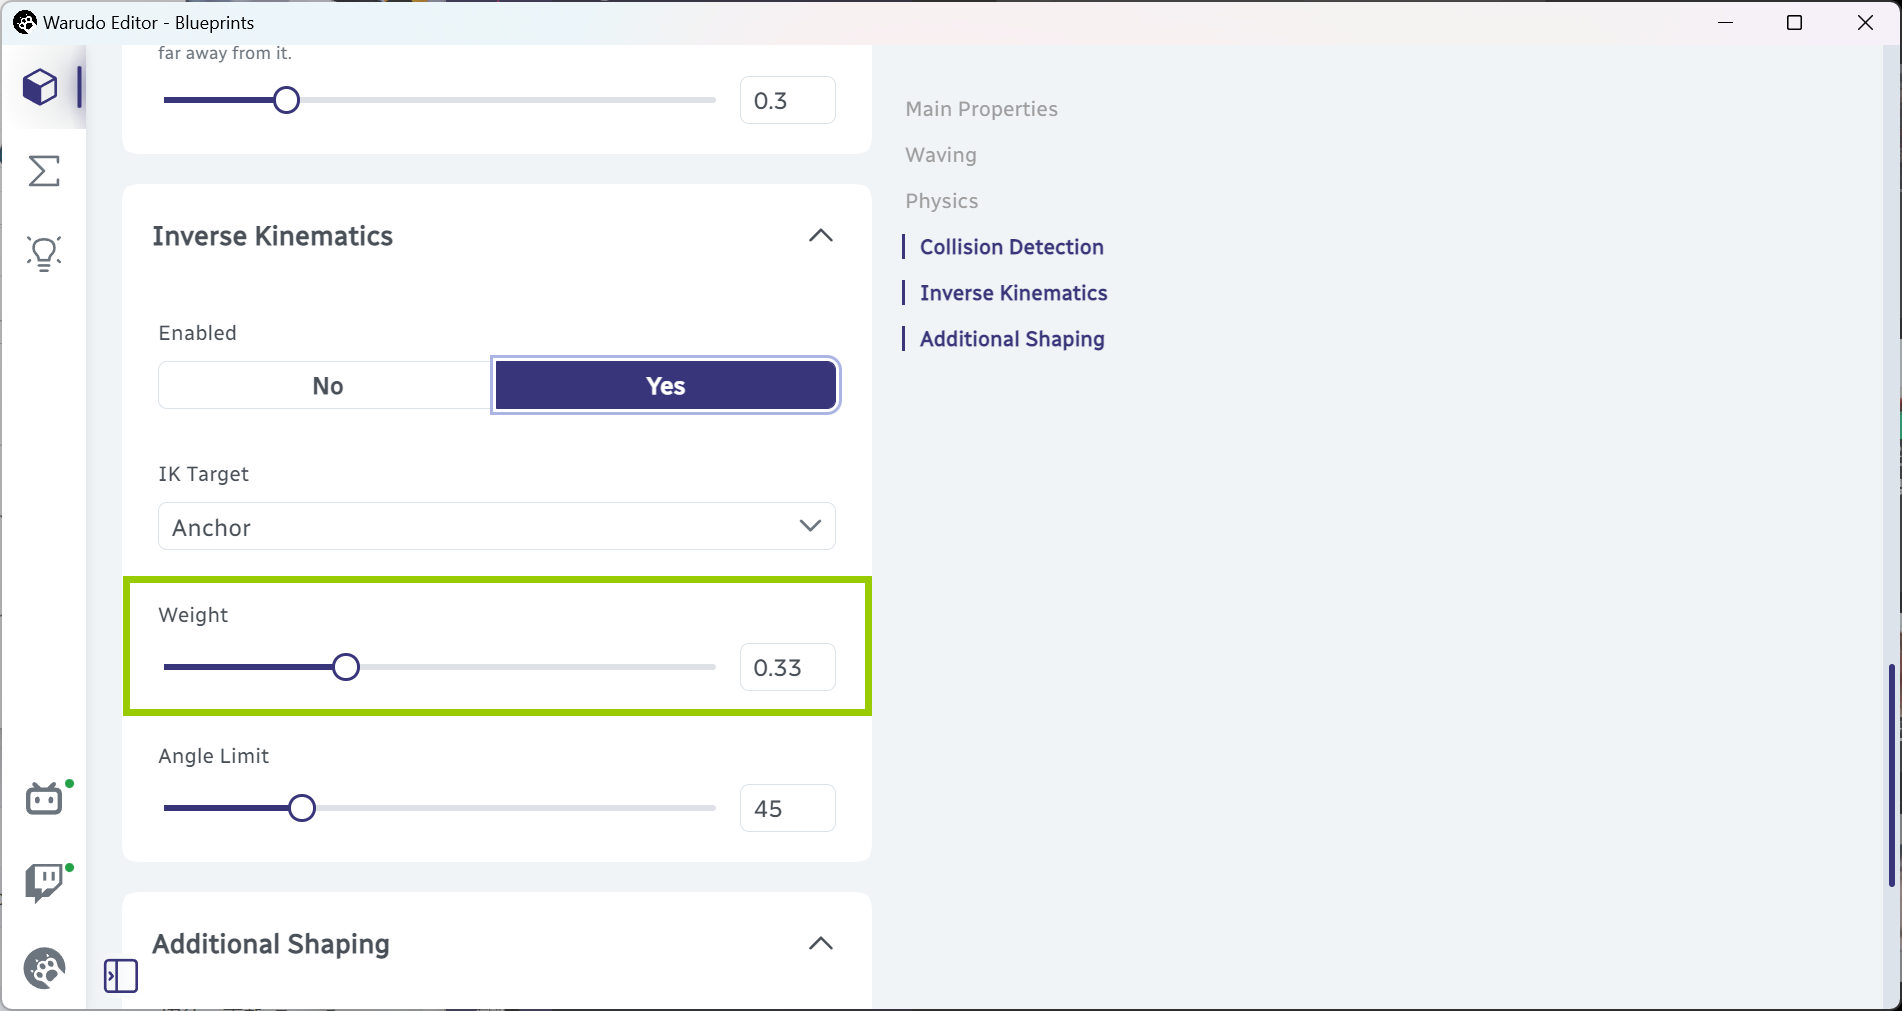
Next, create a Tail asset and set it up on your character. In the Inverse Kinematics section, set Enabled to Yes, and set IK Target to the anchor we just created:

If you have already created a tail, notice that you need to disable waving and additional shaping for this tutorial.
This sets up the tail to use inverse kinematics (IK) to point to the anchor. In other words, the tail will always try to reach our character's right hand, like this:
Set Asset Property
Currently, to toggle between grabbing and not grabbing the tail, we need to manually turn on/off Tail → Inverse Kinematics → Enabled.

Is there a way to do this in a blueprint? The bad news is, there isn't a node called "Toggle Tail IK" or anything like that. The good news is, the powerful and versatile Set Asset Property node can do exactly what we want!
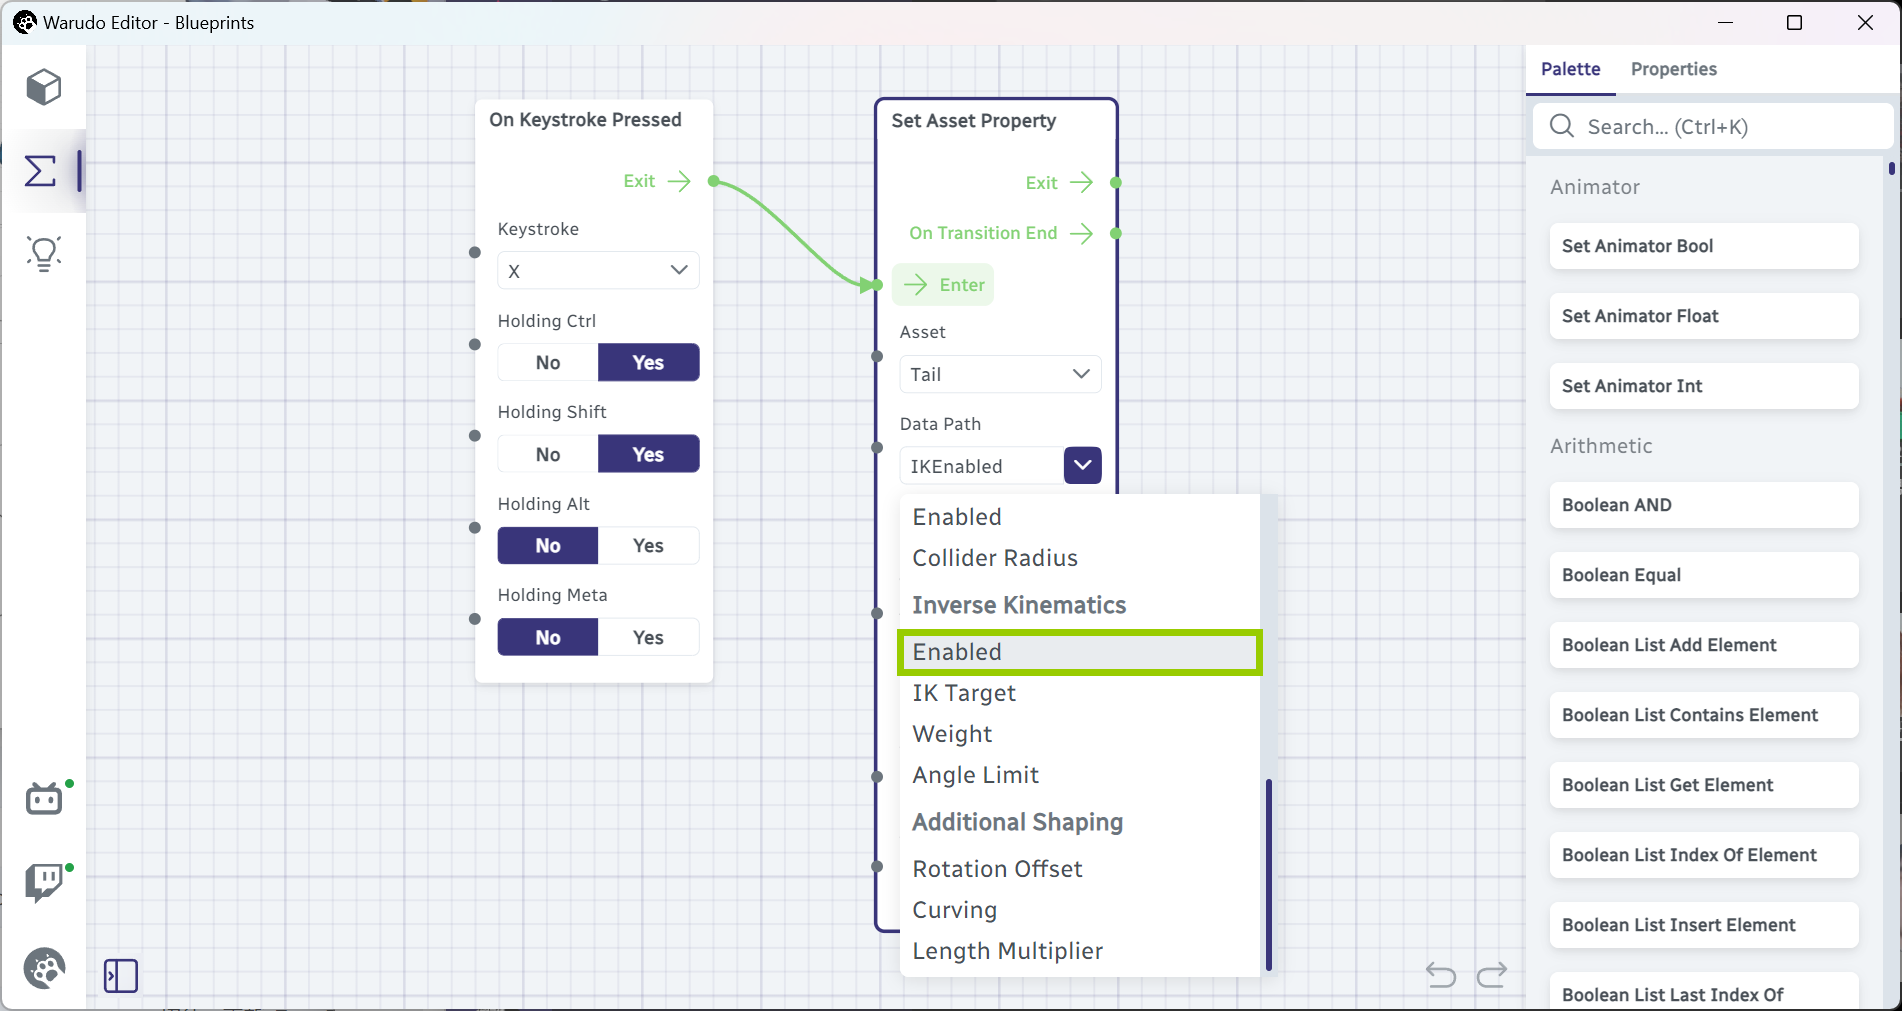
Just like its name suggests, the Set Asset Property node sets a property (option) of an asset. We can simply select the Inverse Kinematics → Enabled property from the Data Path dropdown after selecting the tail asset from the Asset dropdown:
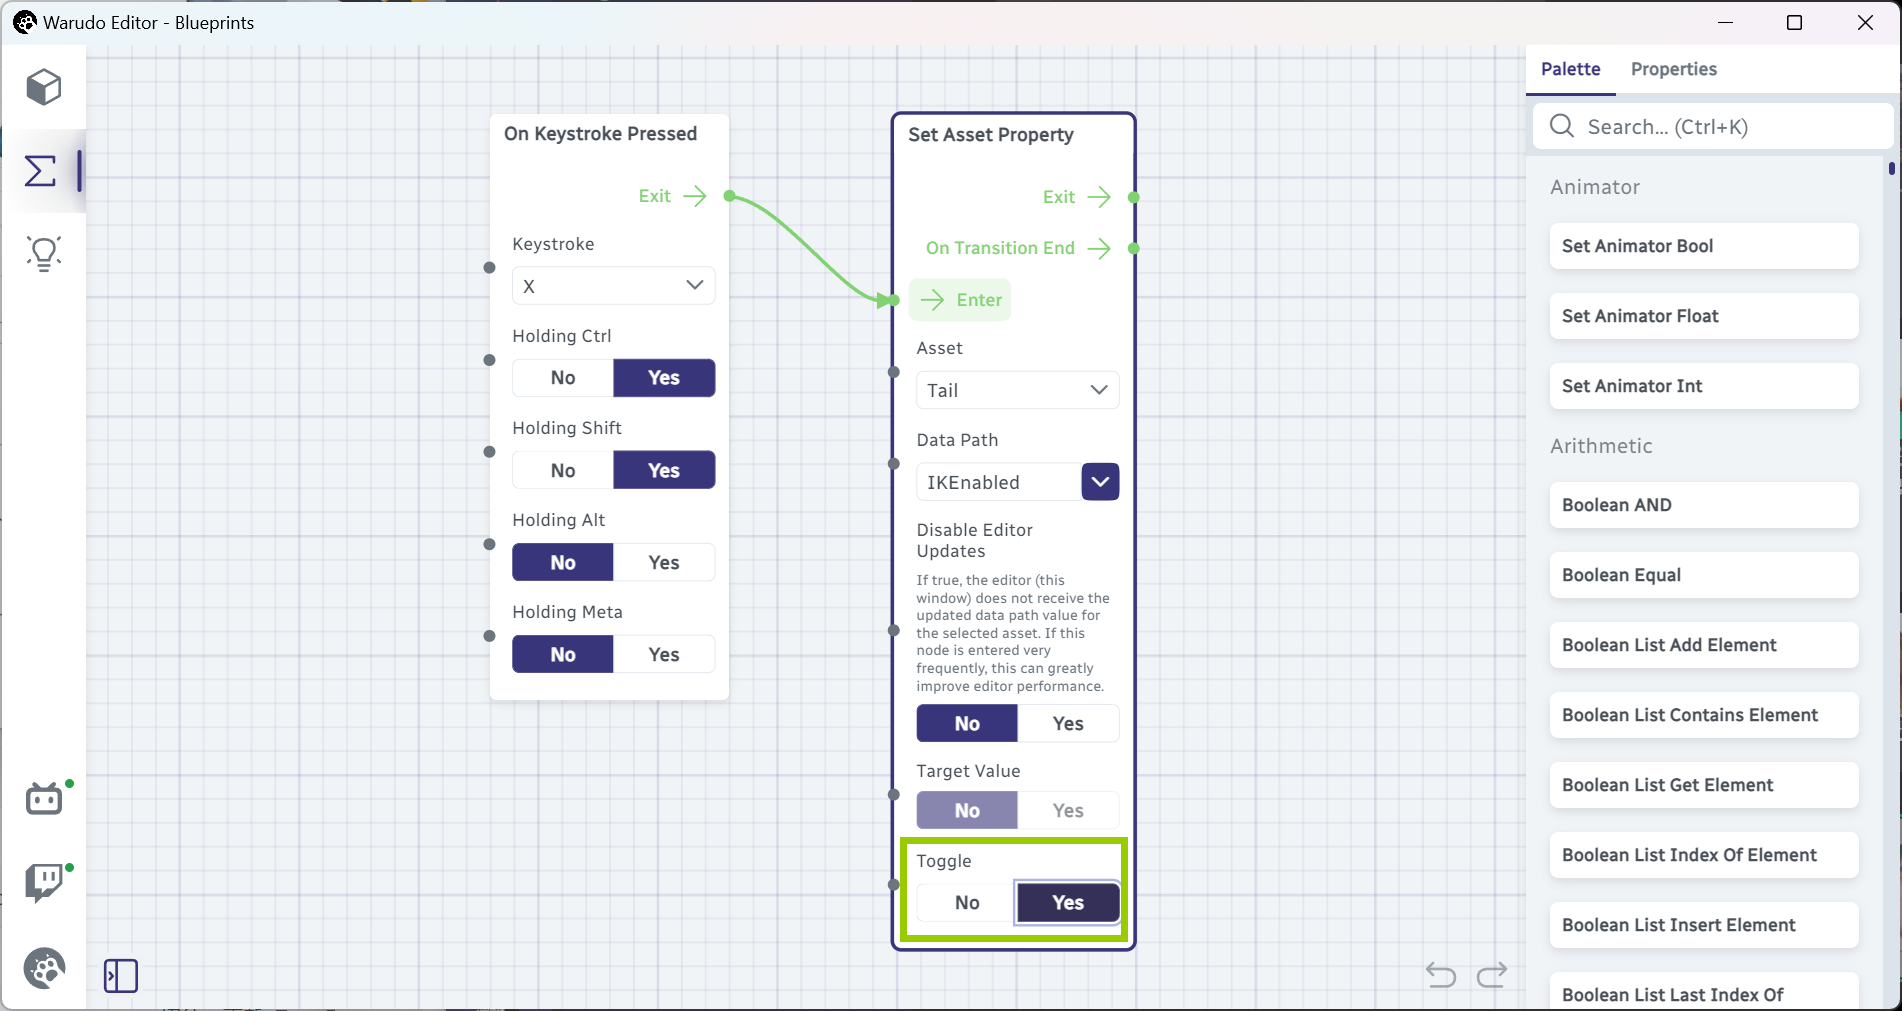
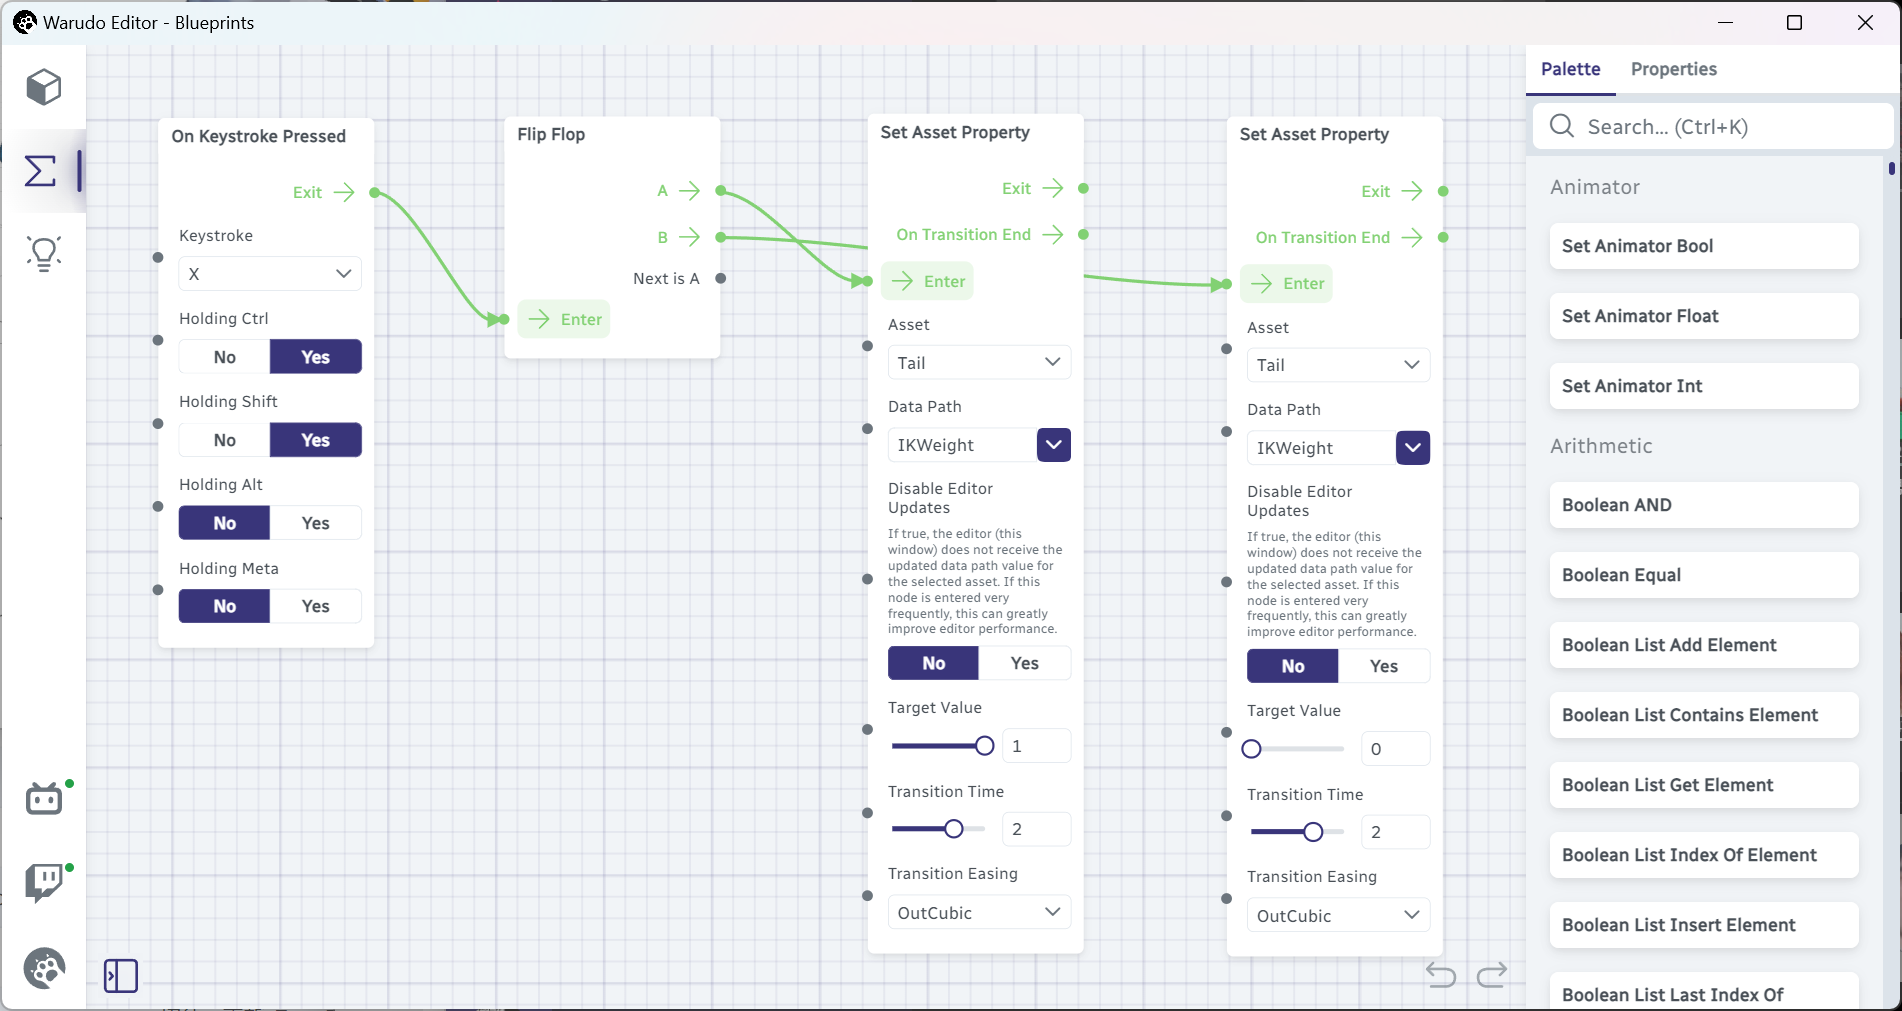
Then, instead of specifying a Target Value, we can just set Toggle to Yes so that the node will toggle the property between Yes and No every time it is triggered:
Now when we press Ctrl+Shift+X, the tail IK will be toggled on/off! Simple, isn't it?
Toggling the tail IK is nice, but you may notice that the IK is instantly turned on/off. It would be better if we can gradually turn on/off the IK, so that the tail will gradually reach the hand instead of instantly reaching the hand.
To do this, we can set Tail → Inverse Kinematics → Enabled to Yes, and control the Tail → Inverse Kinematics → Weight option instead:
If you drag the weight from 0 to 1, you will see the tail gradually reaching the hand. How do we do this in a blueprint? Well, the Set Asset Property node again! This time we select the Tail → Inverse Kinematics → Weight property:

And we set Target Value to 1 and 0 respectively on the two nodes. Recall that the Flip Flop node will alternate between its two Exit flow outputs every time it is triggered, so when we press Ctrl+Shift+X, the tail IK will gradually turn on/off.
As you can see, the Set Asset Property node can set almost anything you see in the Assets tab! Sometimes, it can even replace a dedicated node. For example, the Set Asset Property node can set the Enabled option of a prop, so it seems like you don't need to use the Toggle Asset Enabled node anymore.
However, since Set Asset Property is more general, its performance is worse than dedicated nodes like Toggle Asset Enabled. You should especially be careful to not trigger a Set Asset Property node too frequently (such as after an On Update node), or it may cause performance issues. The rule of thumb is, if there is a dedicated node for what you want to do, use it instead of Set Asset Property.
Invoke Asset Trigger
Now we know how to automate slider adjustments and switch toggling, but how do we automate button clicking? For example, is there a way to automatically "click" the Tail → Reset Tail button with a hotkey?

There is! The Invoke Asset Trigger node can do exactly that. It is similar to the Set Asset Property node, but instead of setting a property, it invokes a trigger (button) of an asset. We can select the Tail → Reset Tail trigger from the Trigger Path dropdown:

There are quite a few buttons in Warudo, so this node can come in handy at times! For example, if you use iFacialMocap or MediaPipe for face tracking, I personally find it useful to assign a hotkey to iFacialMocap Receiver / MediaPipe Tracker → Calibrate so that I can calibrate my face tracking with a hotkey.
Authors