Squashing the Head with Props
Since we are already playing with bone scales, let's take it a step further in this tutorial and squash the character's head flat!
I guess you can say I am... flattened.
The First Attempt
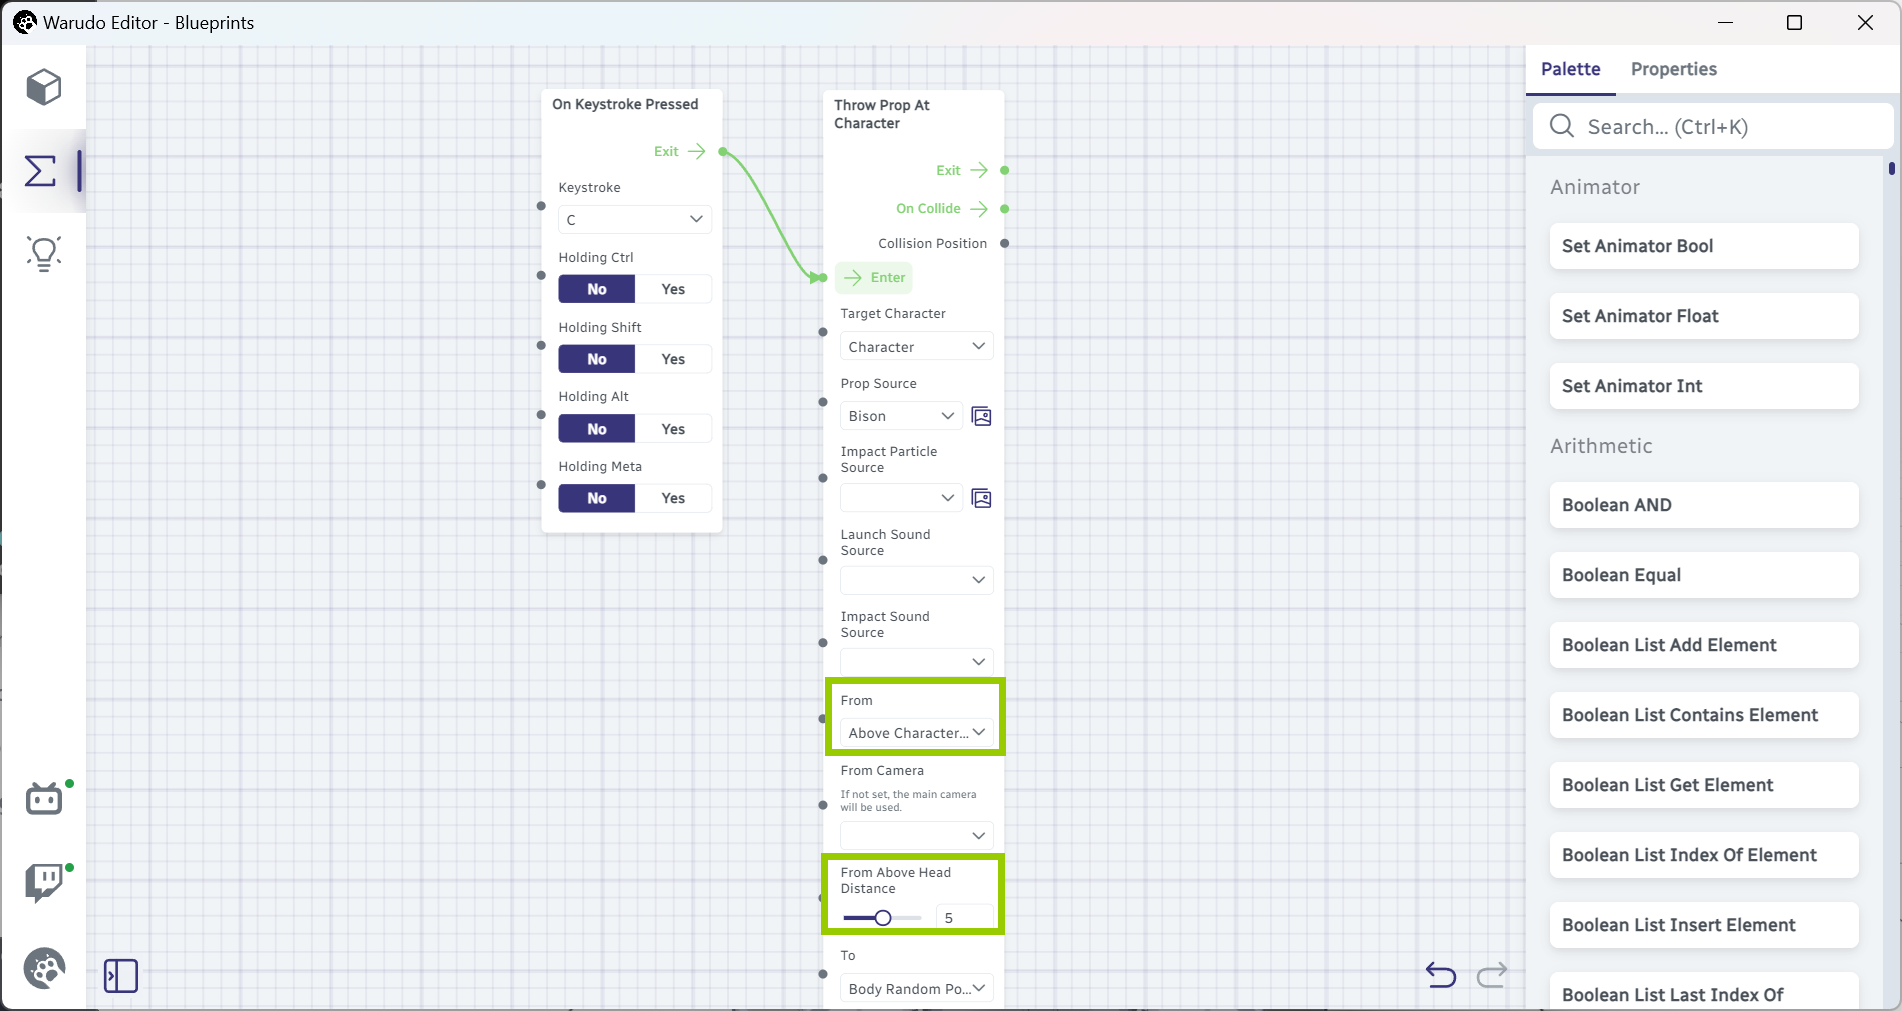
Let's start with what we are familiar with: the classic On Keystroke Pressed and Throw Prop At Character nodes. (You can of course replace On Keystroke Pressed with any event node you want, but we stick with it for simplicity.) Note that we have set Throw Prop At Character → From to Above Character Head and the distance to 5, so the prop will fall from above the character's head.
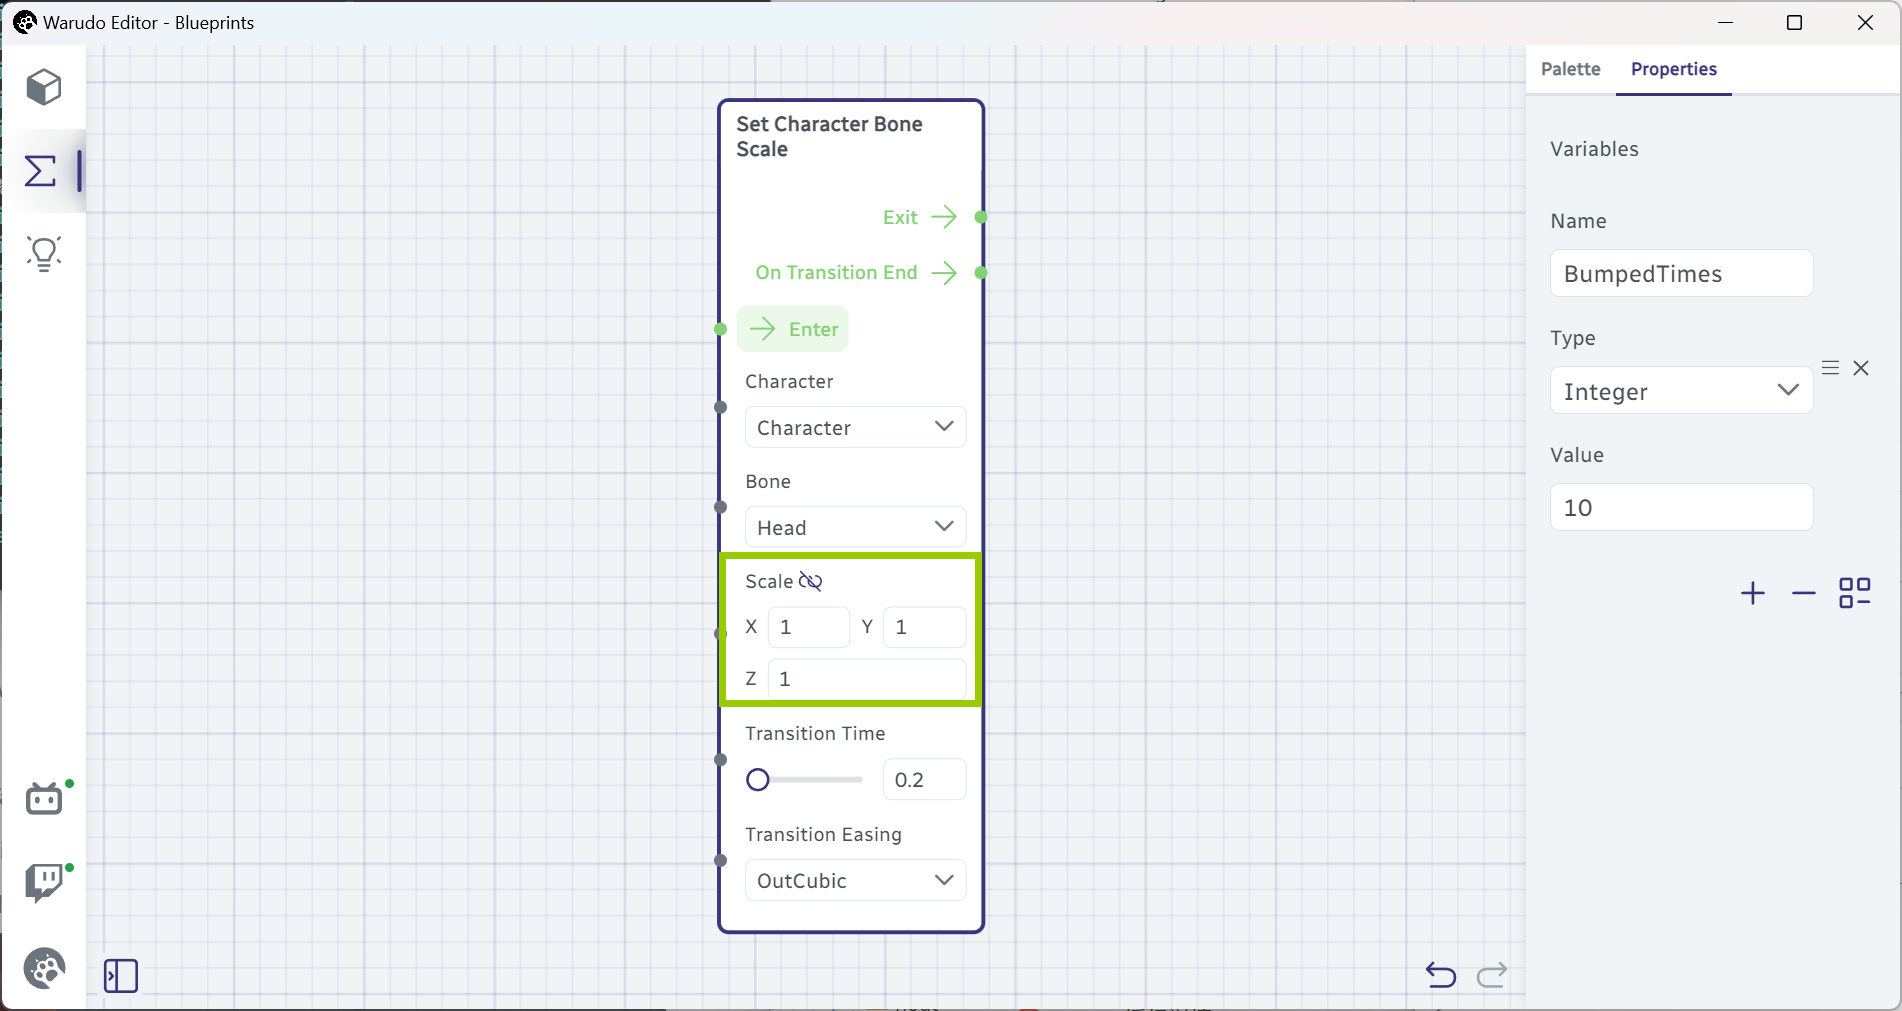
Just like what we did in the last tutorial, we can use the Set Character Bone Scale node to scale the head bone when the prop collides with the character, like this:

Now when we press C, the prop falls from above the character's head, and the character's head is squashed flat on collision.
We will also add a separate Set Character Bone Scale node that helps the head bone return to its original scale:
We can click on the Enter flow input whenever we want to reset the head bone scale! (Or if you prefer, you can assign a hotkey to it.) This will be quite useful in below sections when you want to reset the head scale.
Multi Gate
So far, we know how to squash the character's head flat and also resetting it. The problem is we want to have some progression, as in, the head should be squashed more and more flat as we press C more and more times. How do we do that?
The Multi Gate node can help! Different from all the nodes we have seen before, the Multi Gate node has a variable number of flow outputs, meaning that you can have as many flow outputs you want. Set the Exit Count to 4 like below, and you will see 4 flow outputs from Exit 1 to Exit 4:
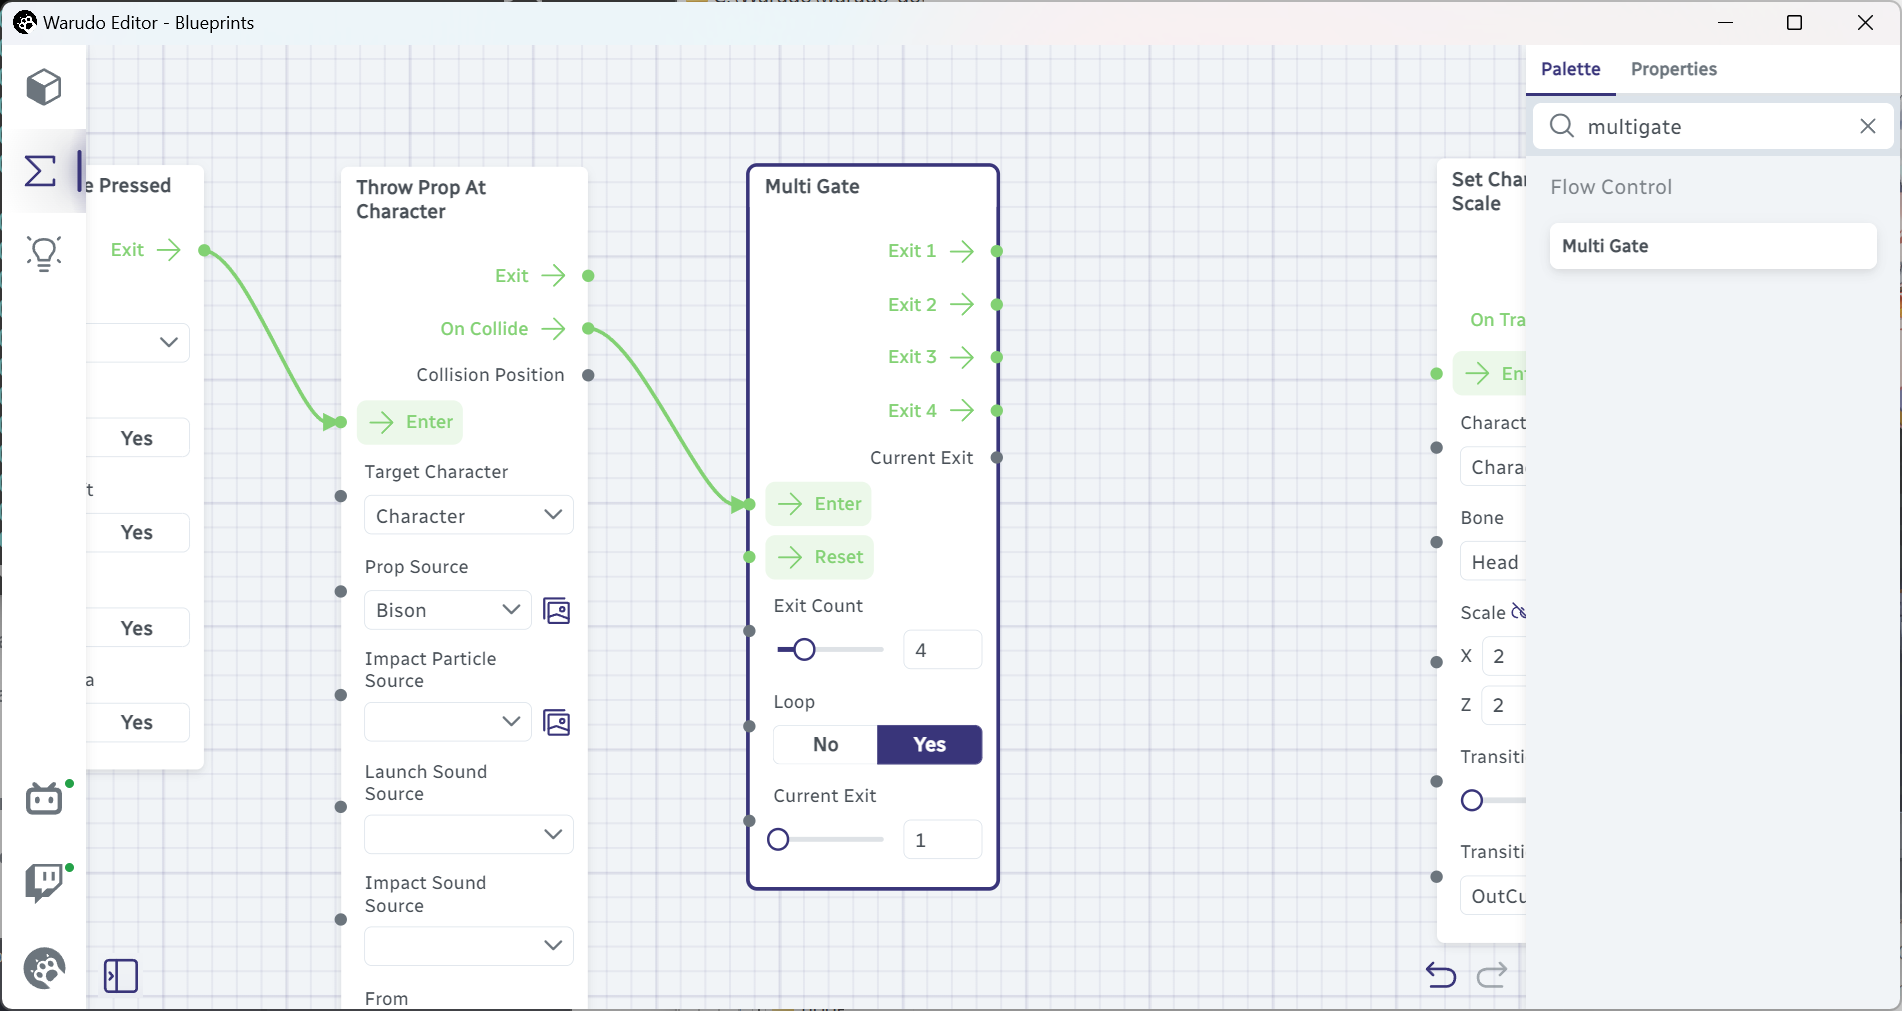
Each time the Multi Gate is triggered, it will trigger the next flow output. For example, if the Multi Gate is triggered for the first time, it will trigger Exit 1; if it is triggered for the second time, it will trigger Exit 2; and so on. When the Multi Gate is triggered for the fifth time, since there is no Exit 5, it will trigger Exit 1 again, and the cycle repeats.
That's exactly what we need! We can reset the head bone scale to 1 when the Multi Gate is triggered for the first time, and squash a little bit when it is triggered for the second time, and squash a little bit more when it is triggered for the third time, and so on. Translated into a blueprint, it looks like this:

We start with the normal scale (1, 1, 1), then squashed a little bit (1.33, 0.83, 1.33), then (1.66, 0.67, 1.66), then (2, 0.5, 2). Note we scale up the X and Z axes but scale down the Y axis, so the head is squashed flat; you can also keep X and Z at 1 and only scale down Y, but I find it looks better when the head is squashed this way.
Now go ahead and press C a few times, and you will see the head is squashed more and more flat, while resetting every 4 times!
Variables
We can call it a day, but you know we always want to make things more interesting. What if we want to squash the head 10 times? Or 100 times? Creating 100 flow outputs and 100 Set Character Bone Scale nodes is not a good idea; there must be a better way.
That's when a variable helps. A variable is a piece of data that can be changed and read by nodes. In the above blueprint, we created 4 Set Character Bone Scale nodes, but the settings on each node are essentially the same except the Scale option. This means instead of creating many nodes, we can just create one node, and tell that node to use a changing value (i.e., a variable) as the scale!
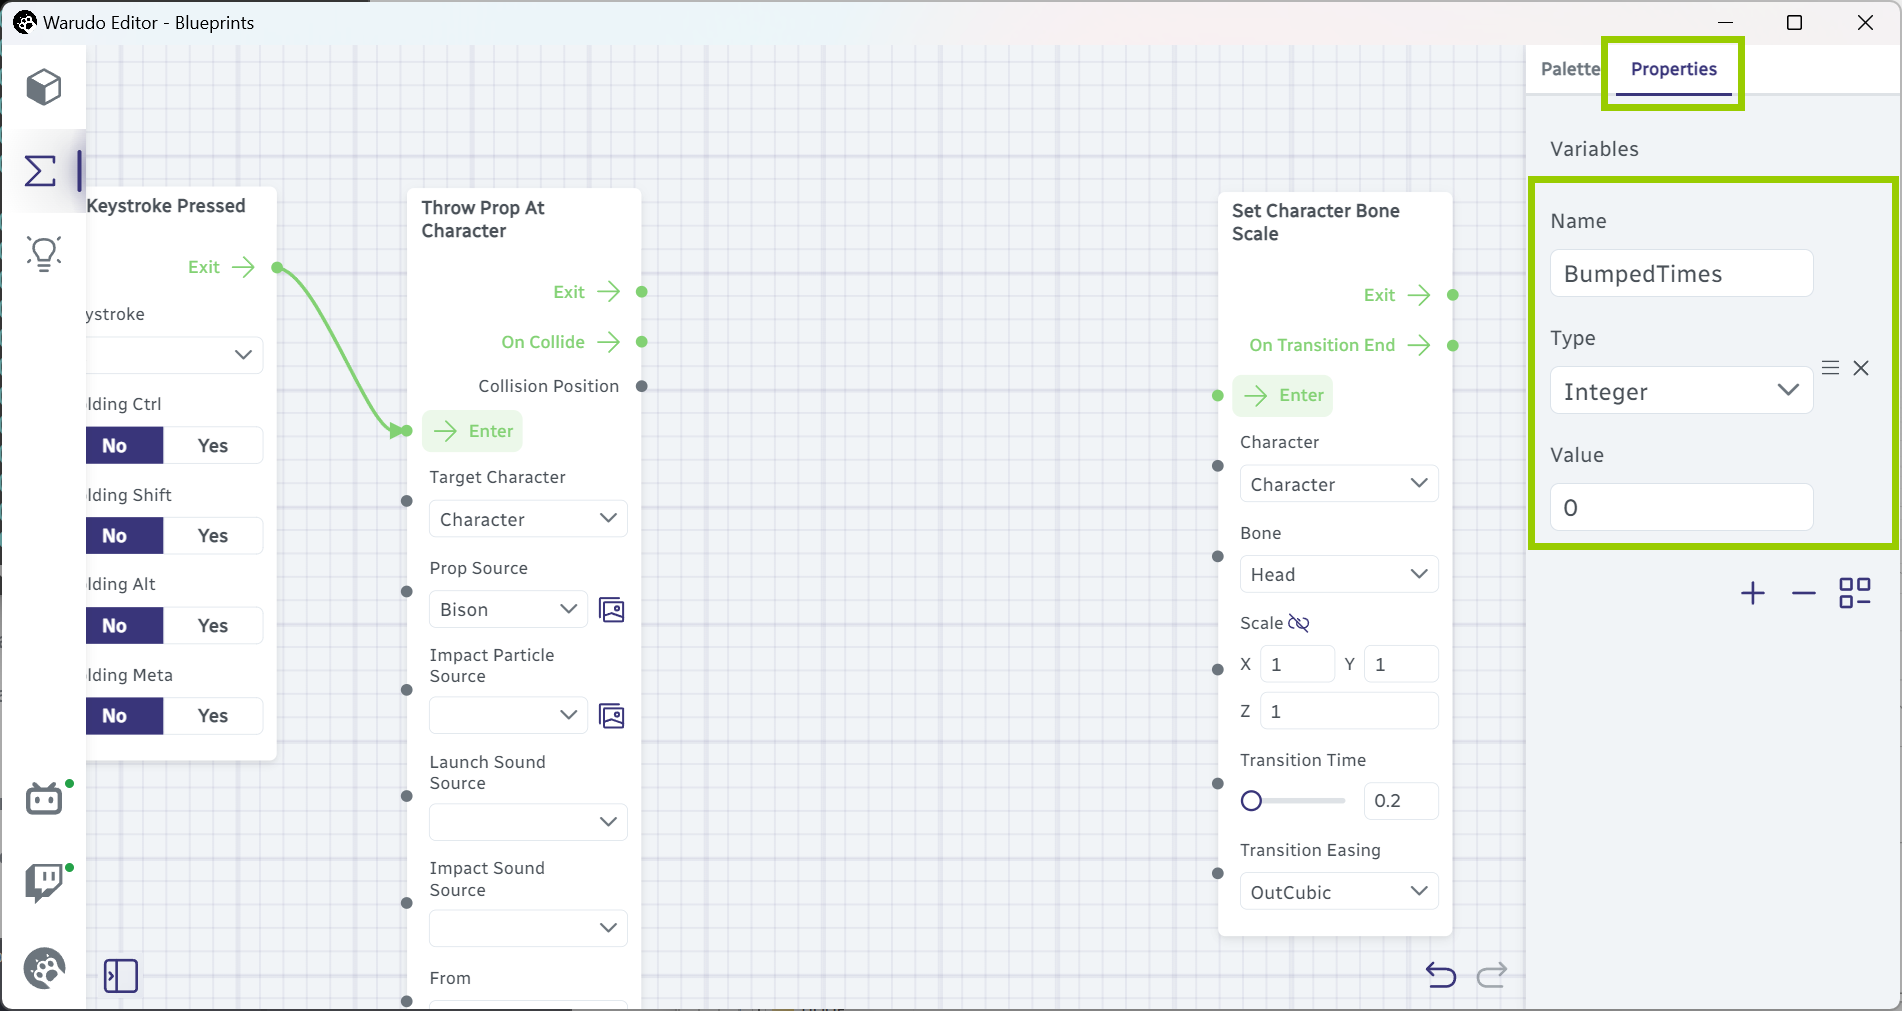
Let's start by creating a variable. Go to the Properties tab in the node editor, and click the + button to create a variable. Set its name to BumpedTimes and type to Integer (an integer is a fancy way of saying "whole number", since we can't squash the head 1.5 times or 2.3 times):
We use the Integer Variable Add node right after the Throw Prop At Character node to increment the variable by 1 every time the prop collides with the character:

Go back to Warudo and press C a few times, and you will see the variable is incremented by 1 every time the prop collides with the character:

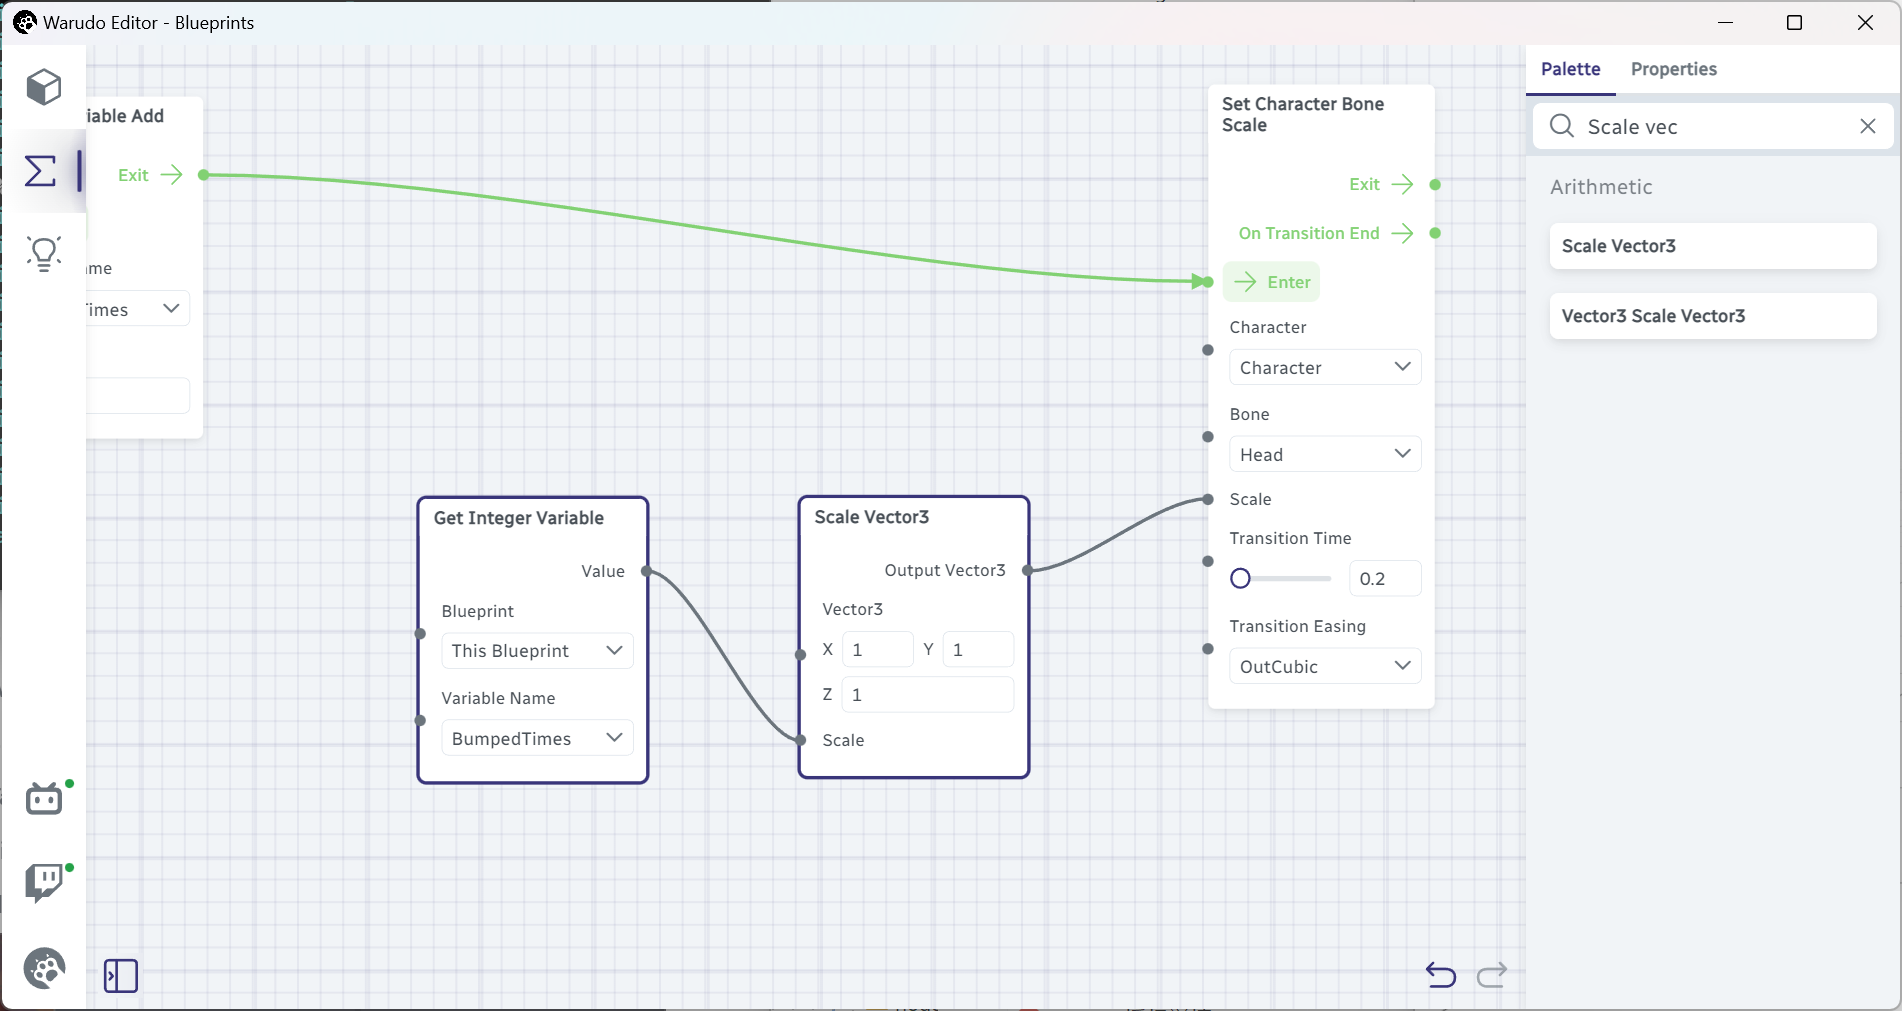
To read from this variable, we can use the Get Integer Variable node. Let's reset the BumpedTimes variable to 0 in the Properties tab, and add Set Character Bone Scale, Get Integer Variable, and Scale Vector3 nodes like below. Note Scale Vector3 → Scale is set to (1, 1, 1):
Before reading on, can you guess what the blueprint does?
Now if you press C, the head bone should grow bigger and bigger every time the prop collides with the character! This makes sense, because what we are saying is: every time a prop hits, we increment BumpedTimes by 1, and then we set the head bone scale to (1, 1, 1) multiplied by BumpedTimes. So, the first time the prop hits, BumpedTimes is 1, and the head bone scale is (1, 1, 1) × 1 = (1, 1, 1); the second time the prop hits, BumpedTimes is 2, and the head bone scale is (1, 1, 1) × 2 = (2, 2, 2); and so on.
But we want to squash the head, not grow it like a balloon! Go ahead and recreate the below blueprint:

Reset the BumpedTimes variable to 0 in the Properties tab, and press C a few times. You should see the head bone is squashed more and more flat! But how does that work?
One personal trick I use when I read blueprints like this is to follow the flow of the data from right to left. In this case, we start with the Vector3 literal node which would output our final scale to the Set Character Bone Scale node. Note the X and Z values are provided by the top Float Addition node, and the Y value is provided by the bottom Float Addition node. The top Get Integer Variable → Float Multiplication → Float Addition path is essentially calculating (BumpedTimes × 0.1 + 1), while the bottom path is calculating (BumpedTimes × -0.1 + 1).
We use the Float Multiplication/Addition nodes instead of Integer Multiplication/Addition because the end result is a decimal number (float), not a whole number (integer).
Let's manually calculate the final scale for different values of BumpedTimes:
| BumpedTimes | X and Z | Y | Final Scale |
|---|---|---|---|
| 1 | 1 × 0.1 + 1 = 1.1 | 1 × -0.1 + 1 = 0.9 | (1.1, 0.9, 1.1) |
| 2 | 2 × 0.1 + 1 = 1.2 | 2 × -0.1 + 1 = 0.8 | (1.2, 0.8, 1.2) |
| 3 | 3 × 0.1 + 1 = 1.3 | 3 × -0.1 + 1 = 0.7 | (1.3, 0.7, 1.3) |
| 4 | 4 × 0.1 + 1 = 1.4 | 4 × -0.1 + 1 = 0.6 | (1.4, 0.6, 1.4) |
I am sure you can see the pattern here: the X and Z values are increasing by 0.1 every time, while the Y value is decreasing by 0.1 every time. This is exactly what we want: the head bone is squashed more and more flat every time the prop hits!
Resetting a Variable
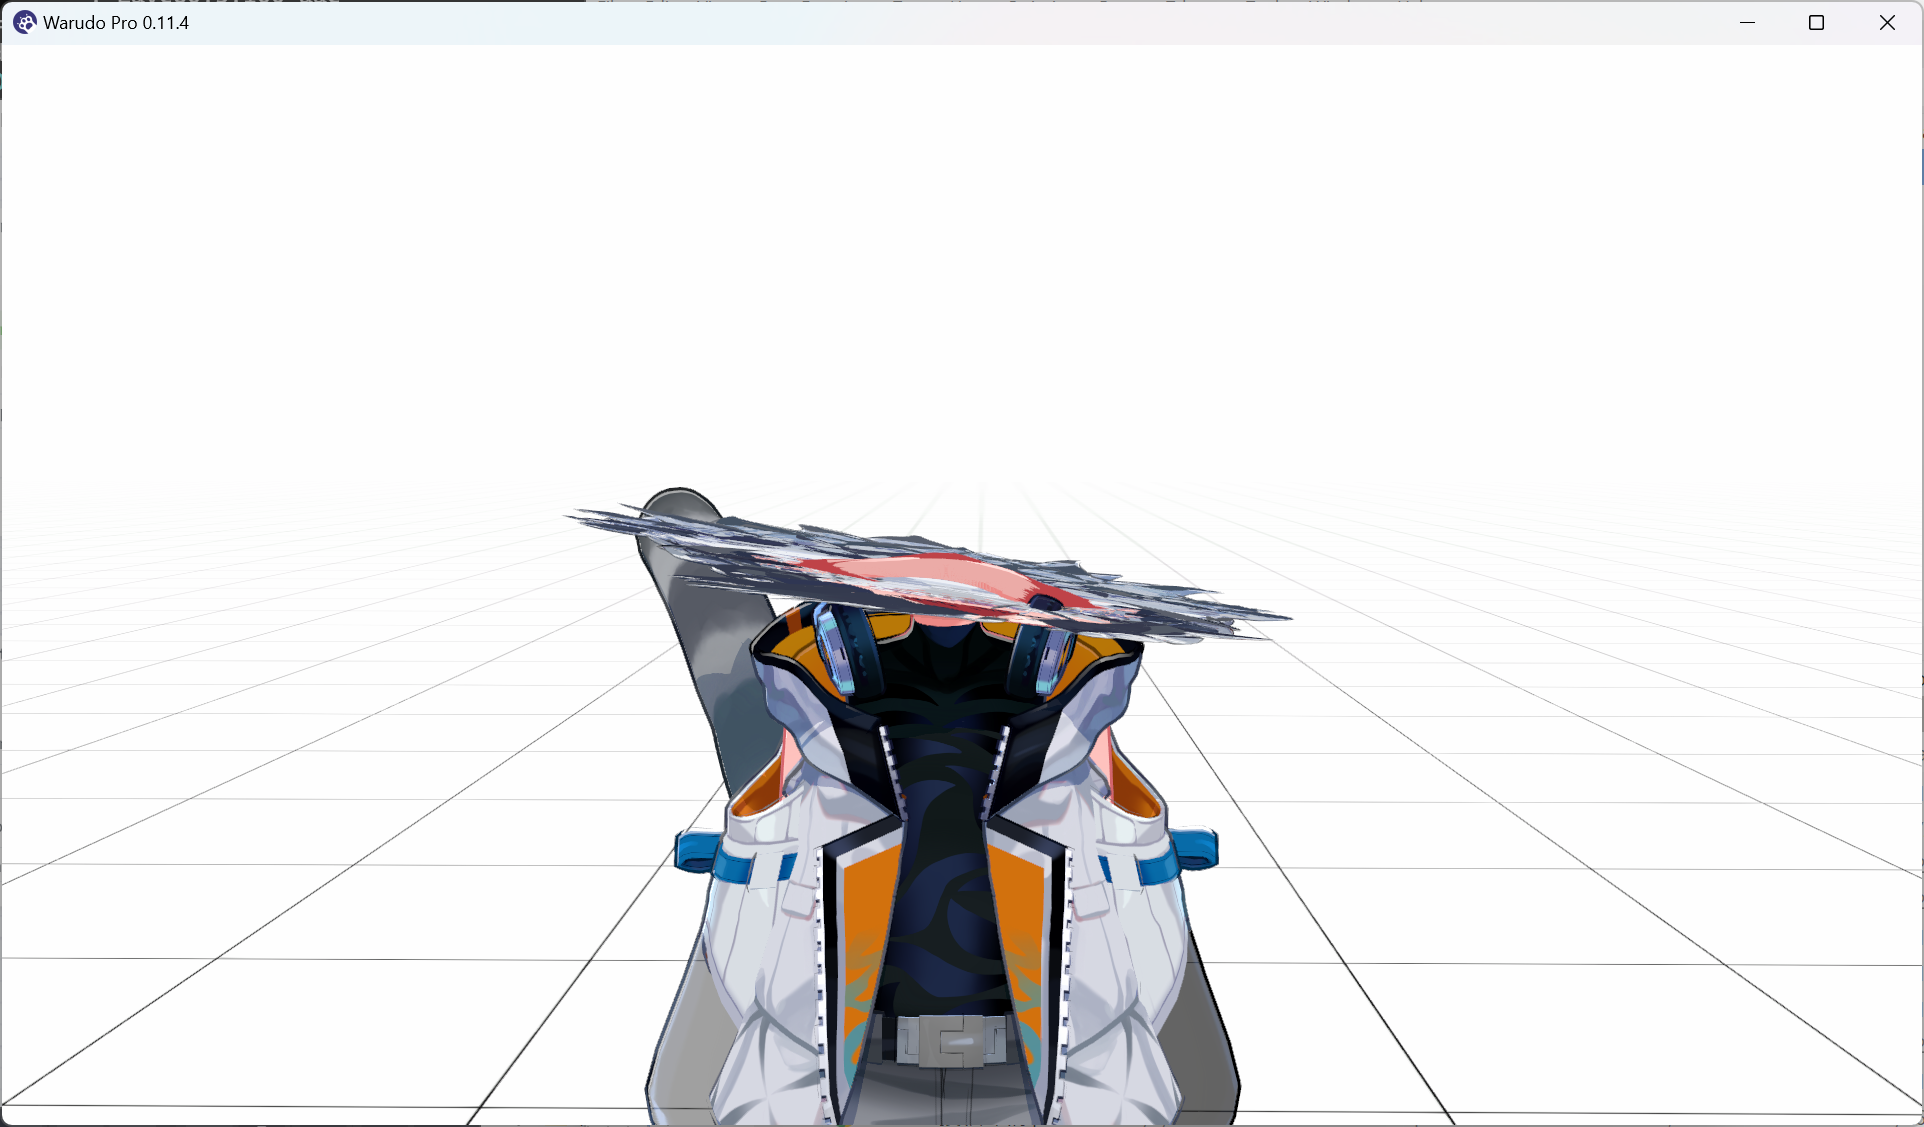
However, if you press C a few more times, you will eventually see the head bone grow in the opposite direction, like this:
Why? Well, let's continue our calculations above:
| BumpedTimes | X and Z | Y | Final Scale |
|---|---|---|---|
| 8 | 8 × 0.1 + 1 = 1.8 | 8 �× -0.1 + 1 = 0.2 | (1.8, 0.2, 1.8) |
| 9 | 9 × 0.1 + 1 = 1.9 | 9 × -0.1 + 1 = 0.1 | (1.9, 0.1, 1.9) |
| 10 | 10 × 0.1 + 1 = 2 | 10 × -0.1 + 1 = 0 | (2, 0, 2) |
| 11 | 11 × 0.1 + 1 = 2.1 | 11 × -0.1 + 1 = -0.1 | (2.1, -0.1, 2.1) |
| 12 | 12 × 0.1 + 1 = 2.2 | 12 × -0.1 + 1 = -0.2 | (2.2, -0.2, 2.2) |
The Y value is becoming negative, which means the head bone grows downward! This is not what we want. Let's reset the head bone scale to (1, 1, 1) when BumpedTimes is 10; that's the flattest we can get without the head growing downward. Fortunately, we already know how to do this: using the If Branch node we learned in the dance tutorial!

The newly added nodes are quite simple: we check if BumpedTimes is greater than or equal to 10, and if so, we reset it to 0, and reset the head bone scale back to 1.
We use the Integer Greater Than Or Equal node here, but you can also use the Integer Equal node to check if BumpedTimes is equal to 10. The difference is that the former will trigger the If True flow output when BumpedTimes is 10, 11, 12, etc., while the latter will only trigger the If True flow output when BumpedTimes is exactly 10. We usually use the former because it is more flexible (imagine somehow BumpedTimes becomes 11 by a mistake, then we will never be able to reset it back to 0).
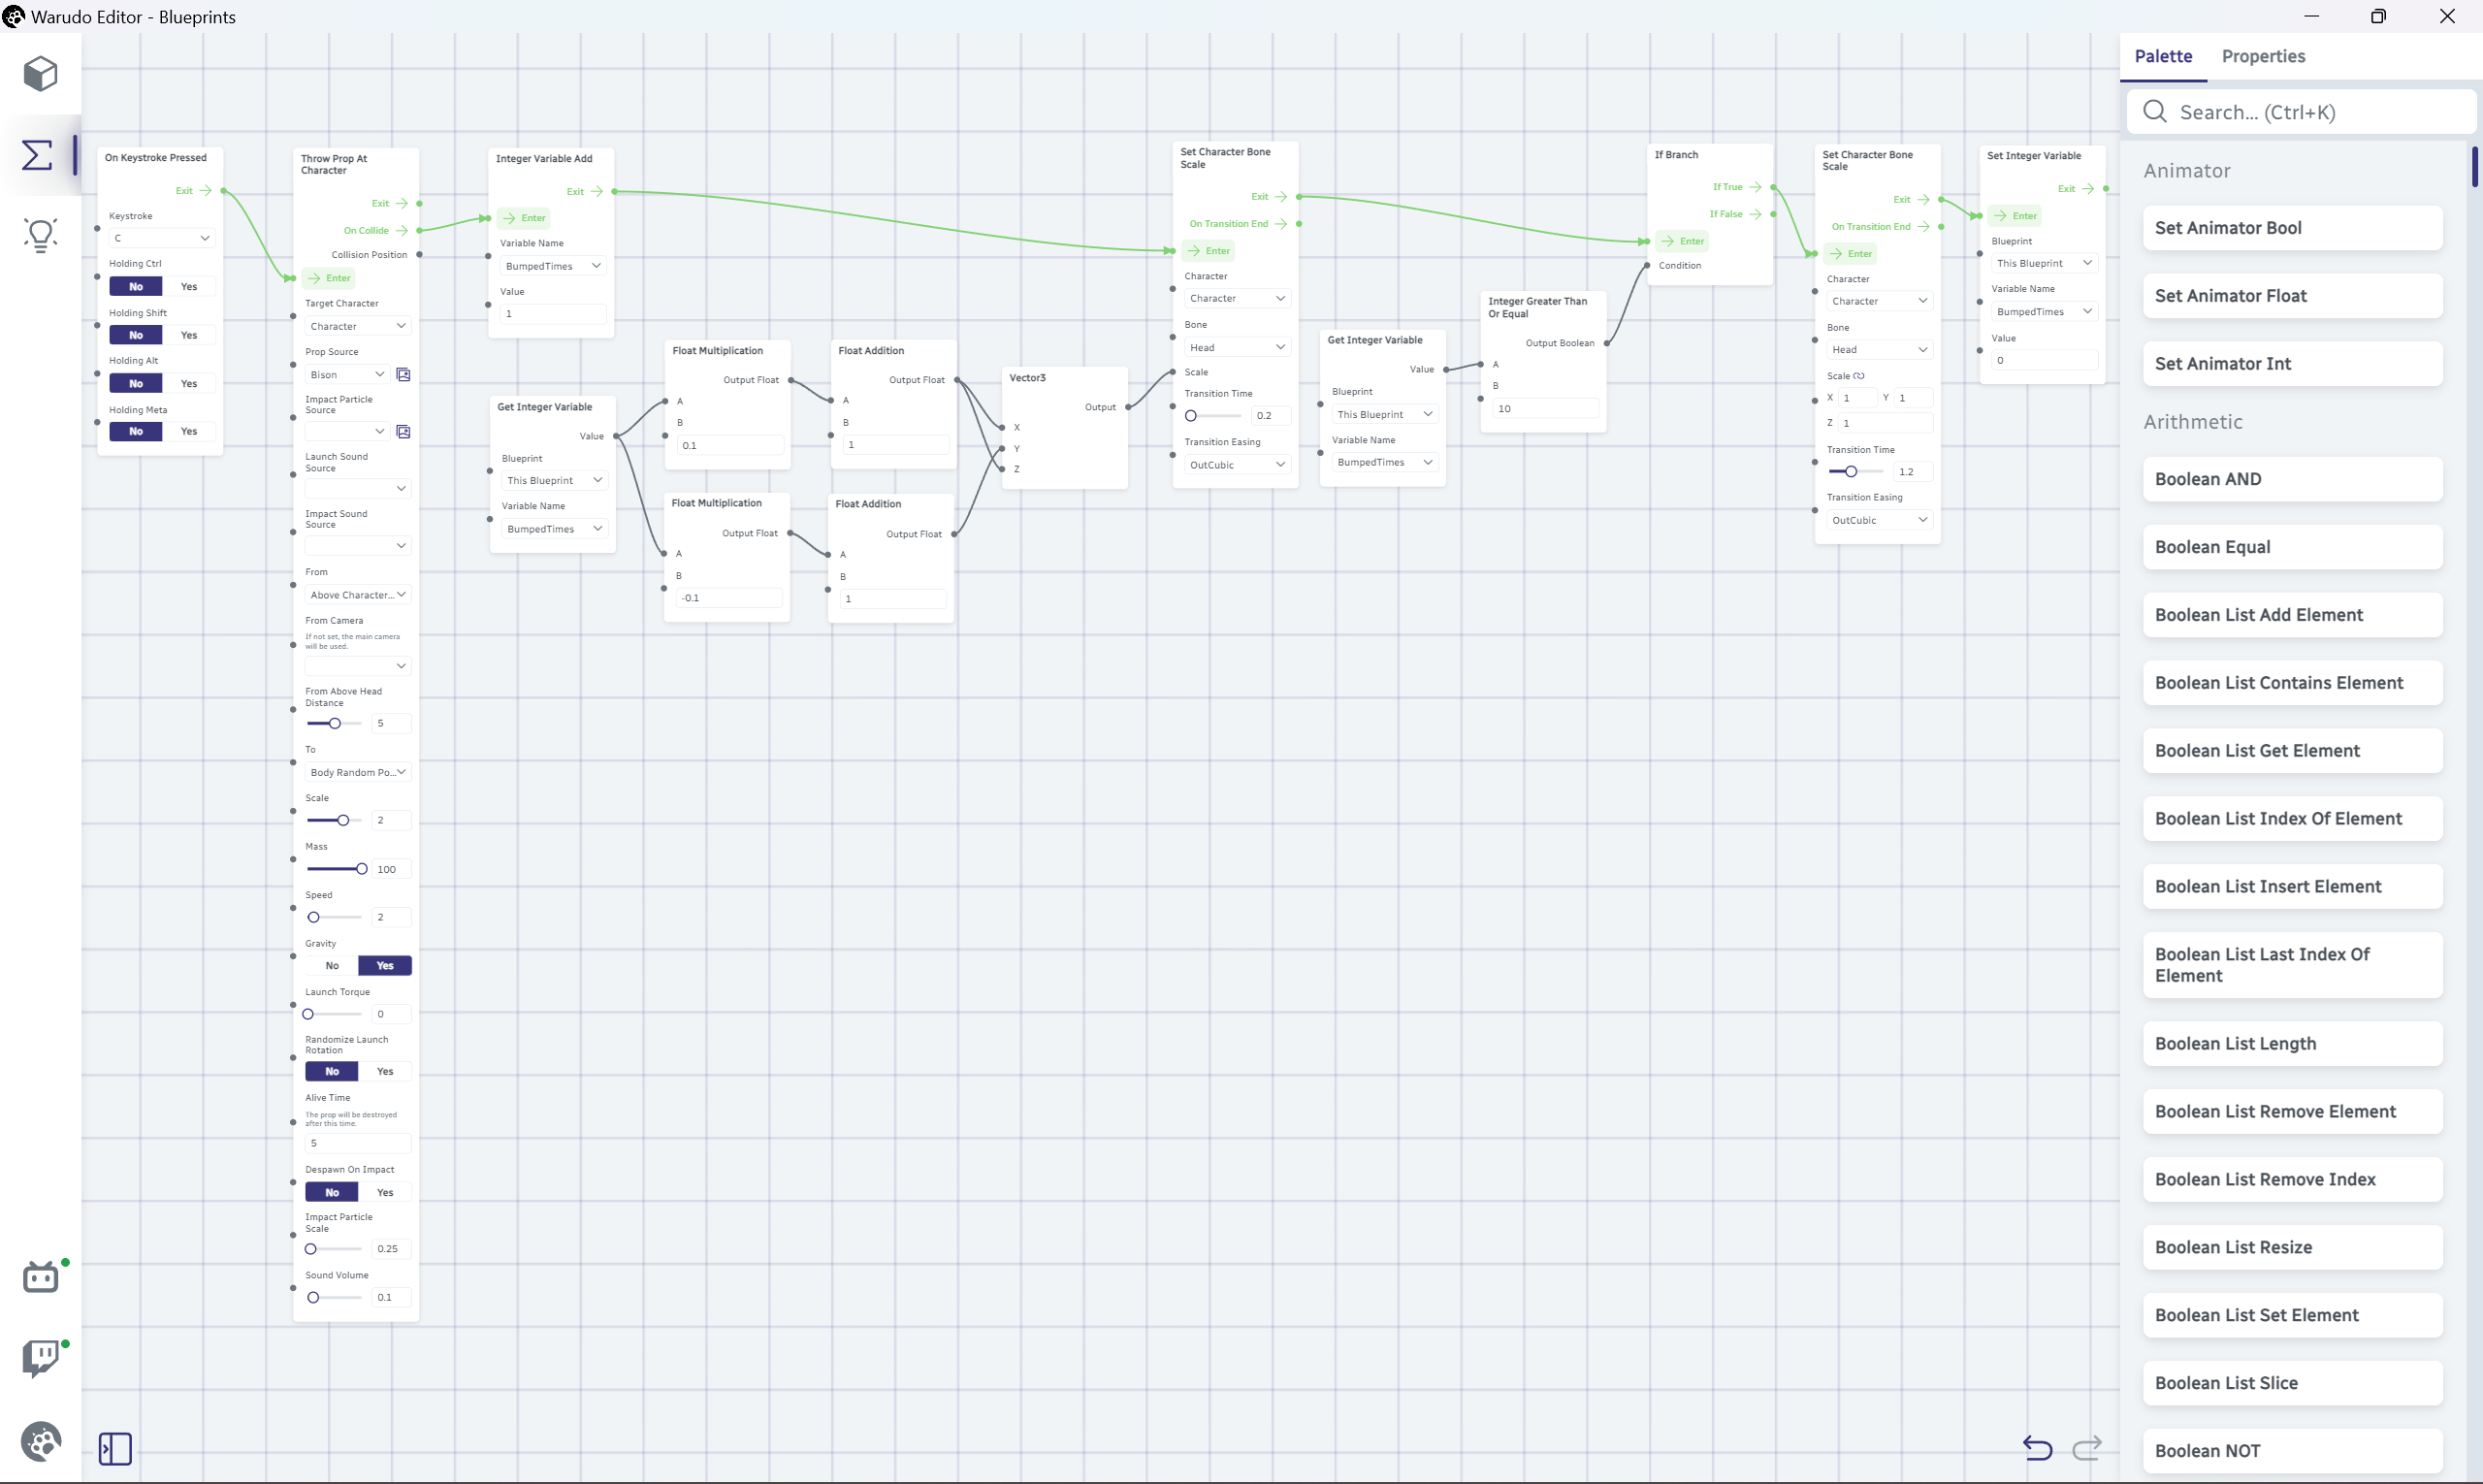
The final blueprint looks like this (quite a big one!):
Congratulations! That's blueprint variables for you. This is a more challenging tutorial than the previous ones, so kudos to you for making it this far!
Authors