Buried by Plushies
To create chaos is to create joy. In this tutorial, we will learn how to spawn a bunch of animal plushies and bury our character under them.
Buried by animal plushies.
Multiple Blueprints
If you have followed the previous tutorials, you may have noticed that we have been creating a new blueprint for each interaction. Couldn't we just add all the nodes to the same blueprint?
Indeed, technically speaking, if you can do something with multiple blueprints, you can also do it with a single blueprint. However, it is a good practice to keep things organized; with multiple smaller blueprints, you can temporarily disable a specific interaction without affecting the others. Furthermore, if you want to share your blueprints with others, it is much easier to share a single blueprint than a blueprint with a bunch of unrelated nodes.
There is also the performance concern. The Warudo editor is not exactly built for a large number of nodes; you will start to notice lag when you have more than 100 nodes in a single blueprint. So, it is always a good idea to split into multiple smaller blueprints whenever possible.
For Loop
Okay, let's create our blueprint! Spawning an animal plush is easy: just use the Throw Prop At Character node which we are already familiar with. But how do we spawn multiple plushies?
The answer is the For Loop node. As you may have guessed from the name, this node allows us to do something multiple times. But the explanation can wait. Go ahead and recreate the blueprint below. For the For Loop node, we have set Last Index to 100, Interval to 0.01; for the Throw Prop At Character node, we have set Prop Source to Tiger and From to Above Character Head, so that the tiger plushies will be falling onto the character's head.
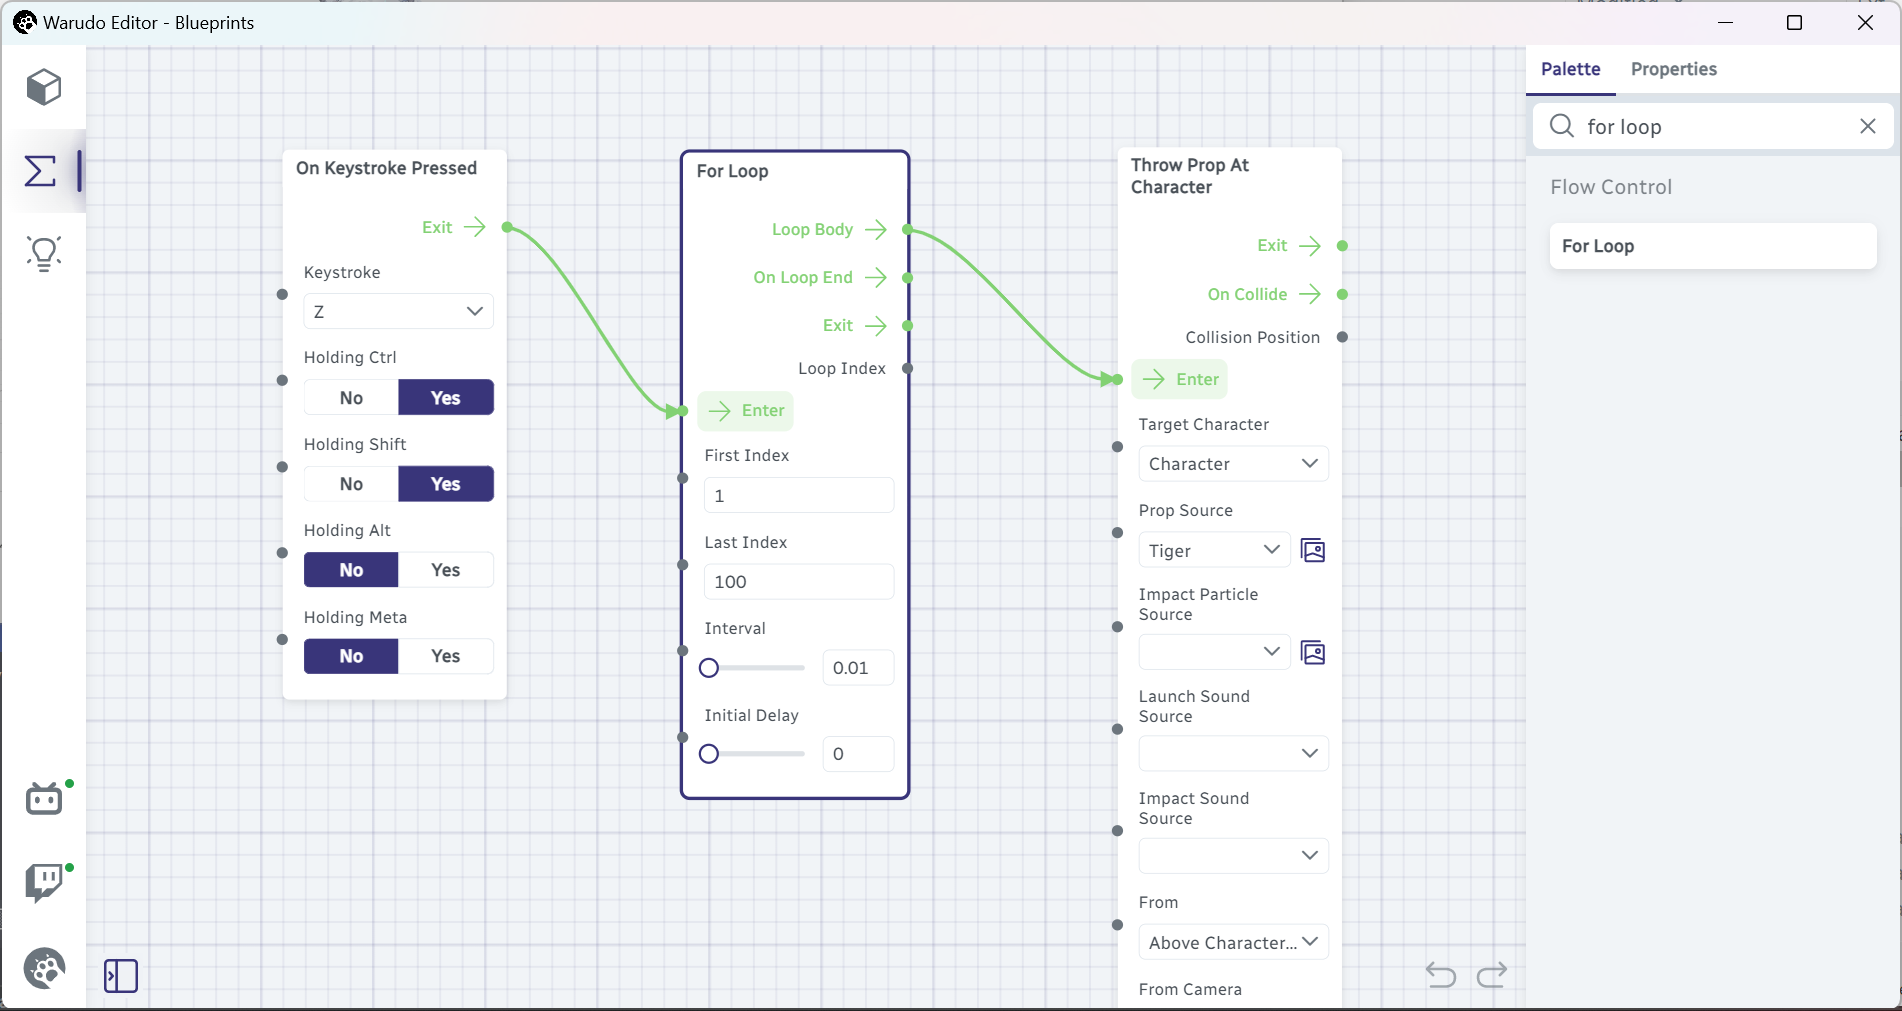
We know what the other two nodes are doing: the On Keystroke Pressed node defines a Ctrl+Shift+Z hotkey, while the Throw Prop At Character node spawns a tiger prop and throws it at the character. But what is the For Loop node doing? Let's press Ctrl+Shift+Z and see what happens.
Ouch.
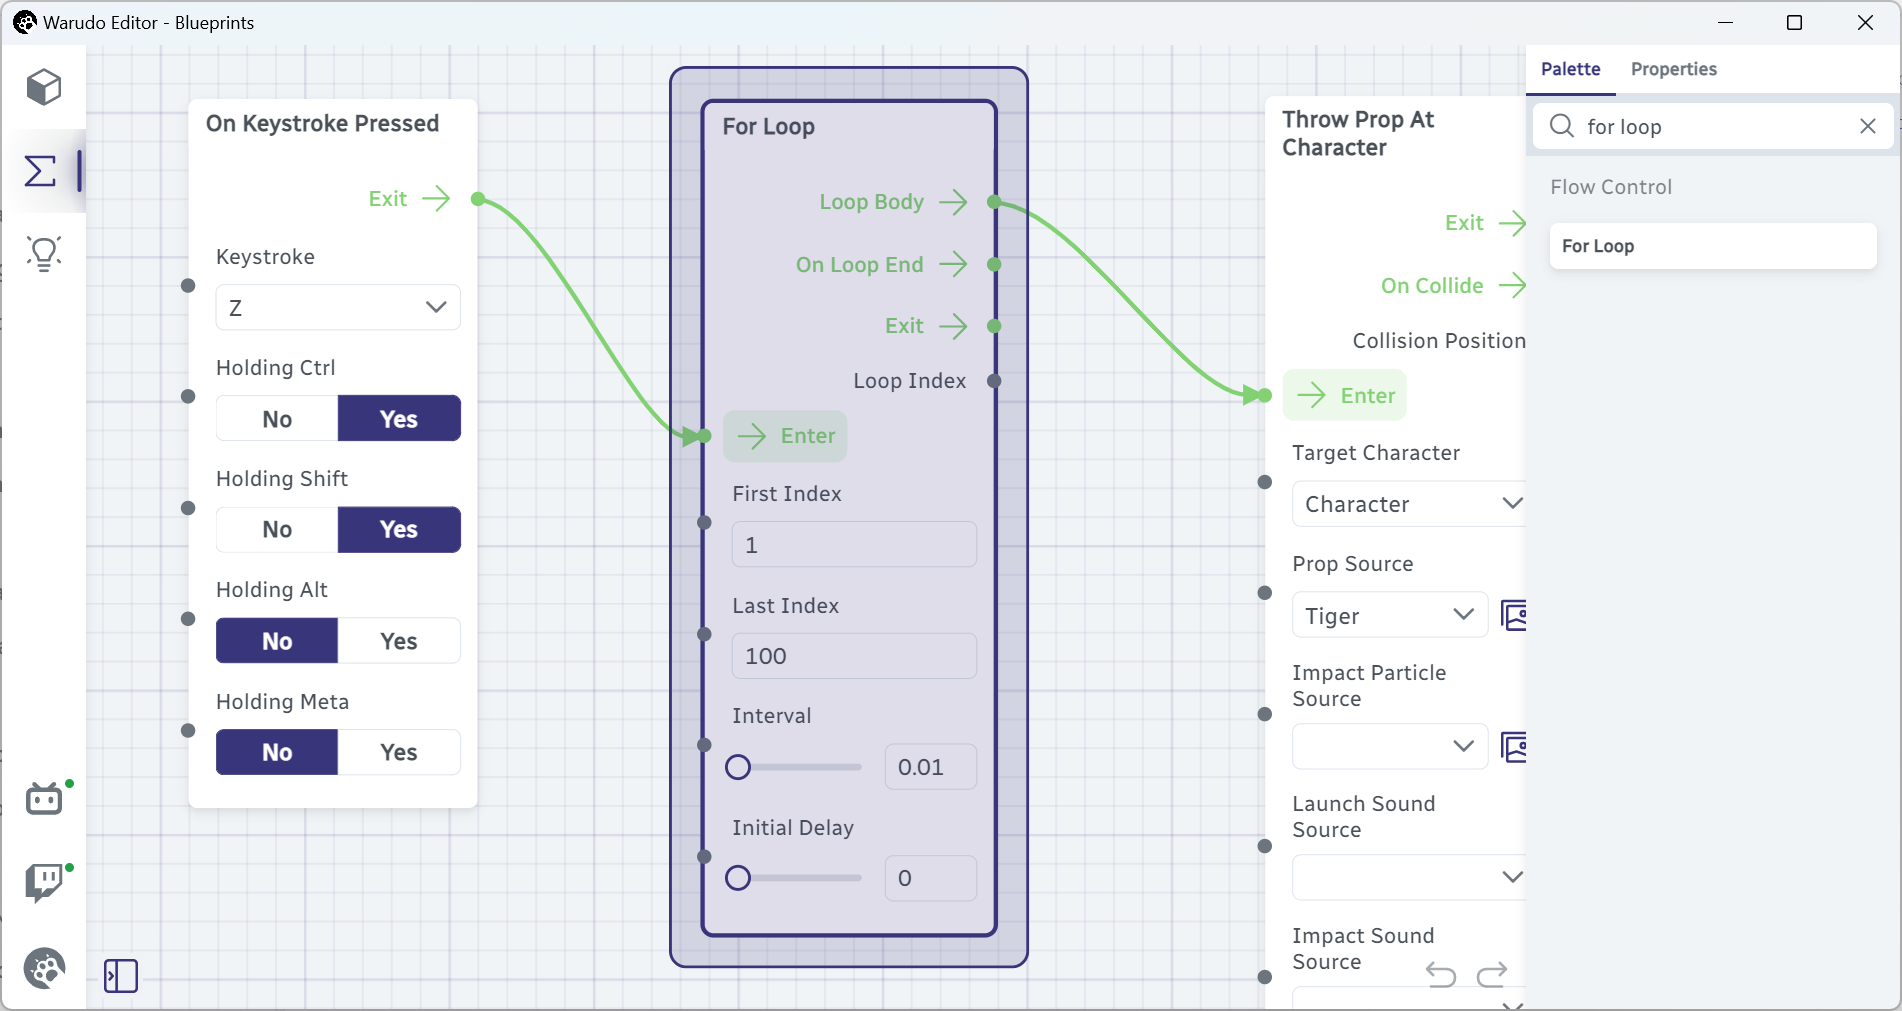
That's a lot of tigers for sure! But how many? Let's take a closer look at the For Loop node. In plain English, the node is saying: "For each number from First Index (1) to Last Index (100), on a 0.01s Interval, trigger the Loop Body flow output." Since the Loop Body flow output is connected to the Throw Prop At Character node, in other words, we are saying: "For each number from 1 to 100, spawn a tiger prop every 0.01s and throw it at the character;" or even more simply, "spawn 100 tiger props throughout 1 second and throw them at the character."
Can you guess what happens if we set Last Index to 1000 instead? And what if we set Interval to 0?
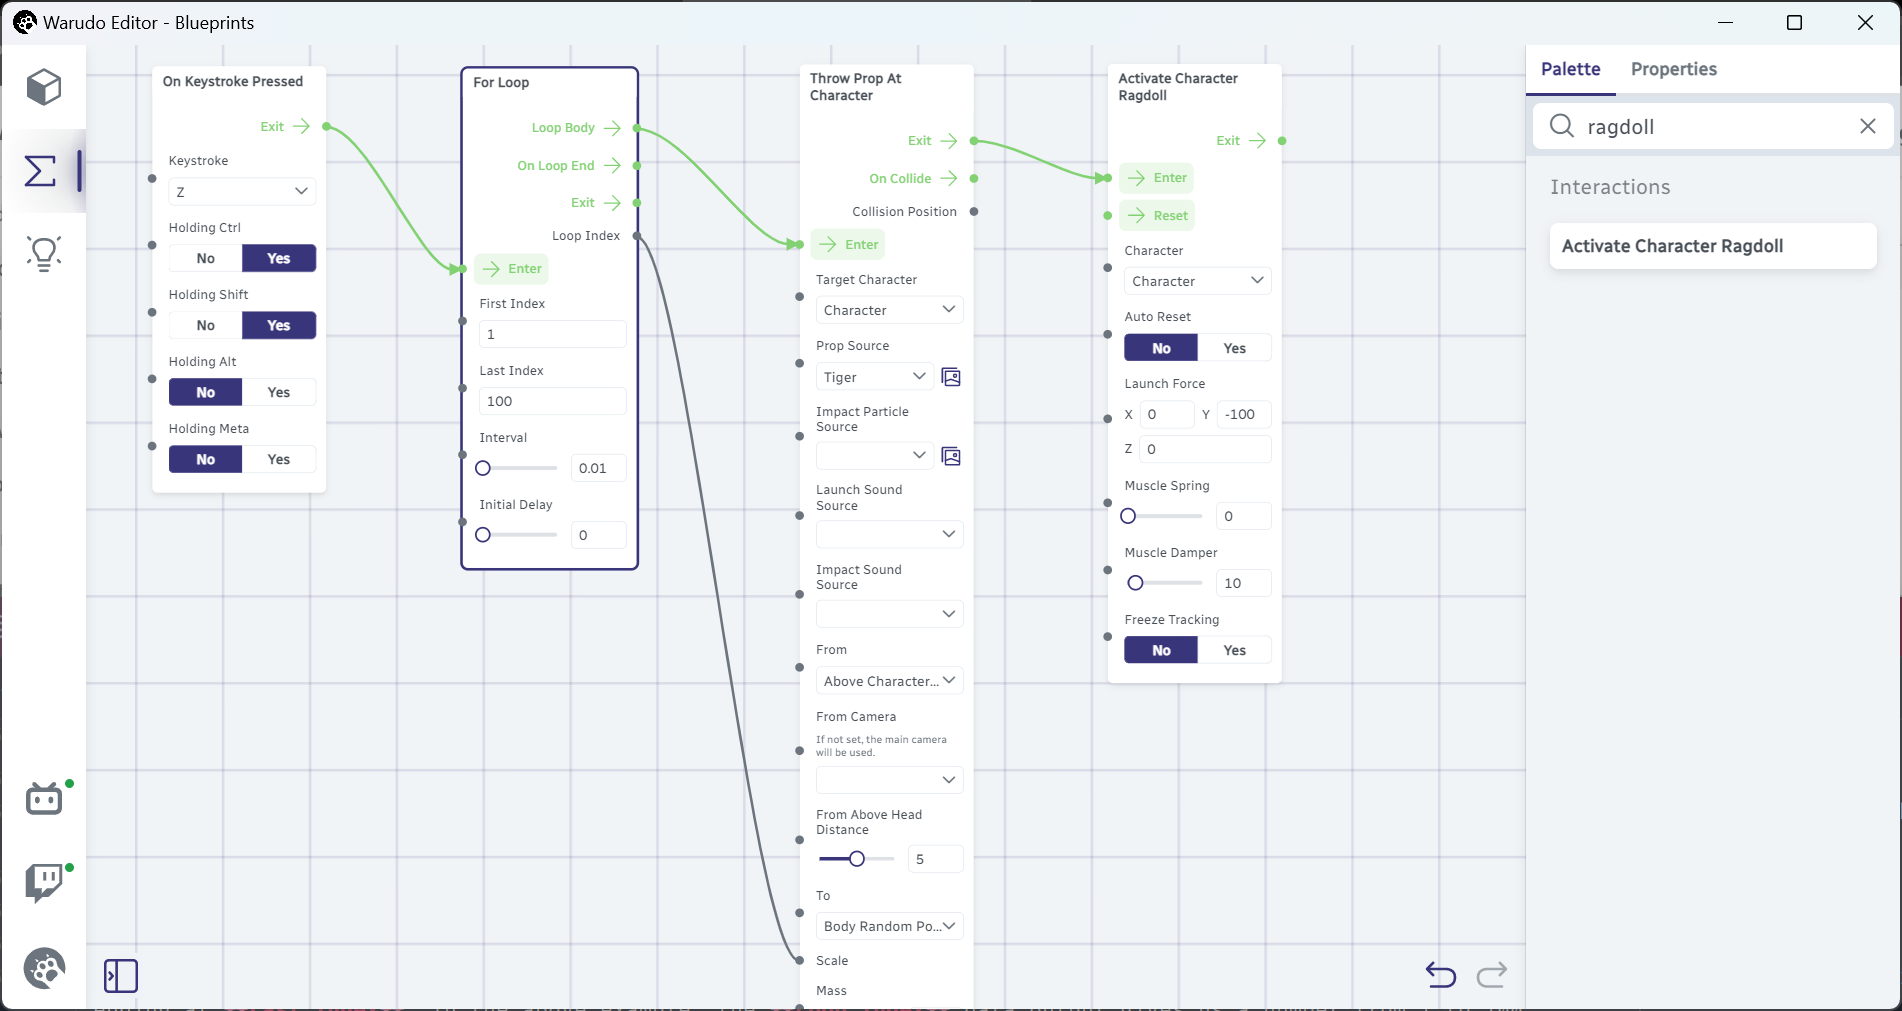
To bury our character however, we need to turn them into a ragdoll. You know the drill: the Activate Character Ragdoll node. Here we set the Launch Force to (0, -100, 0), which launches the character downwards.

Randomizing the Plushies
So far everything is great, but there is one problem: all the plushies are tigers. What if we want to spawn all sorts of animals?
Well, let's take a look at the Throw Prop At Character node. We have set the Prop Source to Tiger, but see that black dot next to it? It means that we can connect something to it. In other words, instead of selecting a prop from the dropdown ourselves, we can let a node decide which prop to spawn, as long as that node has a data output that gives us a prop. That's exactly what the Get Random Prop node does.
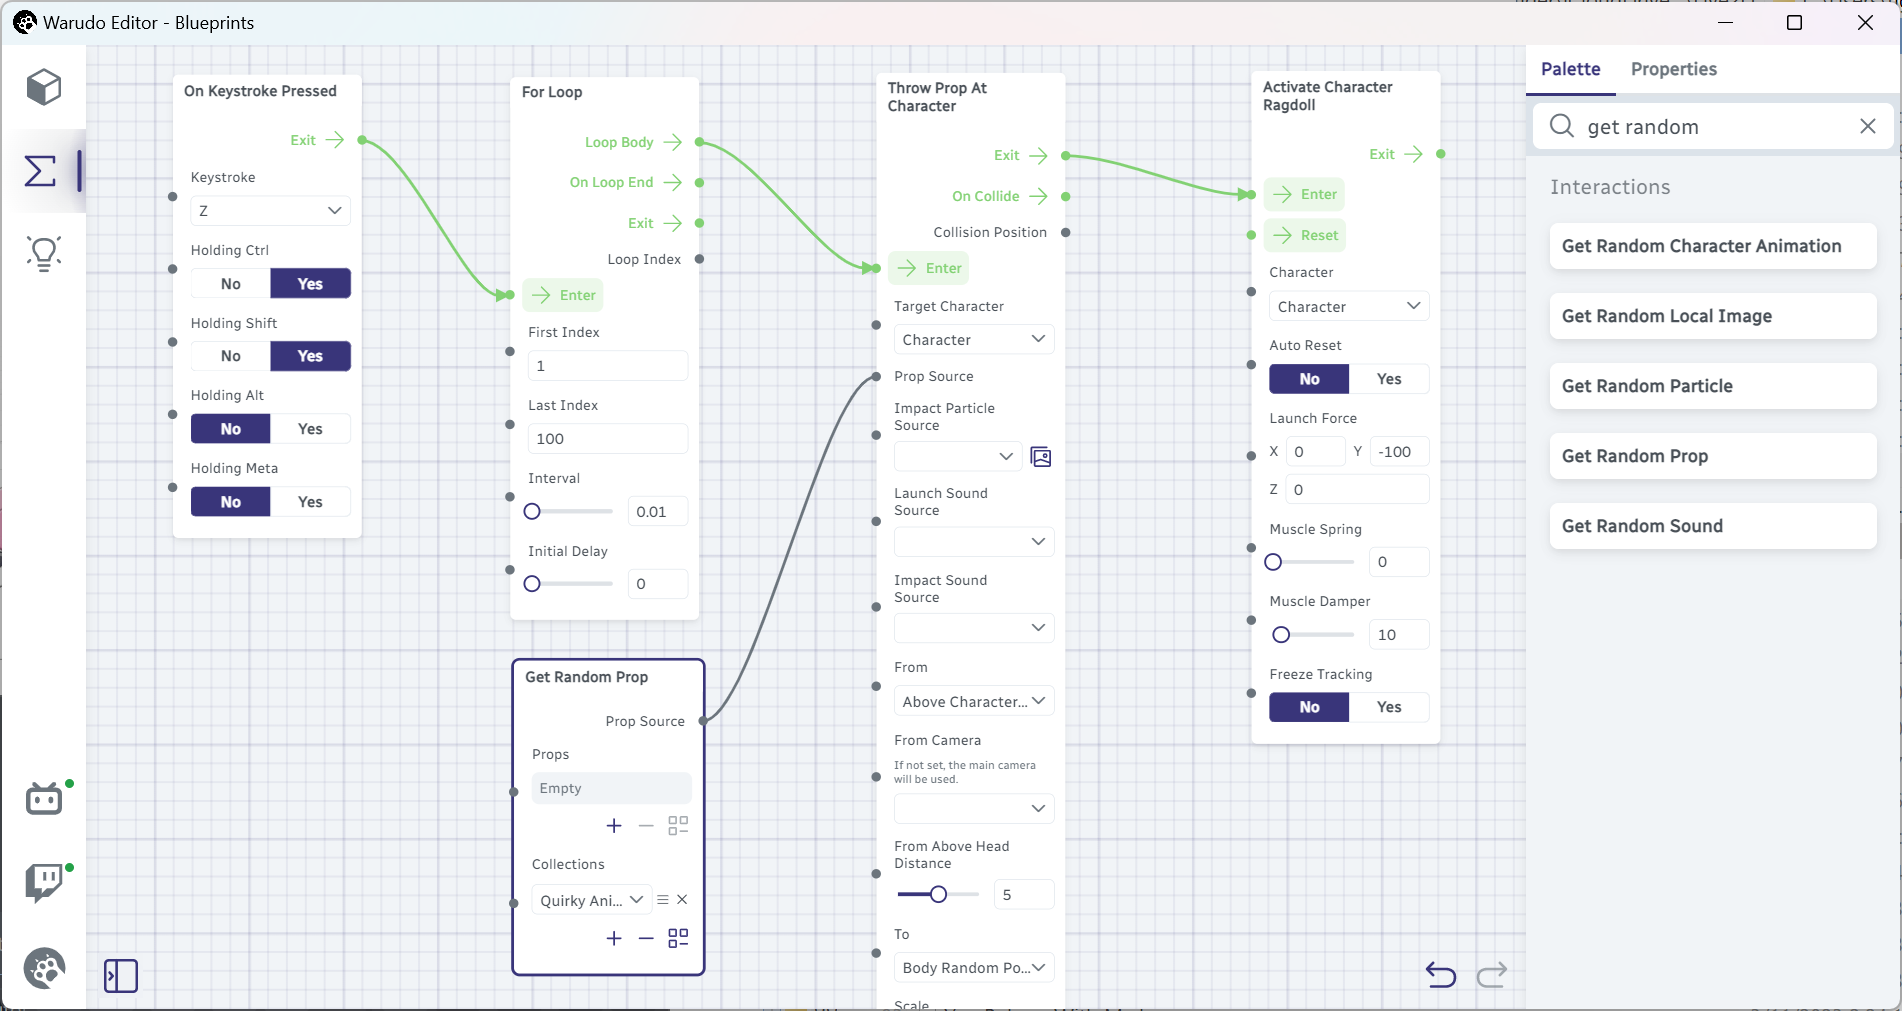
In the above, we have connected the Prop Source data output of the Get Random Prop node to the Prop Source data input of the Throw Prop At Character node. The Get Random Prop node does what it says: it randomly selects a prop from the Props list, or from any prop collection in the Collections list. In this case, we have added the "Quirky Animals" collection to the Collections list, so the Get Random Prop node will randomly select an animal plush prop, and output it to the Throw Prop At Character node.
Let's press Ctrl+Shift+Z again and see what happens. If everything goes well, you should see a bunch of different animals falling onto the character's head, burying the character under them. Fun stuff!
If you are interested in nitty-gritty technical details, the data inputs of a node are only evaluated (i.e., sourced from the connected data output) when the node is triggered. So, in this case, what happens behind the scenes is that the Get Random Prop node is triggered every time the Throw Prop At Character node is triggered (by the For Loop node), outputting a different prop each time.
More on For Loop
You may have noticed that the For Loop node has a Loop Index data output. This data output gives us the current index of the loop, starting from First Index and ending at Last Index. In the above example, the Loop Index data output gives us a number from 1 to 100. What can we do with this number?
Here's an idea: connect the Loop Index to the Scale data input of the Get Random Prop node, like below. Can you guess what will happen?
If you correctly guessed that the falling plushies will become bigger and bigger, awesome!
What if we want to make the plushies smaller and smaller instead? Or instead of a scale from 1 to 100, we want a scale from 0.1 to 10? Try to figure this out yourself! The Float Subtraction and Float Multiplication nodes may be useful.
The For Loop node also has On Loop End and Exit flow outputs. The On Loop End flow output is triggered when the loop ends, while the Exit flow output is triggered immediately after the loop is started. Try adding two Show Toast nodes like below, and see what happens.

Authors