Taking a Nap
It is common to take a break during a stream. In Warudo, when your face is no longer tracked, your character will slowly transition back to an idle pose and expression. In this tutorial, we will make the character transition to a sleeping pose and expression instead, adding a bit of subtle realism to your character.
Sleeping on the job!
This tutorial assumes you are using iFacialMocap or MediaPipe for face tracking. Other face tracking systems may not work because they do not provide a signal when your face is no longer tracked.
The Face Tracking Blueprint
Let's open our face tracking blueprint! Depending on the blueprint options you have selected during the onboarding process, your blueprint may look different from the one below, but the general idea is the same. Also, they look equally terrifying—there's so many nodes and connections!

We will not go through every node in this blueprint, but let's break it down into a few parts. First you should see this node sequence at the left:
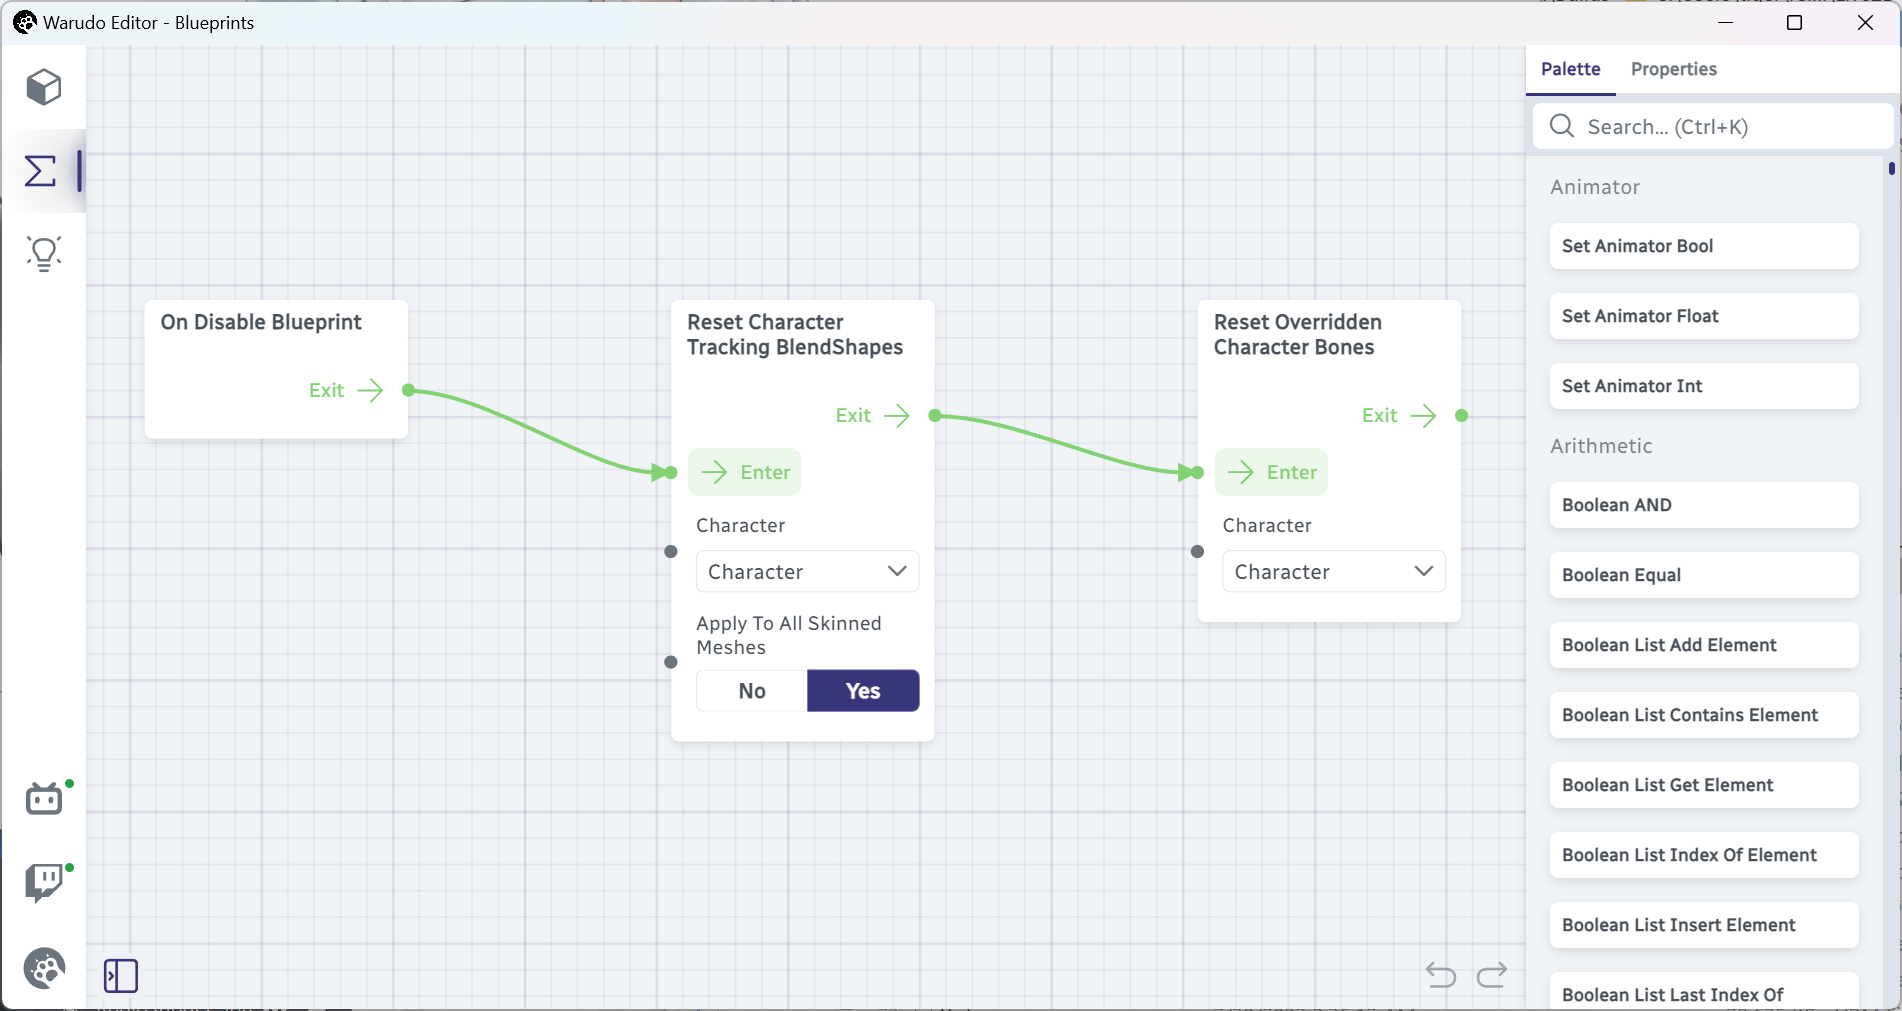
This one is easy! You have already seen the On Disable Blueprint node in a previous tutorial. It is triggered when the blueprint is disabled, and this face tracking blueprint is disabled when you turn off Character → Motion Capture. So, when you disable motion capture, the character's facial expression (blendshapes) is reset by the Reset Character Tracking BlendShapes node, and the character's bones (e.g., head, eyes) are reset by the Reset Overridden Character Bones node.
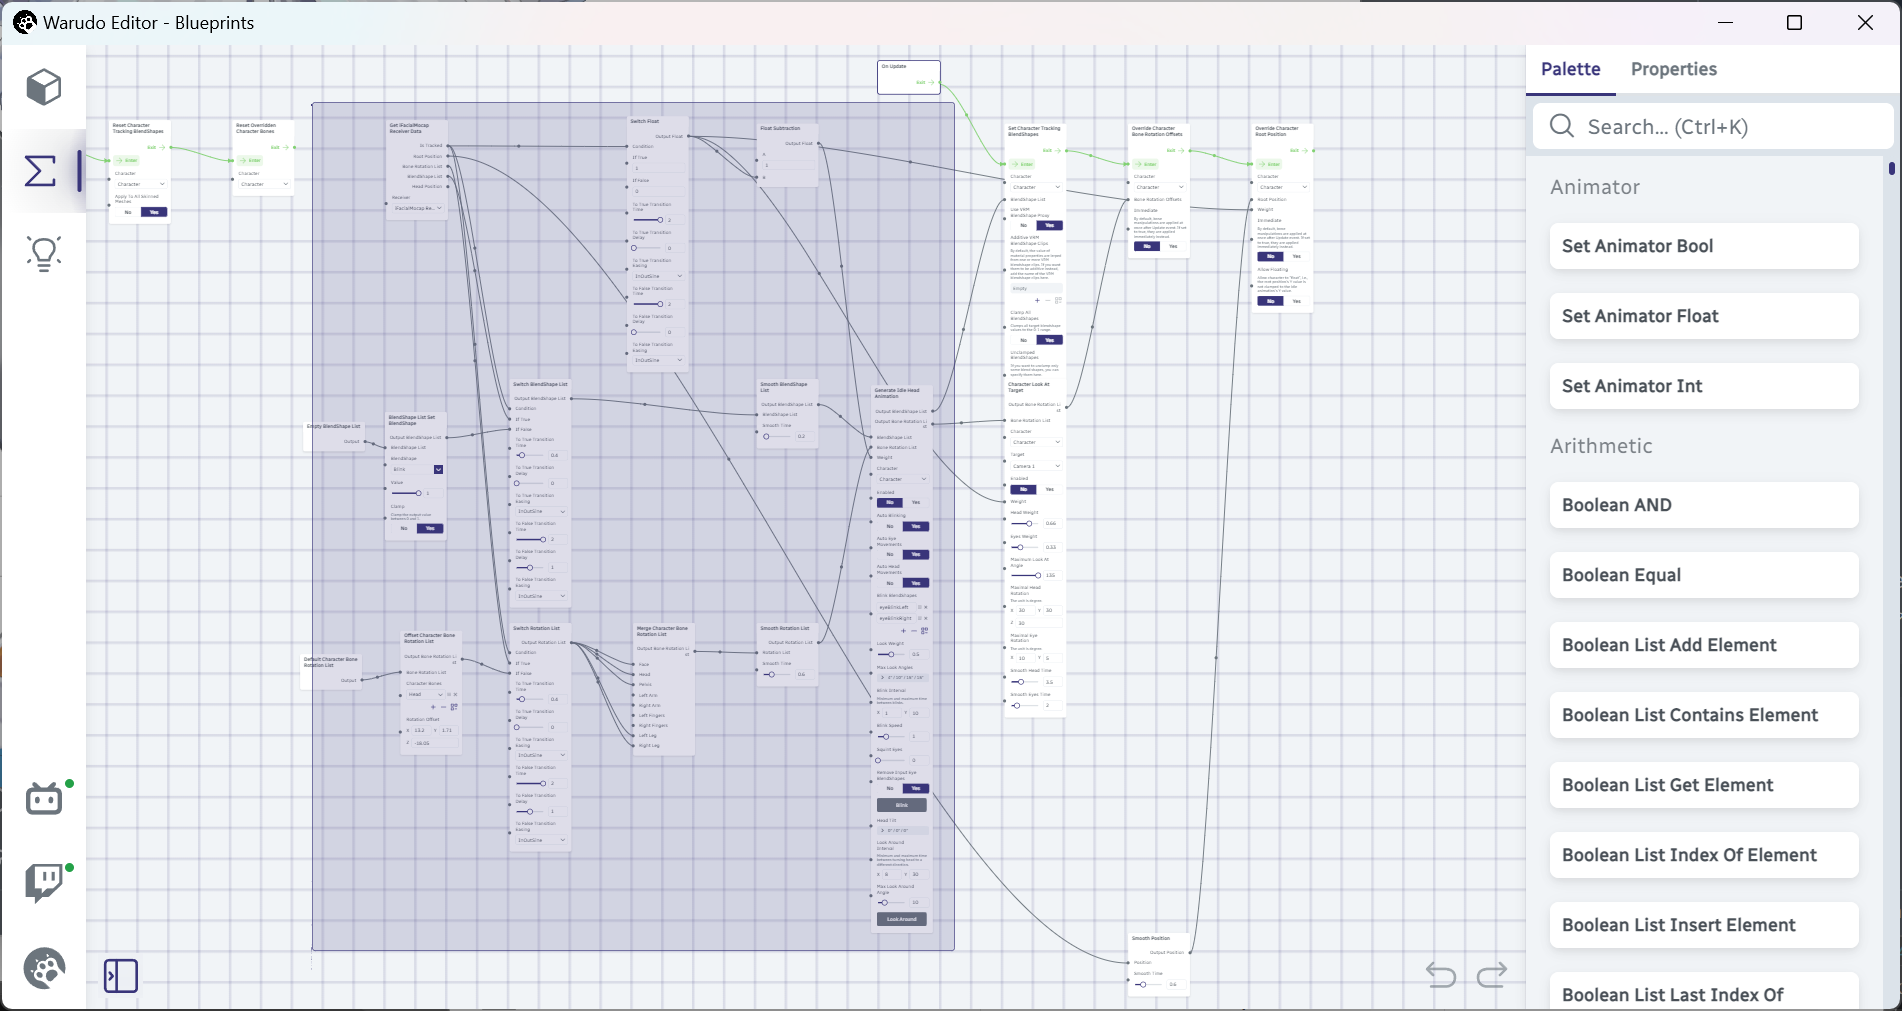
Now let's take a look on the right side of the blueprint:

You are already familiar with the On Update node; it is triggered every frame Warudo is running. This node sequence is saying: for every frame, we want to update the character's blendshapes (Set Character Tracking BlendShapes), bones (Override Character Bone Rotation Offsets), and root position (Override Character Root Position). But what blendshapes? What bones? And what root position? These are the jobs of the nodes in the middle of the blueprint:
Switch BlendShape List
Fortunately, for the purpose of this tutorial, we only need to look at a few nodes. Locate the Get iFacialMocap Receiver Data node (or, if you are using MediaPipe, the Get MediaPipe Receiver Data node); this is the "source" node that provides face tracking data.
The node connections are currently too close to each other, so for clarity, let's move the Get iFacialMocap Receiver Data node towards the bottom left, like this:
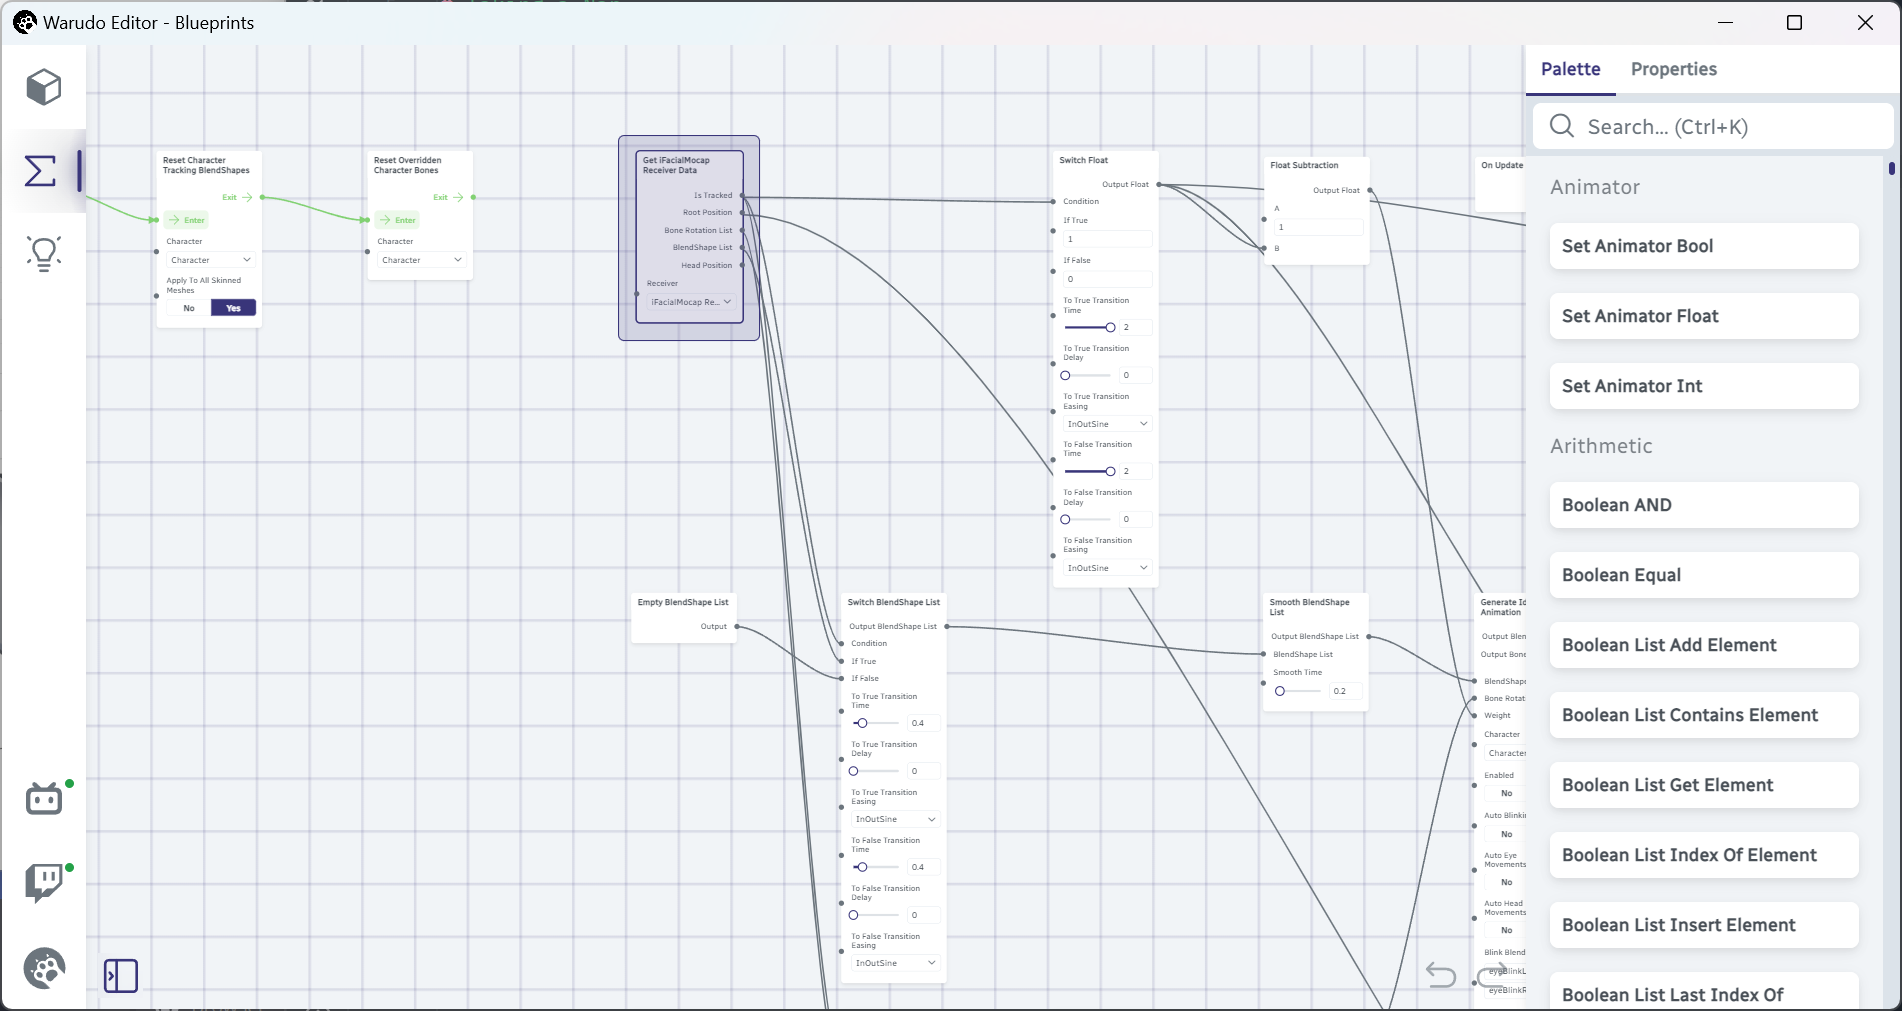
Zoom and pan the blueprint until you see the following 3 nodes: Get iFacialMocap Receiver Data, Empty BlendShape List, and Switch BlendShape List. Knowing nothing about the Switch BlendShape List node yet, just by inspecting the connections to it, can you guess what it does?
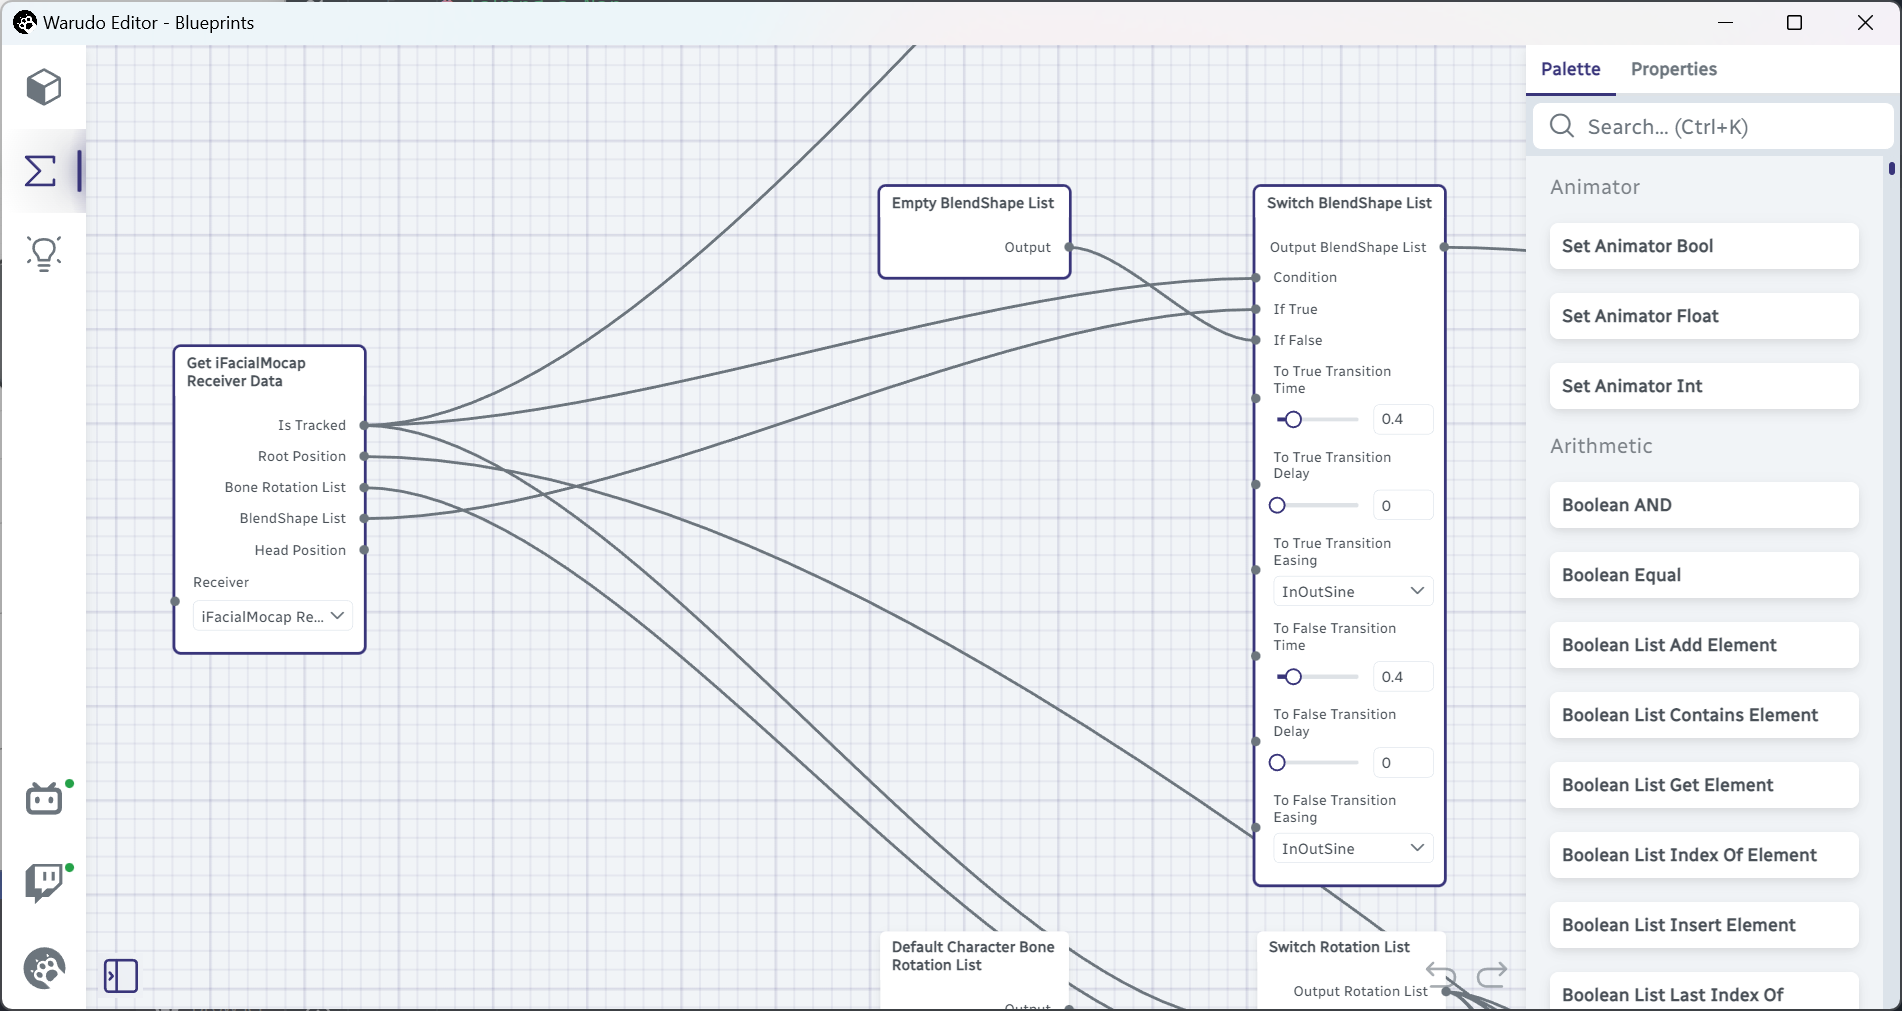
Let's figure this out. First, we see Get iFacialMocap Receiver Data → Is Tracked is connected to Switch BlendShape List → Condition. This means the Switch BlendShape List node cares about whether the face is tracked or not. If the face is tracked, the Condition is Yes; otherwise, the Condition is No.
Next, we see Empty BlendShape List → Output is connected to Switch BlendShape List → If False, and Get iFacialMocap Receiver Data → BlendShapes is connected to Switch BlendShape List → If True. Hmm, I think I am starting to get it!
Indeed, the Switch BlendShape List node essentially checks if the face is tracked at the moment; if the face is tracked, it will pass the tracking blendshapes to the output, reflecting our facial expression on the character; otherwise, it will pass an empty blendshape list to the output, resulting the character not having any facial expression at all.
What makes this node even more powerful is its ability to switch between two blendshape lists with smooth transitions: the To True/False Transition Time, To True/False Transition Delay, and To True/False Transition Easing options allow you to precisely control how the character's facial expression changes when the face becomes tracked or untracked. For example, if To False Transition Time is set to 0.5 seconds and To False Transition Delay is set to 1 second, then 1 second after your face is no longer tracked, the character's facial expression will smoothly transition to the empty blendshape list (i.e., a natural expression) in 0.5 seconds!
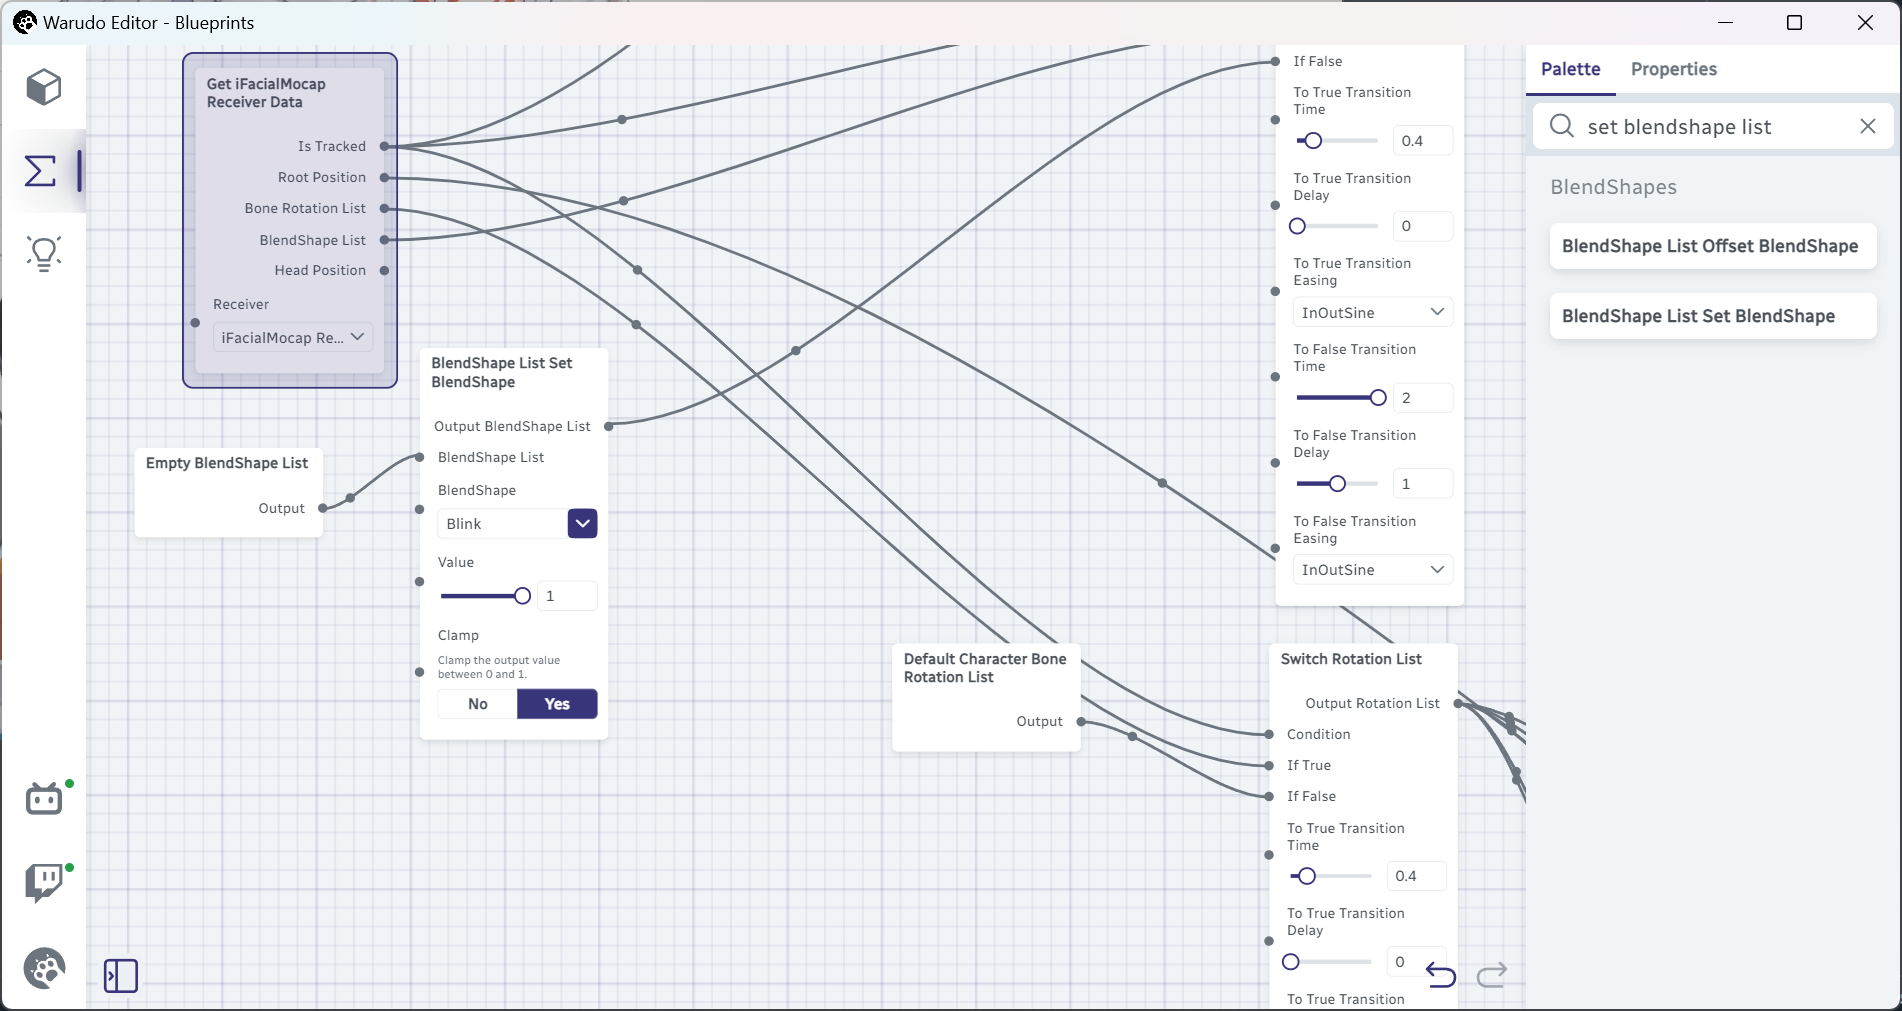
Anyway, if we want to change the character's expression when our face is no longer tracked, we can just modify the input to Switch BlendShape List → If False, which is currently a mere empty blendshape list. We can add a BlendShape List Set BlendShape node in between to add a blendshape to the list:

In the above example, I am creating a blendshape list with only one entry: Blink set to 1. This blendshape list will be passed to the output whenever face tracking is lost, resulting in the character closing their eyes.
If your character does not have a Blink blendshape, you can use the blinking blendshapes that come with your character, for example, eyeBlinkLeft and eyeBlinkRight. To set multiple blendshapes, simply add another BlendShape List Set BlendShape node in between.
Now try to put your hand in front of your iPhone's front camera to block face tracing (or if you are using MediaPipe, just move your face away from the camera), and you should see your character closing their eyes!

The default settings will close the eyes quite fast, so you may want to adjust the To False Transition Time and To False Transition Delay options to make the transition more natural. I have set them to 2 and 1 seconds respectively:

Switch Rotation List
Before reading this section, if you have enabled idle head animation during the onboarding process (which is by default enabled when not tracking), you need to disable it first. Locate the Generate Idle Head Animation node and set Enabled to No:

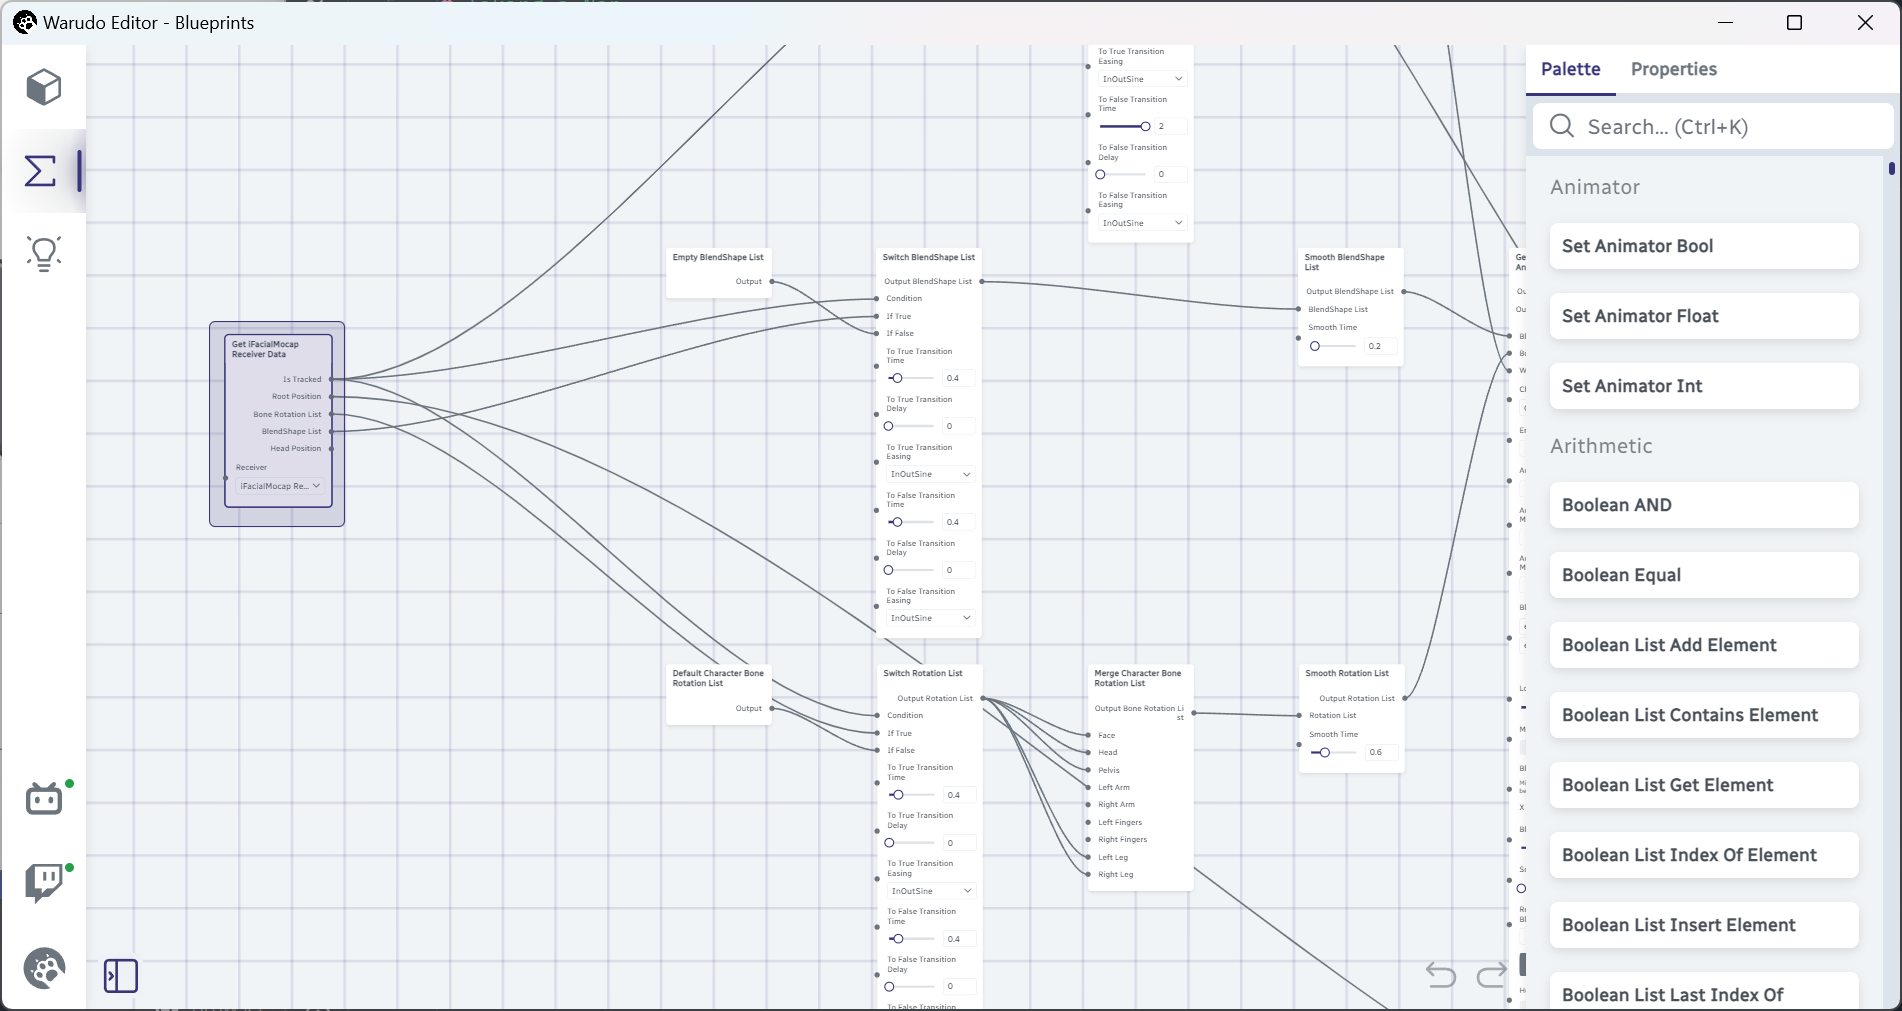
To make the character transition to a sleeping pose, such as tilting their head to the side, the process is actually very similar to what we have just done. Let's once again move the Get iFacialMocap Receiver Data node towards the bottom:
Until you can see the Default Character Rotation List and Switch Rotation List nodes on the right:

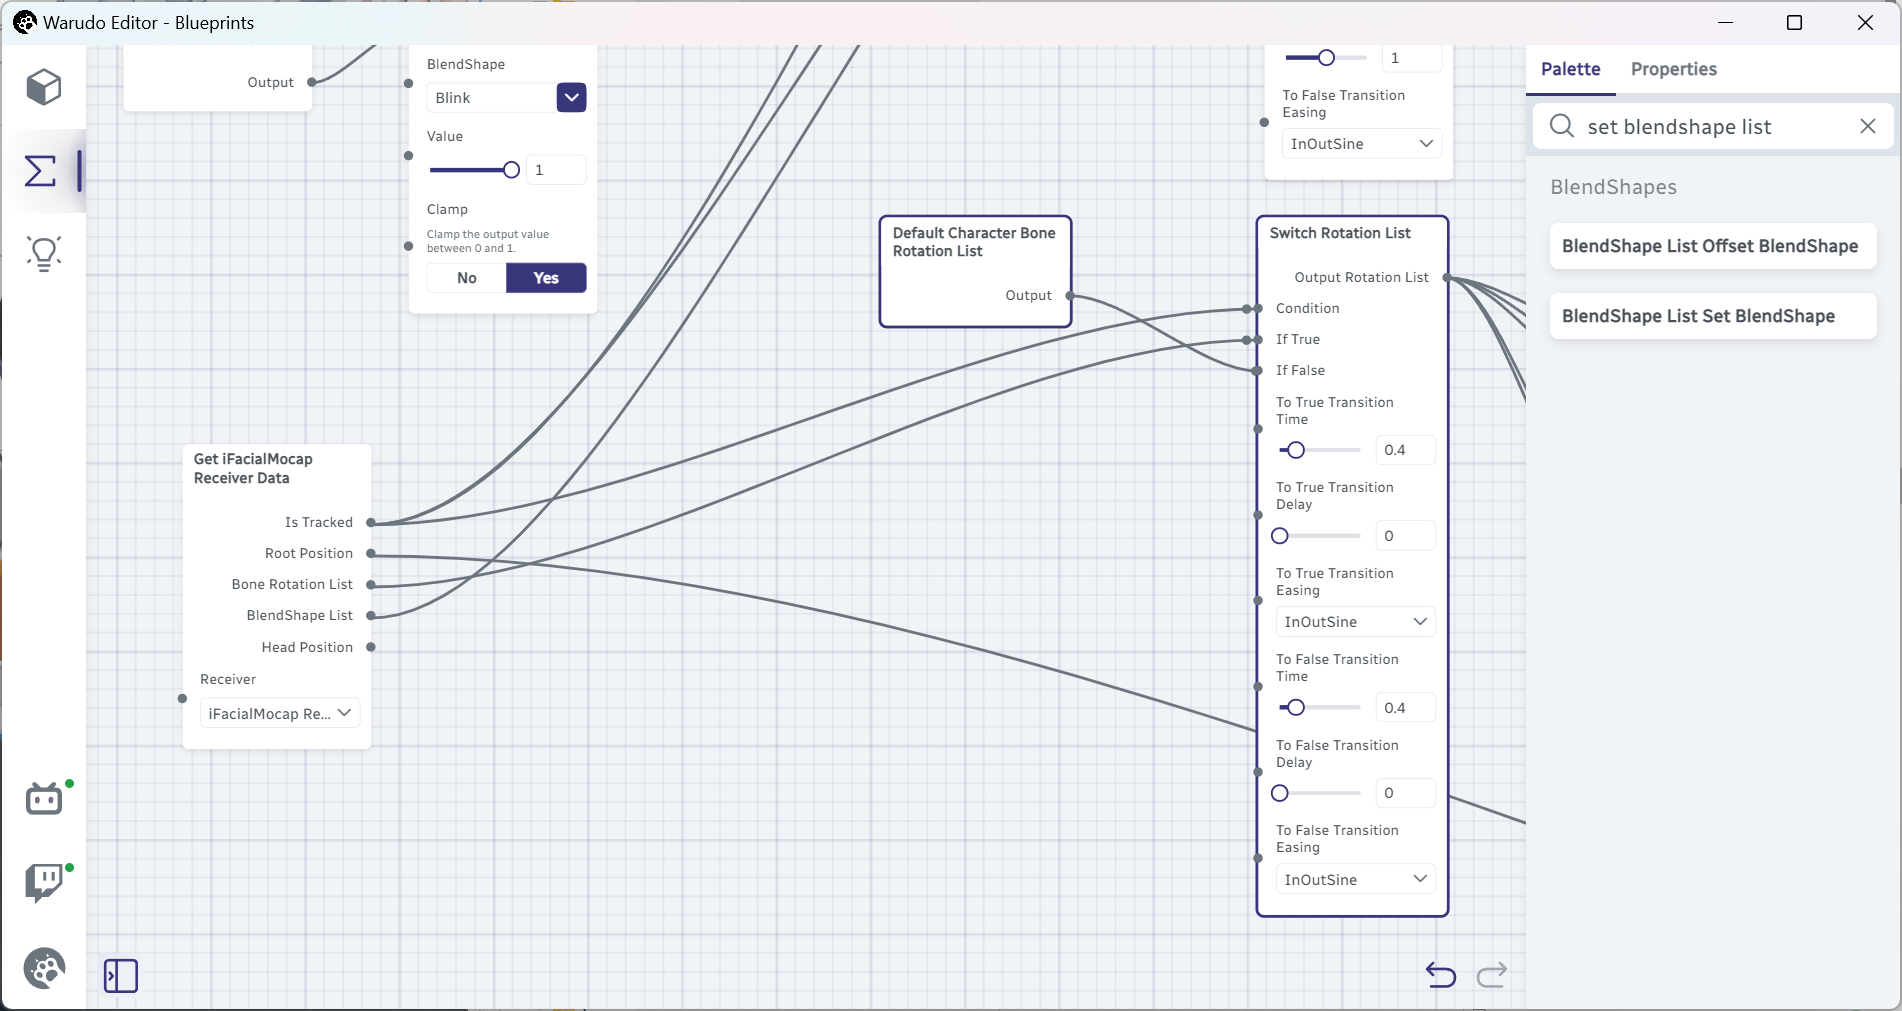
A 3D character's pose is defined by how much each bone is rotated, which is why instead of blendshapes, we are seeing "bone rotations" everywhere. The Switch Rotation List node here checks if the face is tracked, and passes the bone rotation data (i.e., head movement) to the output if the face is tracked, and passes the default rotation list (i.e., head does not move at all) to the output otherwise.
To tilt the head to the side, we can simply add an Offset Character Bone Rotation List node in between to offset the head's rotation:
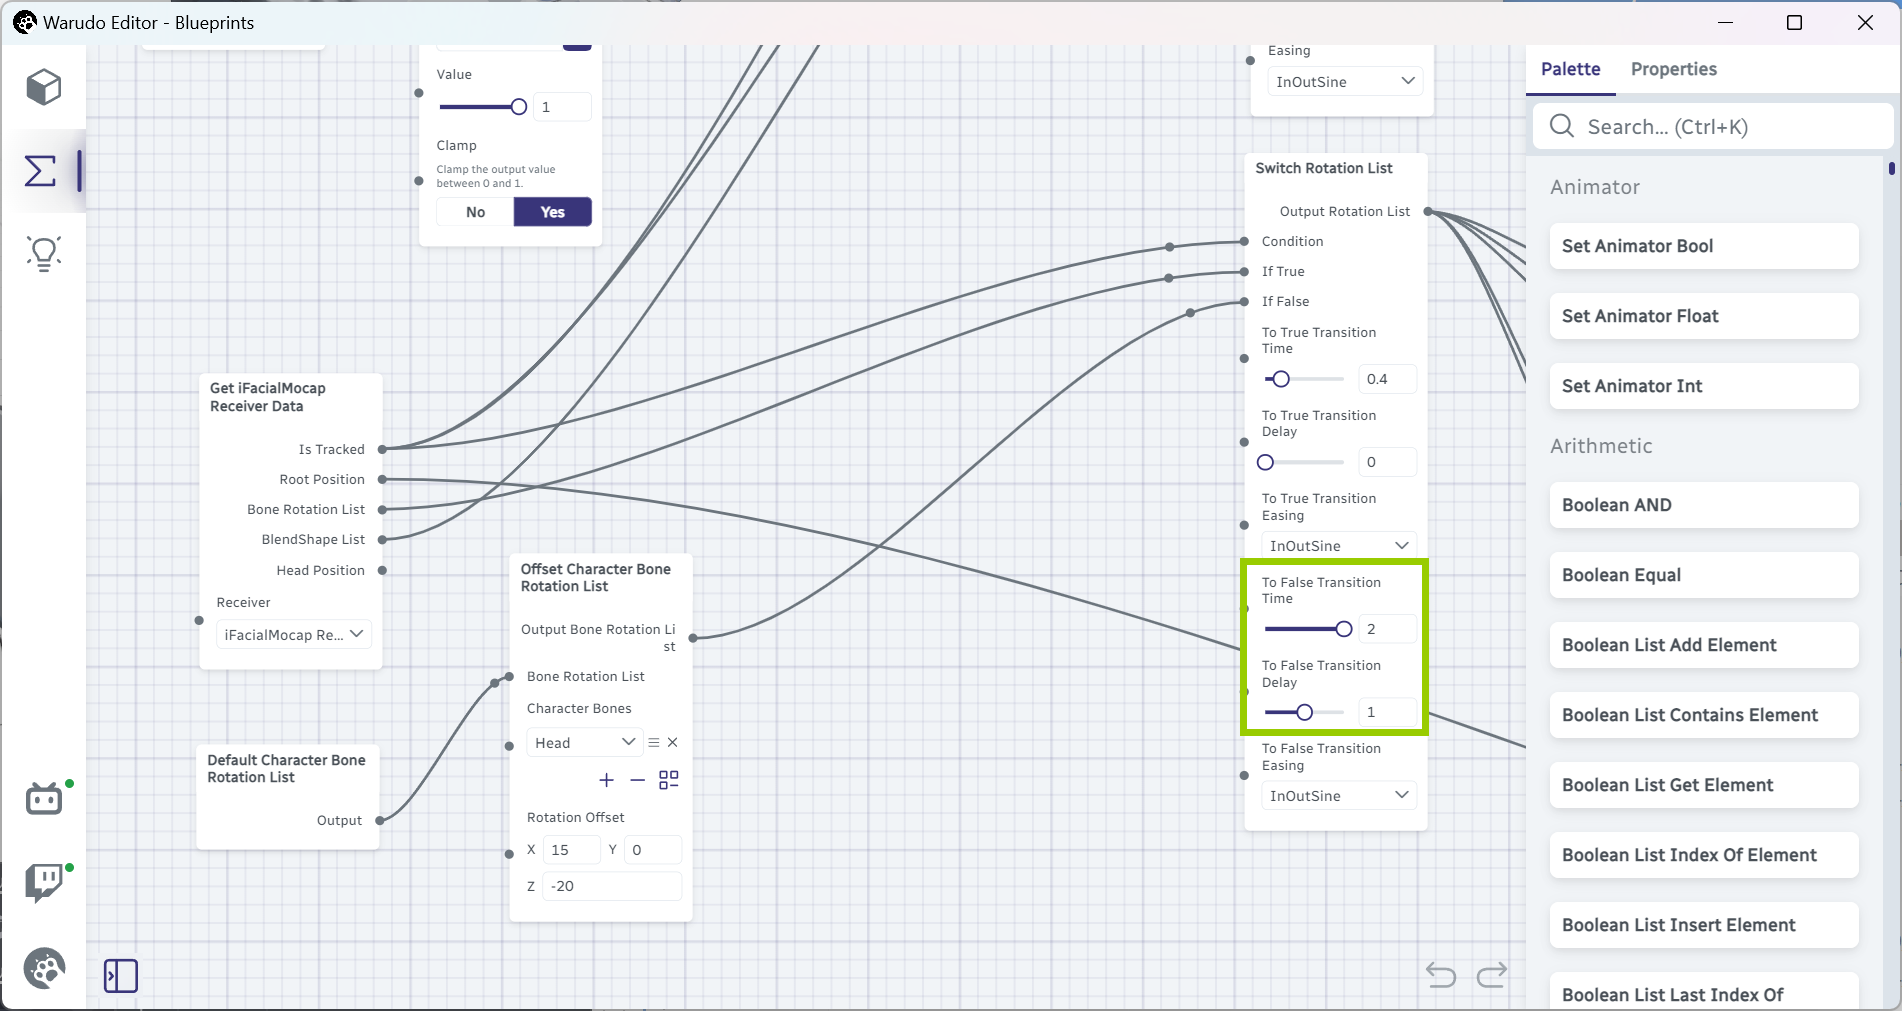
I have added Head to the Character Bones list and set Rotation Offset to (15, 0, -20), which means the head will be rotated 15 degrees to the front and 20 degrees to the right. You are of course welcome to adjust the rotation to your liking, or even add more bones to the list to make the character's sleeping pose more complex!
Instead of manually entering the numbers, you can click and drag the X/Y/Z labels left and right to adjust the numbers. This trick works for any number input!
Now when your face is no longer tracked, your character will tilt their head to the side!

Authors