Director
This feature is only available in Warudo Pro.
The director asset provides simple yet powerful cinematic camera control, enabling you to deliver high-quality live performances with ease.

The video switcher in the director.
The director is based on Unity's Cinemachine, an award-winning procedural camera system. Users of Cinemachine should find most virtual camera concepts familiar.
Setup
A sample scene with a preconfigured director asset is included in your Pro license. We recommend you to start with this sample scene to get a feel of how the director works. Then, you can use the Export Asset button to export the director asset to a JSON string, and import it into your own scene using the Import Asset button.
A director asset controls and animates a camera asset. You can select the camera you want to control in the Camera dropdown. To toggle the control of the camera between the director and the user (e.g., orbit character, free look), press ` (the key above Tab).
The Virtual Cameras list contains a list of virtual cameras that the director can switch between. A virtual camera determines how the camera is positioned, oriented, and animated, when the director switches to it. You can press the hotkey shown next to the virtual camera's name to switch to that virtual camera; you can also set the Live Camera option directly.
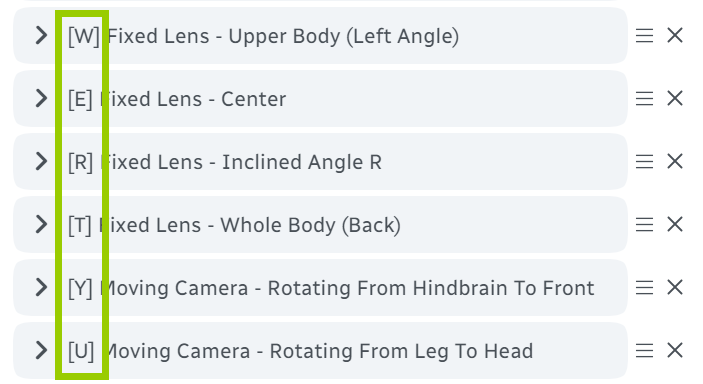
Press the hotkey to switch to the virtual camera.
By default, the Switcher is enabled. The switcher UI provides an intuitive way to preview a grid of virtual cameras and switch between them. You can use Left/Right Arrow to go to the previous/next page, and Mouse LMB to switch to the selected virtual camera. Of course, you can still use the hotkeys to switch between virtual cameras.
Enabling the switcher can affect performance. If you are experiencing low FPS, try to reduce the Grid Size and Update Rate, or disable the switcher altogether.
Virtual Cameras
To add a new virtual camera, simply click the + button below the Virtual Cameras list. You can then configure the virtual camera as you like.
Blend Animation
This option determines how the camera is animated when the director switches to this virtual camera. By default, the camera Cuts to the virtual camera, which means that the camera is instantly moved to the position and orientation of the virtual camera. You can choose to smoothly blend to the virtual camera instead, by selecting a Default Blend such as EaseIn or EaseOut.
Camera Animation
To add animation to the virtual camera, first enable Camera Animation and specify the Single Duration. Then, all options in this virtual camera with the checkbox next to them checked will be animated over the specified duration.
For example, if you want to animate the Field Of View of the camera from 35 to 60, first check the checkbox next to Field Of View. Then, in the Offset field, specify the offset from the default value, which is 25 in this case.

Animating the field of view from 35 to 60.
You can animate virtually any option in the virtual camera, including the camera's Follow Offset, Look At Offset, etc. See below sections for more details.
You can also set the Loop Type of the animation. Play Once means that the animation will only play once. Repeat means that the animation will loop indefinitely. Back And Forth means that the animation will play in a loop, but the direction of the animation will be reversed every time it reaches the end (using the above example, the field of view will animate from 35 to 60, then from 60 to 35, then from 35 to 60, and so on).
Finally, you can concatenate multiple camera animations by enabling Auto Switch Camera On Animation End. This allows you to create a sequence of camera animations that play one after another.
Field Of View
The field of view of the camera, in degrees. A smaller field of view means a narrower view, and vice versa.
This is usually set to a low value (<35) for concert scenes, mimicking lens that is commonly used in real-life concerts.
Position
The position of the camera.
- Manual mode allows you to specify the position directly.
- Follow Target mode puts the camera at the same position as the Target; the target can be a character, prop, or anchor. You can use the Damping option to smooth out the movement of the camera.
- Transposer mode puts the camera at the same position as the Target, but with an offset specified by the Follow Offset option. You can also set the Binding Mode (documentation here). Damping options are available for each translation/rotation axis.
- Orbital Transposer mode is similar to the Transposer mode, but the camera is on an orbit around the target, with the position specified by Angular Offset.
In practice, Manual, Transposer, and Orbital Transposer are the most commonly used position modes.
A common mistake is to set the Target to a character's bone (e.g., head). It may look fine when the character is not moving, but when the character moves, the camera will move rigorously with the character, causing a very shaky camera! To avoid this, you should set the Target Character Mode to Root Position, and enable Fixed Rotation. Or, even better in most cases, just use Manual position mode instead!
Orientation
The orientation of the camera.
- Manual mode allows you to specify the orientation directly.
- Follow Target mode puts the camera at the same orientation as the Target; the target can be a character, prop, or anchor. You can use the Damping option to smooth out the movement of the camera.
- First Person mode allows you to look around using the mouse. Click on the Set Initial Rotation button to make sure the camera starts at the current orientation when the scene is loaded next time.
caution
First Person orientation mode is not compatible with the Switcher UI at the moment. You must disable the Switcher to use First Person orientation mode.
- Hard Look At Character mode enforces the camera to always look at the Target.
- Composer mode rotates the camera to look at the Target, but with an offset specified by the Look At Offset option. Furthermore, you can change Screen X and Screen Y to put the target at a different position on the screen, other than the center.
- Composition parameters allow you to adjust the Dead Zone, Soft Zone and Bias of the camera composition, ensuring that the camera does not move too much when the target moves slightly.
- Lookahead parameters let the camera look ahead of the target, so that the camera can anticipate the target's movement.
tipRead this blog post for a visual explanation of the composer.
In practice, Manual and Composer are the most commonly used orientation modes.
A common mistake is forgetting to set up the Dead Zone and Soft Zone in the Composer mode. This can cause the camera to move too much when the target moves only slightly, causing a very shaky camera! Note that you should set up the Dead Zone and Soft Zone after you have made sure the camera is in a good position.
Fixed cameras with both Position and Orientation mode set to Manual are often more useful than you think——they can reduce the cognitive load of the viewers, ensuring they do not suffer from motion sickness. You can add Handheld Movement (see below) to make fixed cameras more natural.
Position/Orientation Offset
The offset from the default position/orientation of the camera. This is useful when you want to animate the camera's position/orientation from its current position/orientation.
Handheld Movement
Simulates the camera being held by a person. This will add a slight shake to the camera's movement. You can adjust the Intensity and Speed to control the strength and speed of the shake.
Collision Detection
Enables collision detection for the camera, so that the camera will not go through walls or other colliders. You can adjust the Camera Collision Radius and Damping to control the size of the camera and the strength of the collision detection.
Global Offsets
The Global Offsets section allows you to specify global offsets for all virtual cameras, including Camera Animation Speed, Field Of View, Position, Orientation, and Zoom. This can be especially useful for implementing effects such as zooming in and out based on audio volume, regardless of which virtual camera is currently active.
Authors