Launched into the Sky
Want to get launched into the sky? Me neither. But it's fun, so let's do it anyway! In this tutorial, we will learn how to activate ragdoll physics on your character when they are hit by a prop.
Ragdolling your character.
Throwing Props
Let's create a new blueprint. For the trigger, we will once again use the On Keystroke Pressed node, but you can use any event node you want. I will set the hotkey to Space just for ease of testing. Then, add a Throw Prop At Character node right next to it, and connect the nodes like below. Set the Character option to our character, and the Prop Source option to the prop model you want to throw at your character (I will choose "Sea Lion").
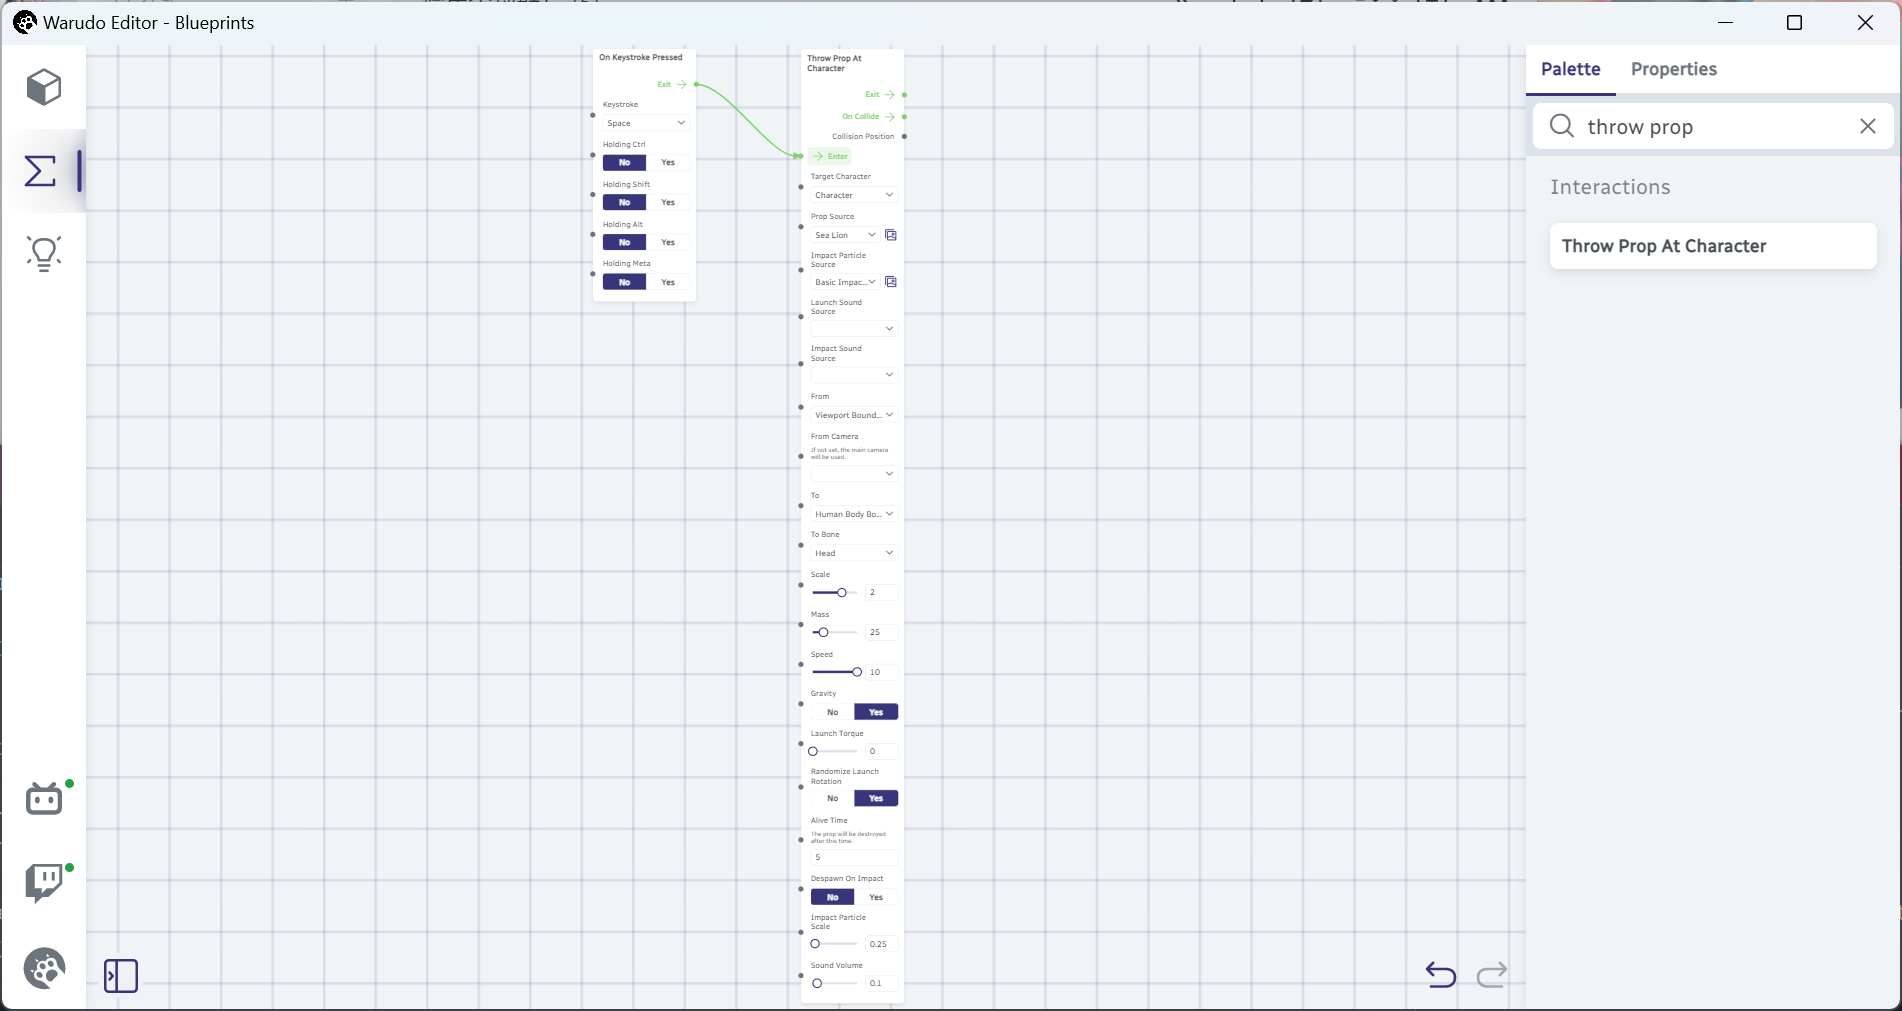
God, this node is huge. There are many options on the Throw Prop At Character node, so let's unpack it a bit.
- Impact Particle Source and Impact Particle Scale determine the particle effect that is played when the prop hits the character; I will choose "Basic Impact 02" here, but you can open the preview gallery by clicking on the gallery icon to see all the available particles.
- Launch Sound Source, Impact Sound Source and Sound Volume are pretty much self-explanatory.
- The From dropdown allows you to choose where the prop is thrown from. You can choose from the following options:
- Viewport Bounds Random Position: Anywhere on screen, i.e., simulating a prop being thrown from the camera.
- Screen Edge: Anywhere on the edge of the screen, i.e., simulating a prop being thrown from outside the camera.
- Above Character Head: Right above the character's head.
- Scene Object: A scene object, can be another prop, a character, or an anchor.
- World Position: A 3D point in the scene.
- The To dropdown allows you to choose where the prop is thrown to. You can choose from the following options:
- Body Random Position: Anywhere on the character's body.
- Human Body Bone: A standard bone on the character's body, e.g., the head, the left hand, etc.
- Transform Path: Any child transform of the character. For example, if you want to throw at your character's tail, you can choose the tail transform here.
- Scale, Mass, Speed and Gravity are the physical properties of the prop and determine how the character reacts to the prop. You can adjust them to your liking; I will change Scale to 2 and Speed to 10.
- Launch Torque and Randomize Launch Rotation determine the rotation of the prop when it is launched.
- Alive Time determines how long the prop will stay in the scene before it disappears.
Now, when you press Space, the prop will be thrown at our character's head, and our character reacts to it.
Activating Ragdoll
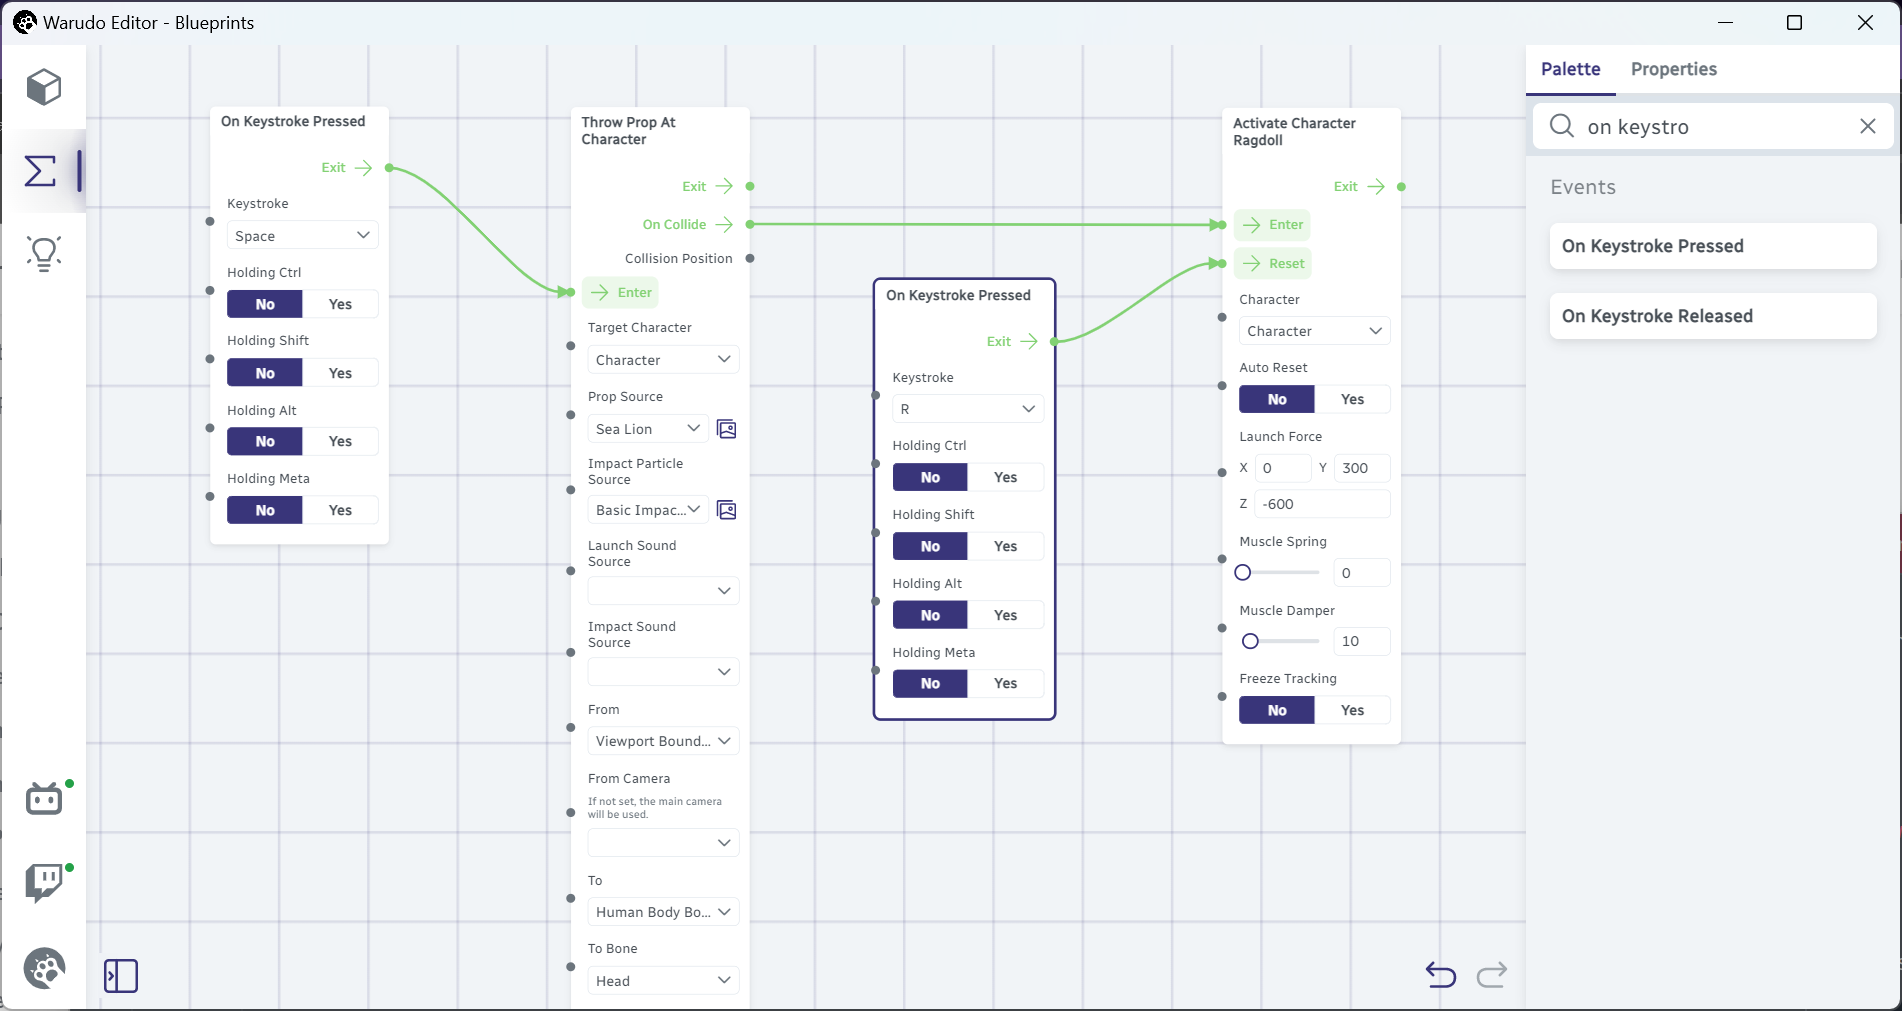
But we wanted to ragdoll our character, not just make them flinch! Let's add a Activate Character Ragdoll node, and connect the On Collide flow output of the Throw Prop At Character node to the Enter flow input of the Activate Character Ragdoll node. Then, set the Character option to our character and Launch Force to (0, 300, -600).

Note that we connect from the On Collide flow output, not the Exit output! This is because we want to activate the ragdoll when the prop collides with the character. If we connect from the Exit output, the ragdoll will be activated immediately after the prop is thrown, which is not what we want.
Let's press Space again. The prop gets thrown, but this time, when it hits the character, the character is launched in the classic ragdoll fashion. You can even press Space multiple times to throw props at your character again, each time hitting them with more force. Awesome!
Other interaction nodes, such as Launch Liquid At Character and Spawn Sticker From Local/Online Image, can be configured similarly. Try to play around with them and see what you can come up with!
Resetting Ragdoll
You will notice that the character resets after 5 seconds, which can be changed by adjusting the Reset Wait Time option on the Activate Character Ragdoll node. You can also disable automatic resetting by setting Auto Reset to No, and trigger the Reset flow input manually. For example, the following blueprint will only reset the character when you press the R key.
Authors