Karaoke Time
Who doesn't love to karaoke on stream? But now we are in the 3D world, let's add some realism by making our character hold a microphone. This tutorial will show you how to do just that: toggling a singing pose and a microphone prop with a hotkey.
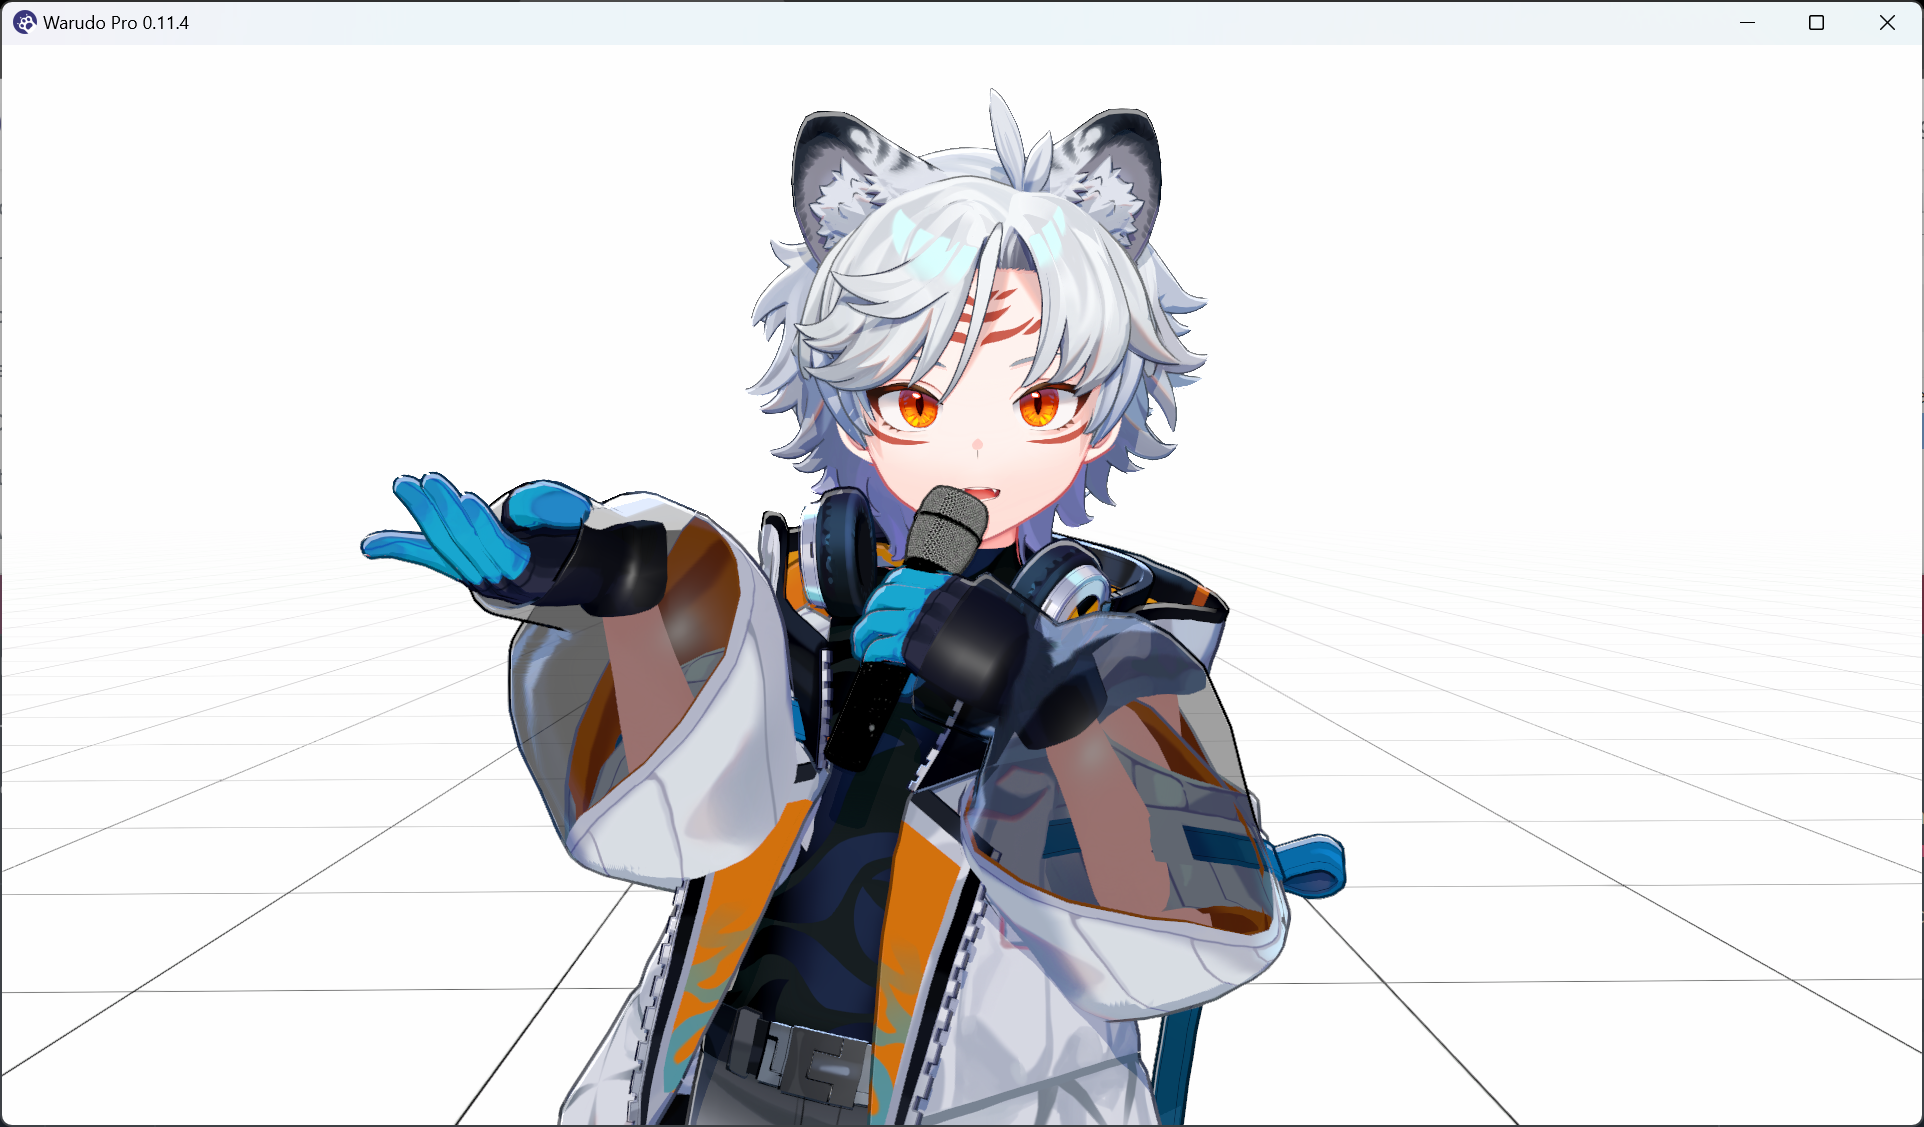
Singing my heart out!
If you want to use this karaoke room environment, you can download it from our Steam Workshop using the Discover tab in Warudo.
Playing Idle Animations
First, add a microphone prop and attach it to your character's left hand. Refer to the Getting Started tutorial if you are not sure how to do this. Then, in the prop asset, set Enabled to No to hide the microphone for now.
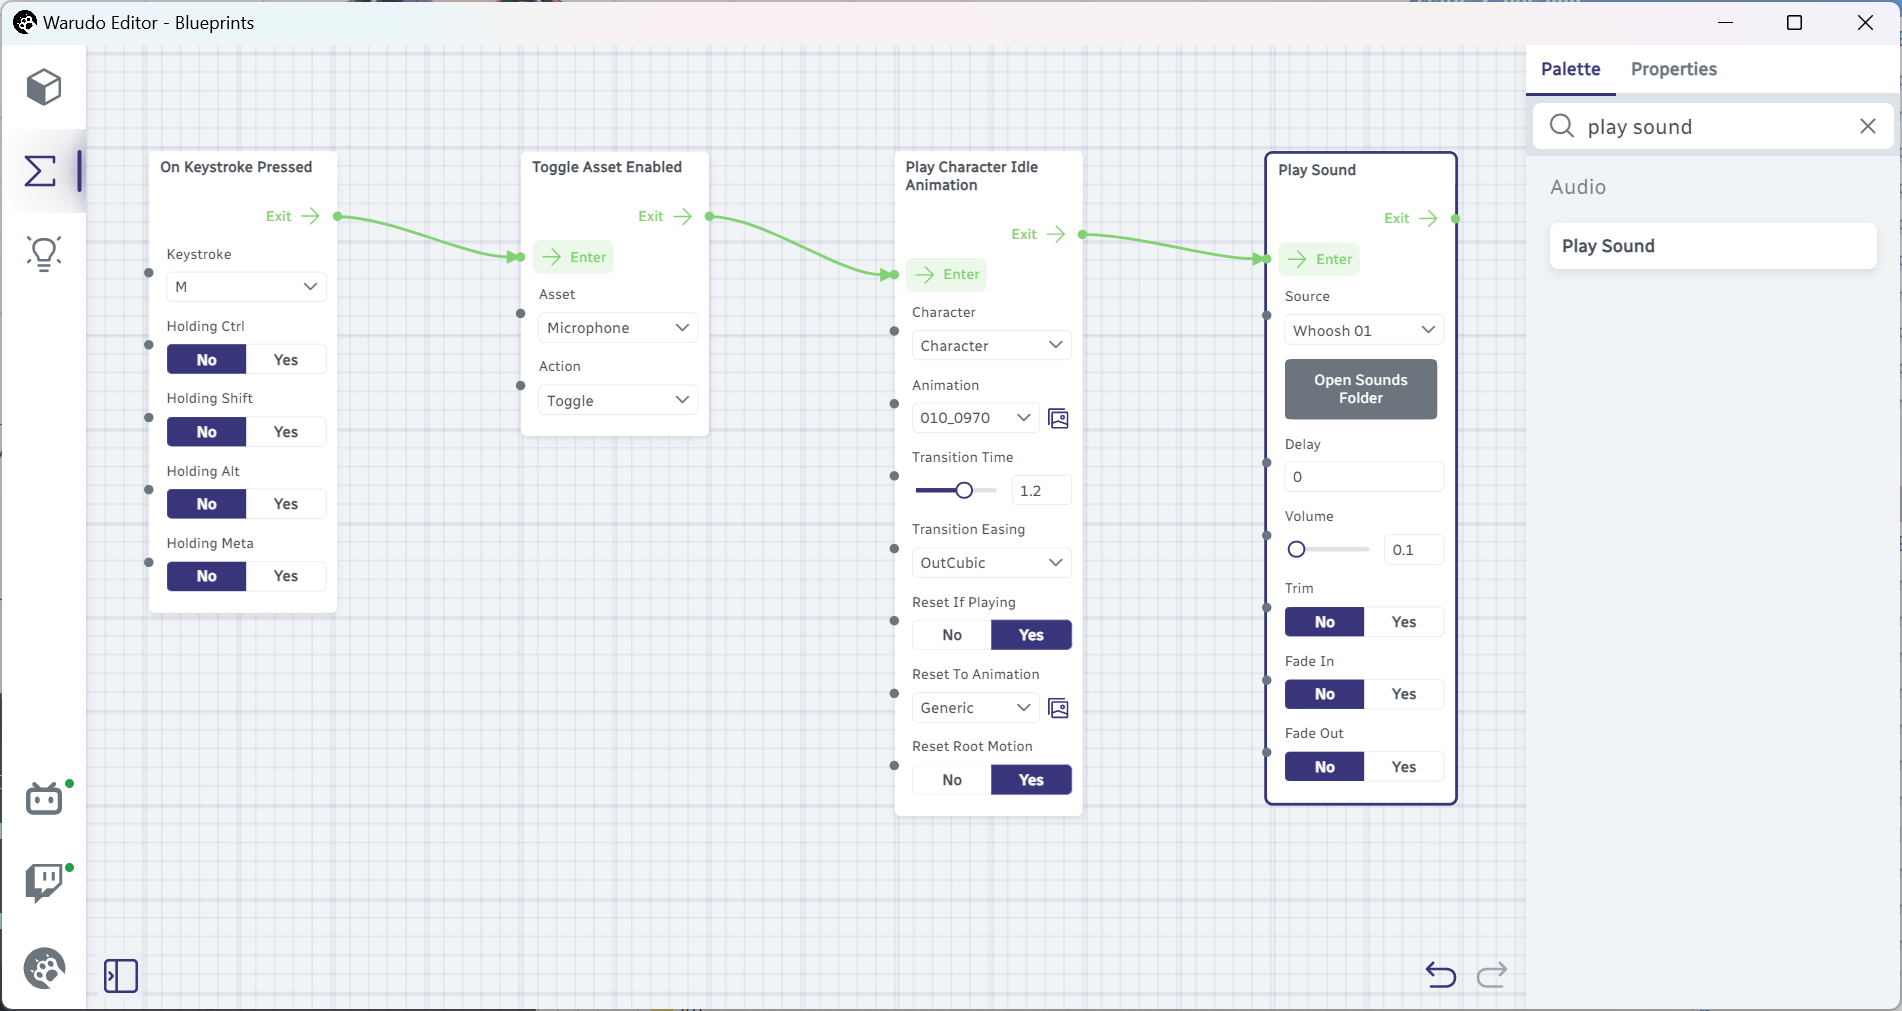
Next, try to recreate the blueprint below using the On Keystroke Pressed node that we are already very familiar with, with two new nodes: Toggle Asset Enabled and Play Character Idle Animation. (Their names are pretty telling, aren't they?) Remember to set Toggle Asset Enabled → Asset to the microphone prop, and Play Character Idle Animation → Animation to a singing pose. I am using "010_0970," but feel free to experiment with other poses.

There you go! Now when I press the hotkey M, the microphone appears, and my character lifts it up, ready to sing.
This is too easy for you, so let's make it more interesting. Can you think of a way to play a "whoosh" sound effect when the microphone appears?
"That's easy," you say. You type "sound" in the search bar, and ah-ha! There is a Play Sound node. You add it to the node editor, set the Sound Source to a whoosh sound effect, and connect it next to the Play Character Idle Animation node:
You press M, and the sound plays just fine. Great job! But notice that the sound effect is played regardless of whether you are putting out the microphone or putting it away. Is there a way to only play the sound effect when you are putting out the microphone?
Flip Flop
The answer is the Flip Flop node. Usually, nodes have an Enter flow input and an Exit flow output; but the Flip Flop node is special: it has two Exit flow outputs, A and B. The first time the Flip Flop node is triggered, it will trigger a flow at A; the second time it is triggered, it will trigger a flow at B; the third time it is triggered, it will trigger a flow at A again; and so on. In other words, the Flip Flop node will alternate between A and B every time it is triggered.
That's convenient. Let's restructure our blueprint like below!

Now the sound effect will only play when you are putting out the microphone!
Animation Profiles
It is cute and all, but there is a limitation of using the Play Character Idle Animation node: you can only select a pre-defined pose/animation. For example, I want my character to only lift their left hand and nothing else, but there is no such pose in the list. That's when Character → Overlaying Animations come in handy.
Open the character asset, set Idle Animation to Generic to reset to default pose, and scroll down to Overlaying Animations. Click the + button to add a new entry to the list, and select "010_0970" from the Animation dropdown:

The character poses as expected:
Now, in order to only lift the left hand, we set Masked to Yes, and add Left Arm to the Masked Body Parts list, like below:

You should also adjust the Weight option until you are satisfied with the pose. In this case, I set it to 0.88; this varies from character to character though.
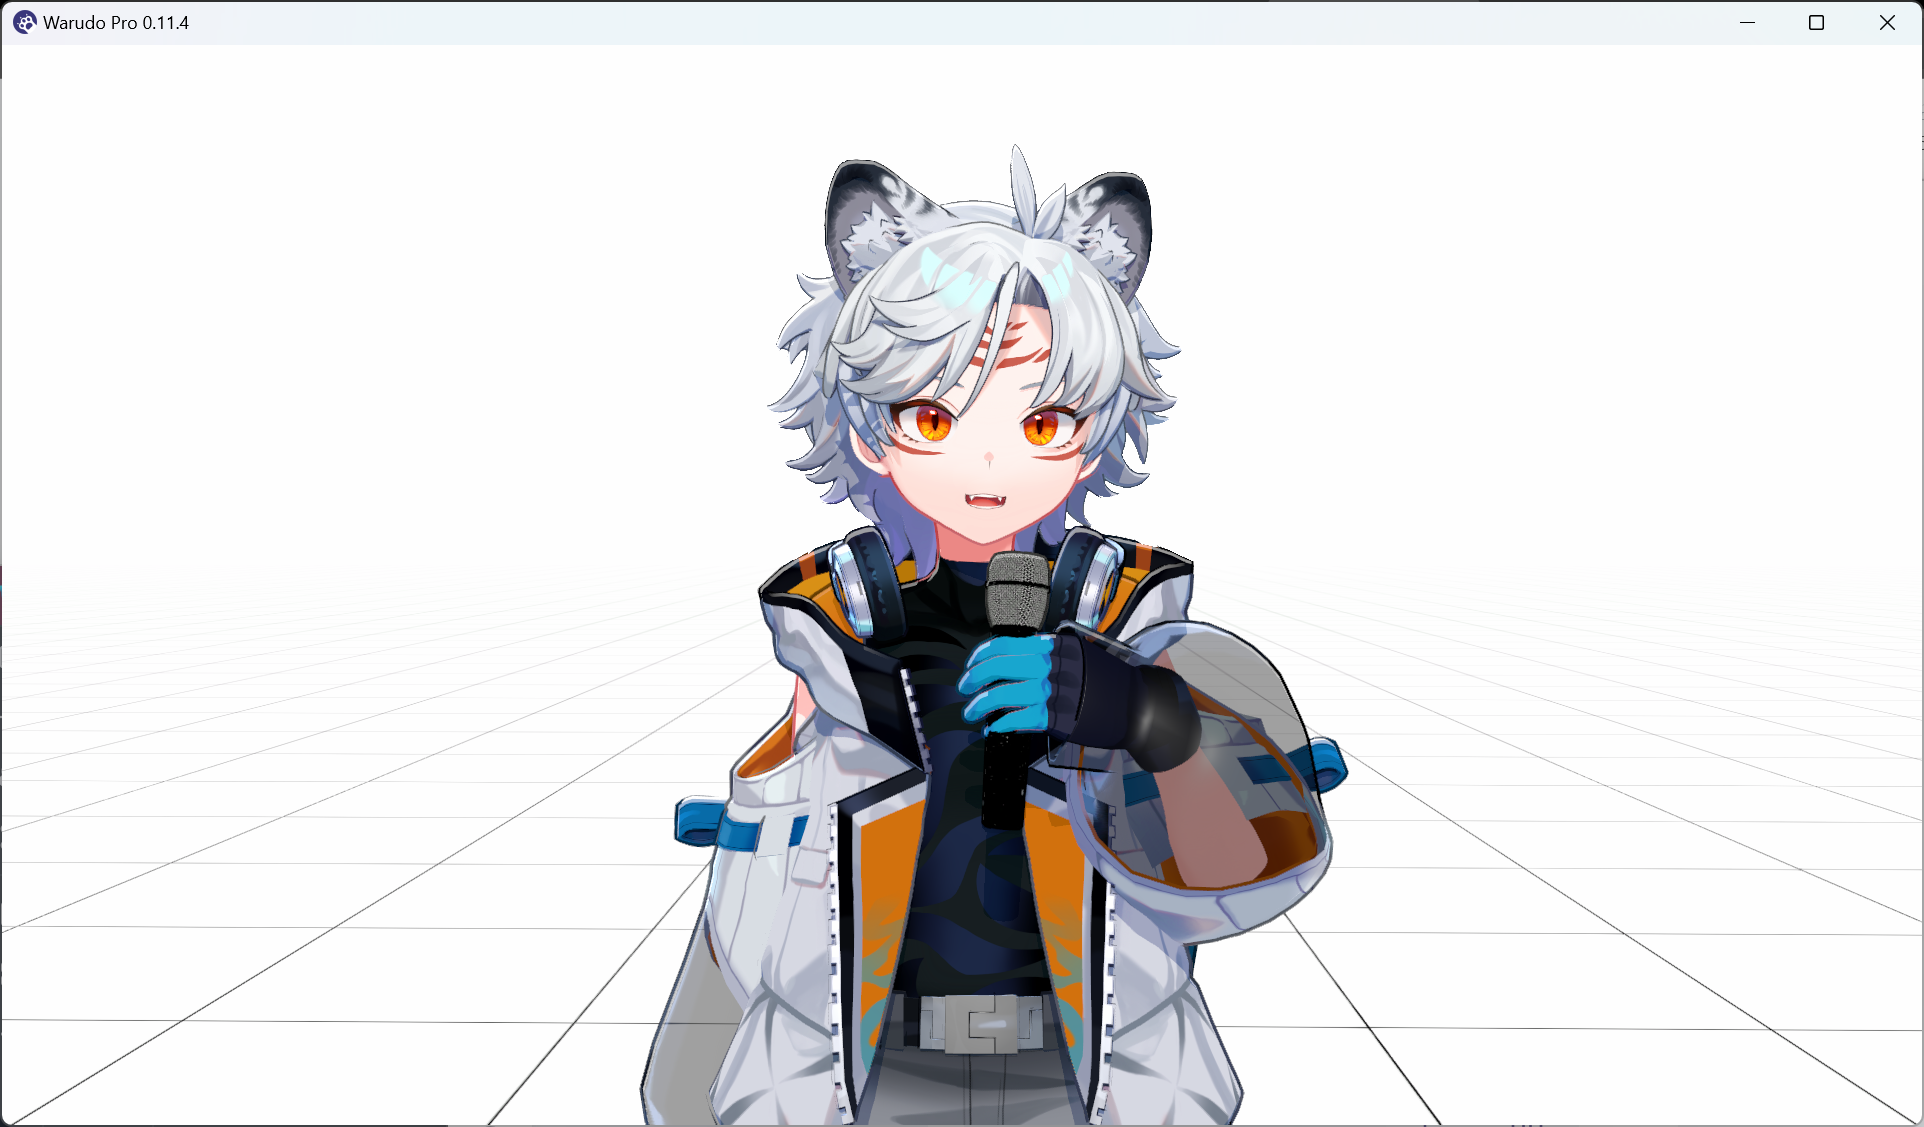
Now the character only lifts their left hand:
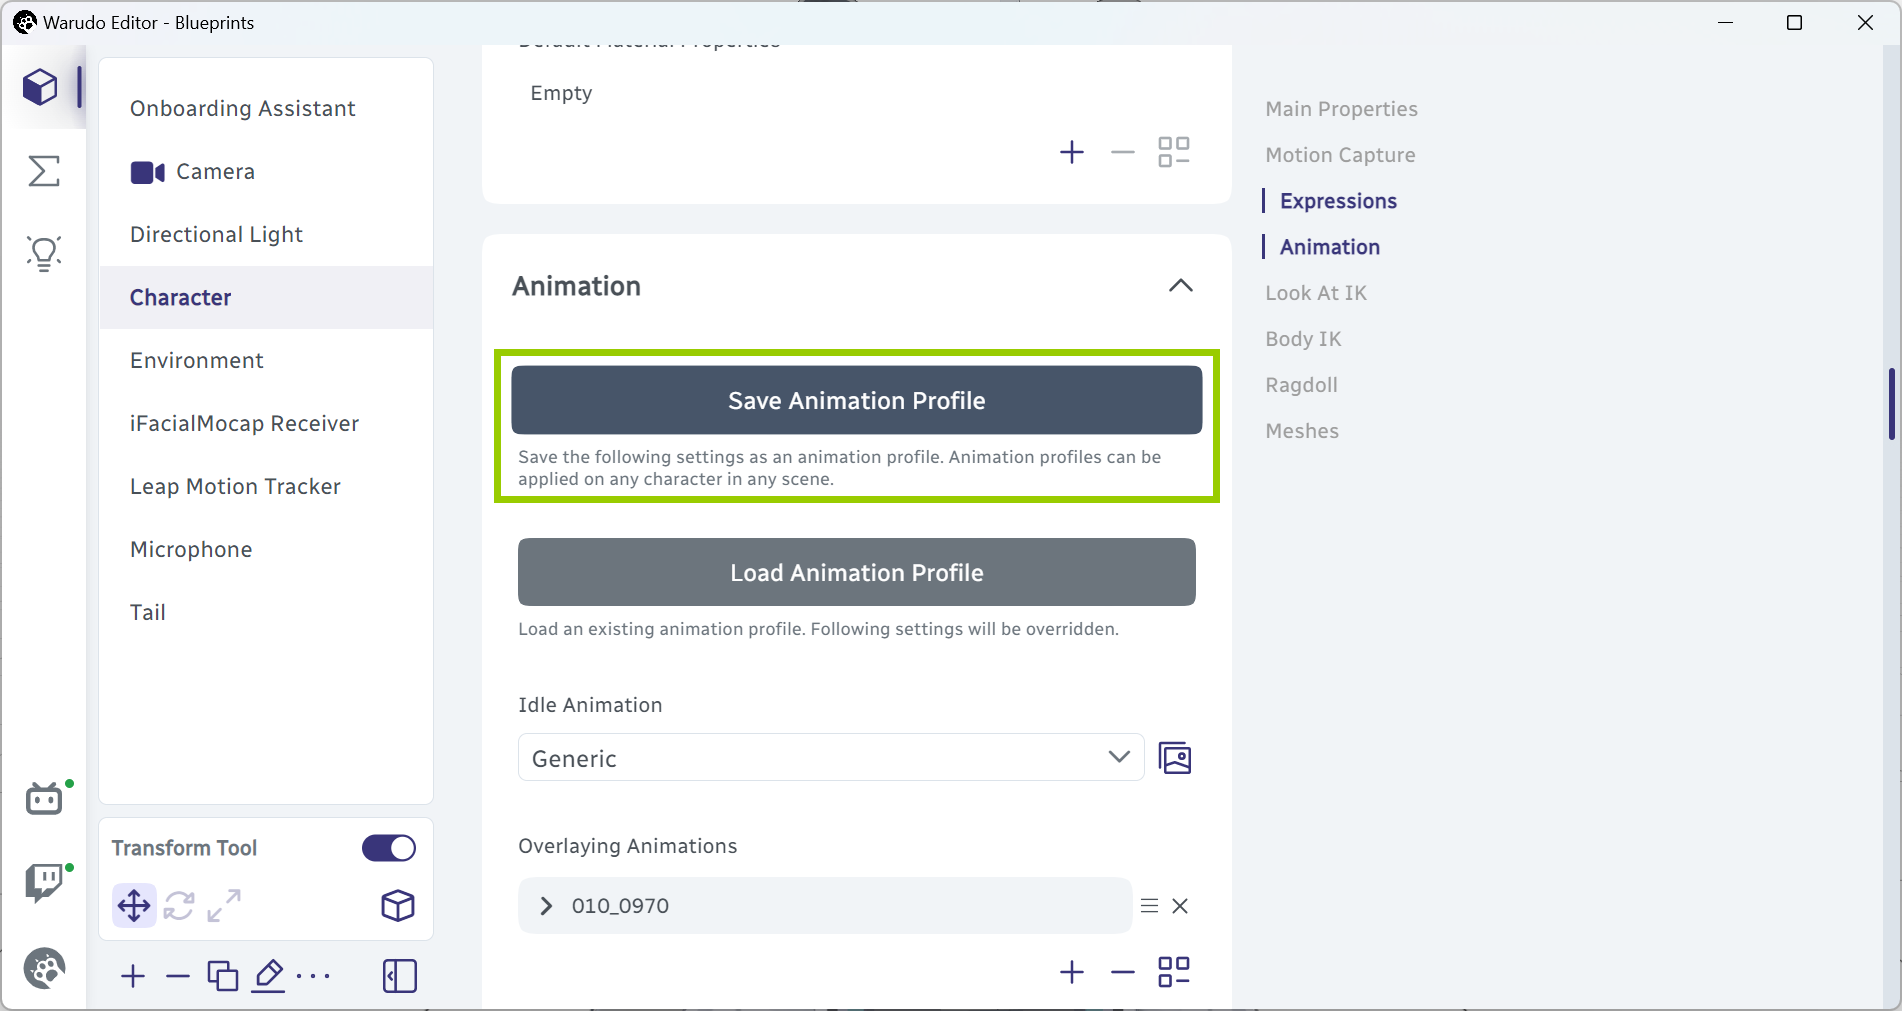
But how can we trigger this pose from a blueprint? Well, we need to first save an animation profile. An animation profile is essentially a snapshot of the character's current animation settings, i.e., Idle Animation, Overlaying Animations, Override Hand Poses, etc. Let's click the Save Animation Profile button:
Give it a name, e.g., "LeftHandMic," and click OK:

Now that we have saved an animation profile, we can use the Load Animation Profile button to load it at anytime!
We will soon see how we can do this from a blueprint, but first, let's create another animation profile for the idle pose. I am keeping it simple: I just clear the Overlaying Animations list, and set Idle Animation to Generic. You are of course welcome to create a custom idle pose!
Save another animation profile named "Idle," and we are ready to go! Go to our blueprint, and replace the "Play Character Idle Animation" nodes with the "Load Animation Profile" nodes. Remember to select the correct profiles from the Profile dropdown:

Now, when I press M, the "LeftHandMic" animation profile will load, and when I press M again, the "Idle" animation profile will load!
The above is just a simple example of how you can use overlaying animations and animation profiles; the takeaway is that they allow you to mix and match different poses and animations, so that you can pose your character however you want.
Delaying Flows
Finally, let's fix a small issue. Note that when your character put away the microphone, the microphone disappears immediately. It would be more realistic if the microphone disappears after the character has put it away. How can we do that?
Hint: You can use the Delay Control Flow node to achieve this. Give it a try before reading on!
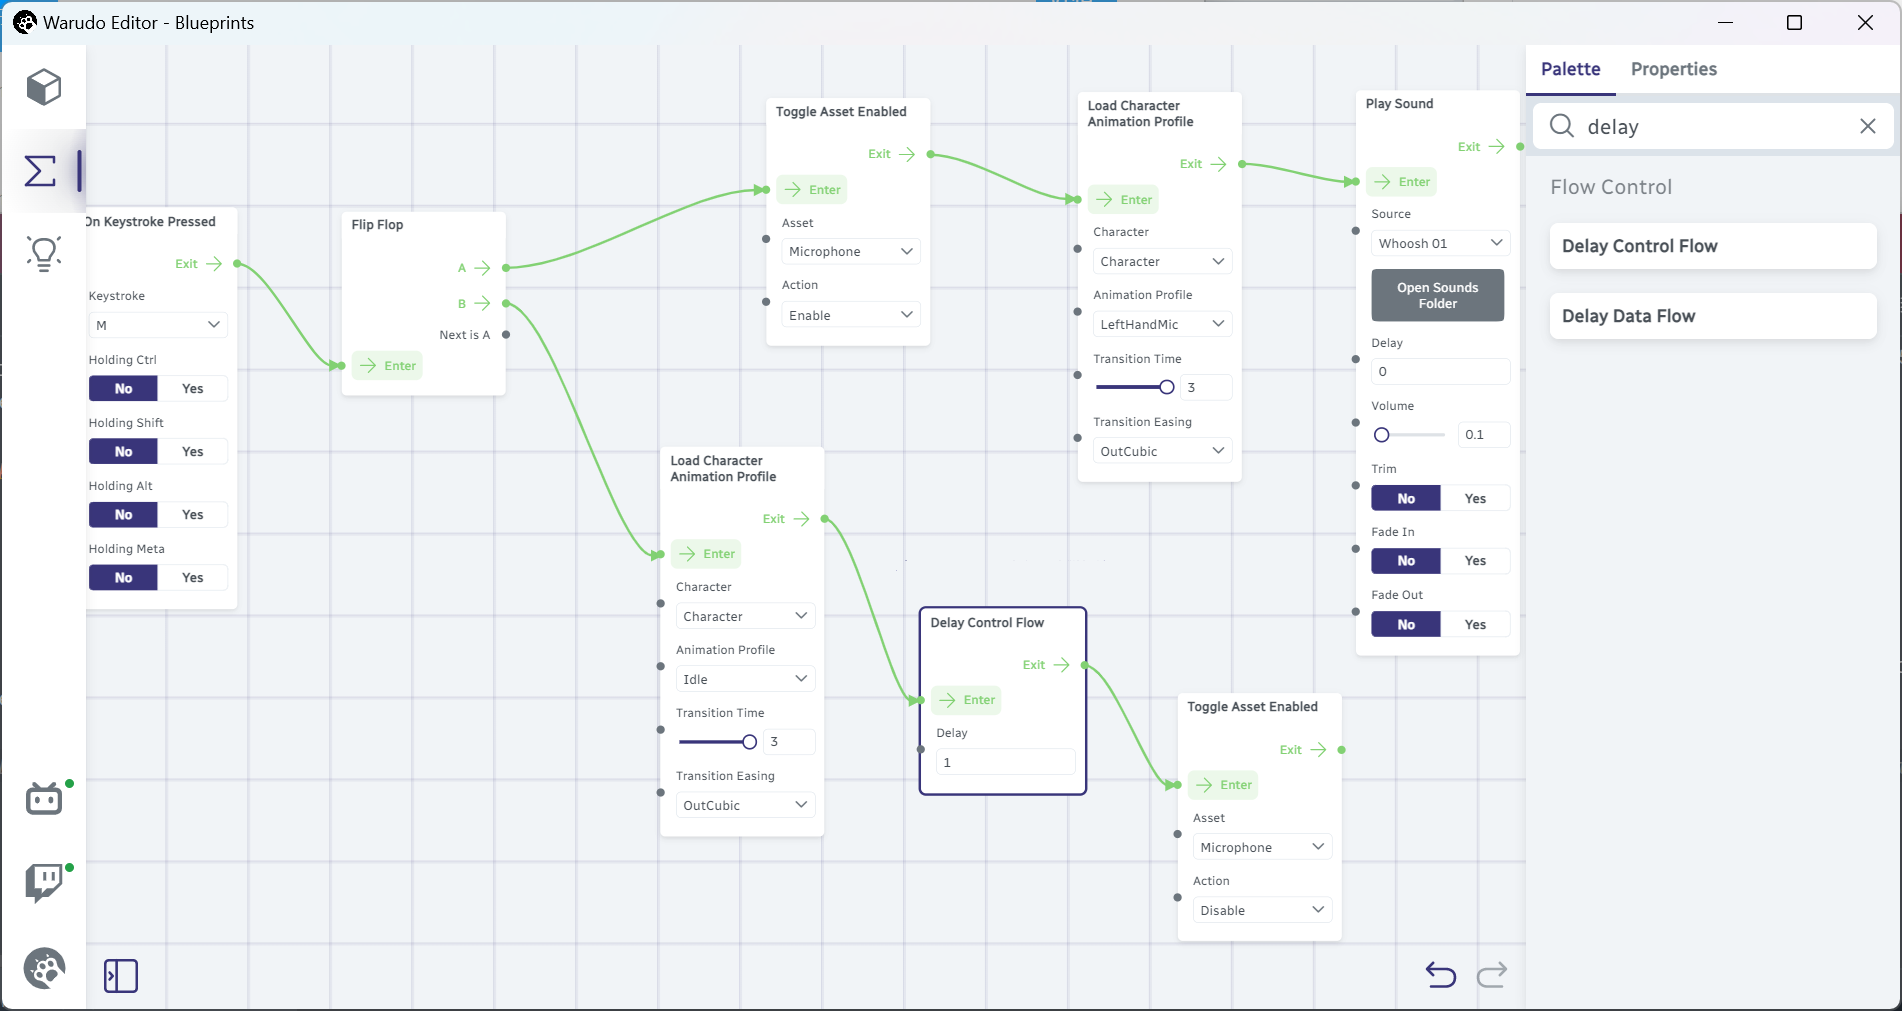
Here's a simple solution: we simply flip the order of the Toggle Asset Enabled and Play Character Idle Animation nodes, and add a Delay Control Flow node in between. We set the Delay to 1s, so that the microphone will disappear 1s after the character has put it away.
The Delay Control Flow node only triggers a flow at the Exit after the specified delay. Using this node, you can create sequences of events that happen one after another. For example, you can use it to make your character dance for 5s, when you suddenly drop a bunch of props on their head, with an explosion particle effect played at the end. It is all up to your imagination!
Authors